Recently your computer is not recognizing your headphones, and you cant enjoy your favorite music on your PC? Well, I see that problem quite often and don’t worry because it has some easy solutions.
Your headphones are one of the essential components for your computer but also smartphones and other devices. Trough this device, you will be able to play all the multimedia content that you like on the internet.
There are multiple options on headphones and headset, but any brand or type that you have will work without problems on your computer although there are some cases when your device can’t be recognized on your PC
In this case, I want to leave below some of the best solutions and tips that will help you to fix your computer when it doesn’t want to recognize your headphones.
Troubleshooting Hardware Issues
Before starting with some of these steps, you need to verify that your headphones are in good standing and don’t need any kind of external repairment.
- Connect your headphones on other devices: You first make sure that headphones work correctly on other PC or smartphones.
- Try different USB ports: There is some kind of headset that comes with a USB connection. One good advice is to try to connect your device in different ports like the ones on the back of your computer; those are one that always works.
If you find any issue with your headphones hardware, you will need to contact the vendor to ask for support or even replacement. When you rule out any hardware issue, continue with the following methods.
Method #1: Disable front panel jack detection
This issue has been reported several times when you have installed the Realtek HD Audio Manager on your computer. There is a feature from this manager that detects when you connect a headphone or mic on your PC and then configure it depending on your settings.
When your computer is not detecting your headphones, you can try to disable this feature to fix the problem. To do that, follow these steps:
- Go to the taskbar in the right, and double-click on the Realtek HD Audio Manager icon
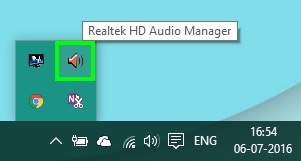
- Once there, click on the folder icon located in the upper right side of the windows
- On the window that pop-ups, check the box Disable front panel jack detection
- Now close all the windows and try to connect your headphones again; hopefully this time it will be recognized without problems
- You can also try to restart your computer to apply the changes
Method #2: Run the Troubleshooter
On Windows 10, when you have a problem with headphones, speakers, or audio in general, you can try to run a useful utility that will fix the problem automatically.
One of those troubleshooters is Playing Audio. This utility will scan your computer for any driver, connection, or hardware problems with your headphones, and then it will try to fix the issue.
You can run this utility following these steps:
- Search in Windows 10 the word control
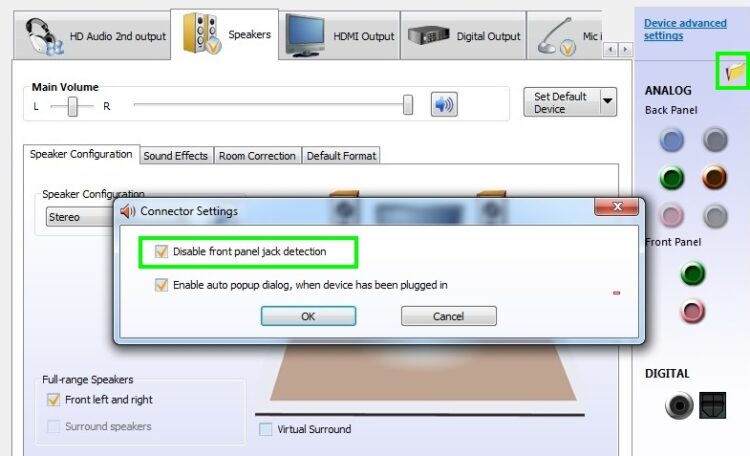
- Now, in the results, click on Control Panel to open it

- Once opened, you need to sort the view by icons like on this image:

- Then, scroll down and click on the section Troubleshooting
- In this section, click on the line Troubleshoot audio playback
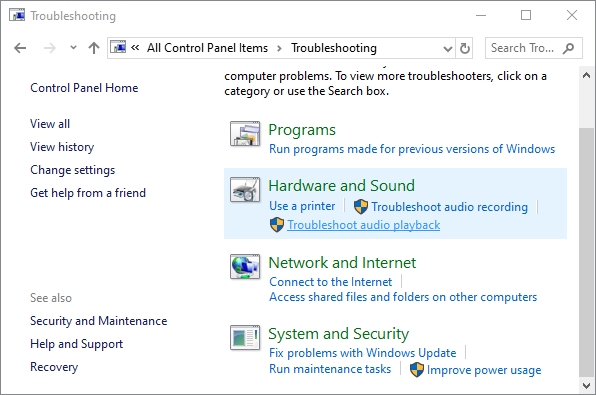
- The troubleshooter will open, and there click on the Next button. Make sure to connect your headphones before
- The utility will scan your computer for problems and then it will fix the issue
Method #3: Enable Headphones
If your computer still doesn’t recognize your headphones, maybe your device is disabled in the Sound Control Panel, and that is why you can use it correctly.
Windows will always enable by default all the audio devices that you connect, but some programs can disable some of them to avoid some conflicts.
If you are not sure if your headphones are enabled, you can check that following these steps:
- You will need to run a command on the Run windows, to open that, press the keys Win + R
- A new window will open, and there copy the following:
control mmsys.cpl sounds - Click on OK to open the Sound Control Panel
- Once there, you will see a list of all your playback devices, and there you need to find your headphones and right-click on them
- Finally, in the menu that opens click on Enable

- Click on Apply to save the changes. This will fix your headphones issue, and you will be able to enjoy your multimedia content. You only need to test if everything is working correctly
Method #4: Set Headphones as Default
After you successfully enabled your headphones in your PC, you may need to perform an additional step to use your headphones.
Like in the previous method, you will need to open the Sound Control Panel with command control mmsys.cpl sounds and once there, follow these steps:
- You will be again in the Playback tab, there right-click on your recently enabled headphones
- This time, in the menu, click on Set as default
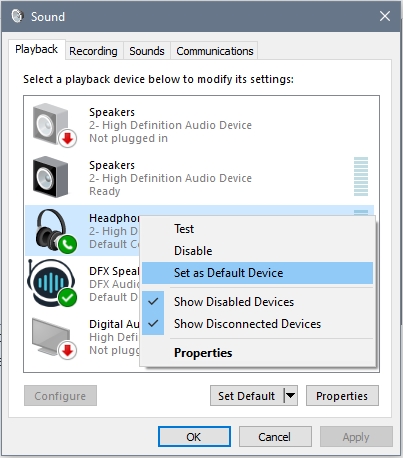
- Now, click on the Apply button to save the changes. Hopefully, this step will make your headphones work correctly on your computer without issues.
Method #5: Update Audio Driver
You follow all the steps I show you above, but nothing seems to work with your headphones? Don’t panic, you have one last method that surely will fix this issue successfully.
You can try to update your audio drivers in two different ways, from the Device Manager and also automatically using a driver updater software.
Update Manually Audio Drivers
- Rightclick on the Start Menu and click on Device Manager
- Navigate to the section Sound, video and game controllers, there right-click on High Definition Audio Device
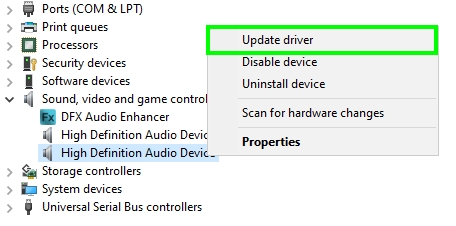
- In the menu that opens, click on Update driver, then choose the option Search automatically and let Windows install your drivers
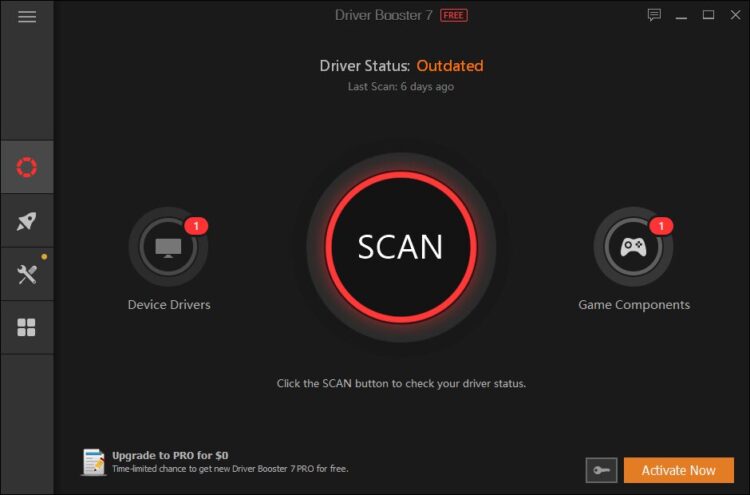
Update Drivers Automatically
- Visit the following website and download Driver Booster
- Save the file to your computer and install the software as usual
- When you are finishing installing the program, click on the button Scan
- Driver Booster will detect your headphones and also your audio drivers, and then it will show you the latest available updates
- You can install both devices clicking on the button Update Now and then you only need to wait until the program finishes
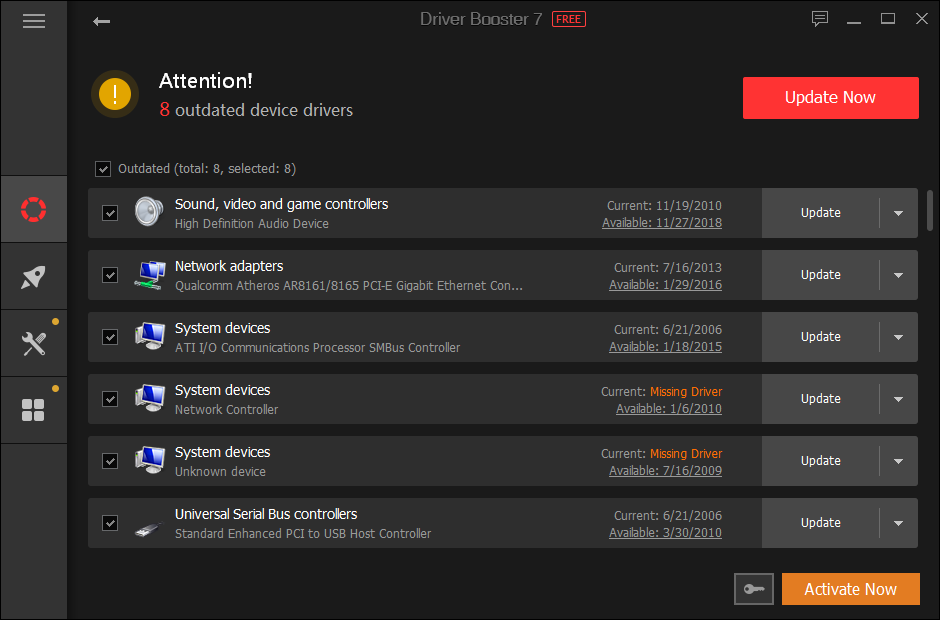
- Restart your computer to apply the updates and then test your headphones
Wrapping Up
If you like to play music and watch Youtube videos with your headphones, you may get frustrated when your computer doesn’t recognize it. Fortunately, following the steps on this tutorial, you will be able to fix this problem quickly.
Below, I will be leaving you some other audio related issues that may help you with your problem: