Do you play Overwatch and always use your microphone to talk with your team, but recently, the voice chat is not working? Don’t worry, that issues have been reported several times in Blizzard forums, and on this post, I will talk about how to fix it.
Voice Chat in competitive games is one of the essential features that you should use. Trought this chat, you can talk with your team and plan several strategies or just have fun chatting with your friends.
When you have problems with this voice chat, you may get frustrated, but you can know to try to fix this issue following the next methods I will leave you below.
Troubleshooting Hardware Issues
This should be your first step before trying yo change settings or files on your computer. You need to make sure that your microphone and headset are in good standing.
Something that you can do is to connect your headset in another computer and verify that you can use the microphone. If you don’t have another PC, you can try to use the mic in another program, like Skype, to verify this.
When you finish ruling out any hardware issue in your headset, you can continue following the next methods.
Method #1: Set Microphone as Default
On Windows, you can connect multiple headphones and microphones at the same time, but you can’t actually use them all at once.
The system will always take as default the last device that you connect to the computer, but in some cases, your headset microphone isn’t the default one, and that could be the reason why the voice chat is not working on Overwatch.
You need to verify that on the Sound Control Panel following these steps:
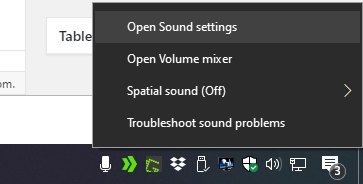
- In the right side of the taskbar, right-click on the Speaker icon, then in the menu click on Open Sound settings
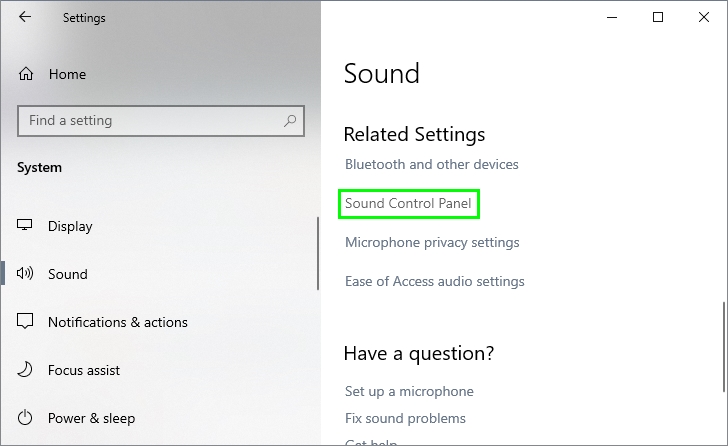
- A new window will open, there scroll down and click on the line Sound Control Panel
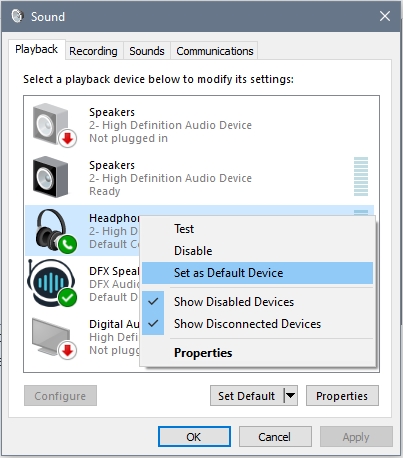
- You will be opening the Sounds window, there navigate to the Recording tab
- Now, you will see a list of all the microphones installed on your computer, and there you need to find your headset mic and right-click on it. Finally, select the option Set as default
- Close all the windows, then launch Overwatch and test the voice chat
Method #2: Disable Exclusive Control
You cant use the voice chat after following the steps above? Well, don’t worry, there are some other methods like this one that you can try.
By default, Windows will let your installed programs to take control of your microphone when they are running. This also applies to background programs, and maybe there are some of these apps that are taking exclusive control of your microphone.
If you cant use the voice chat on Overwatch, you need to disable that feature to fix the issue:
- You will need to open the Sounds window again, this time press the keys Win + R
- In the window that opens, copy this command
control mmsys.cpl sounds - Click on OK to open the Sounds window and navigate to the Recording tab
- Rightclick on your microphone and select Properties
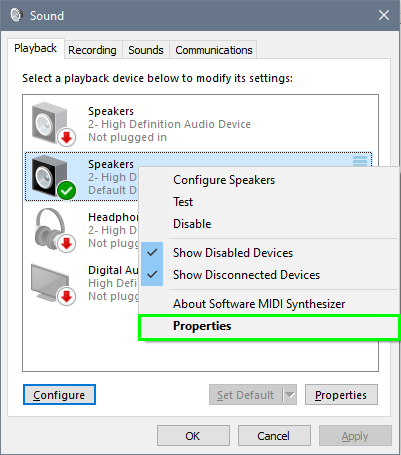
- In the Properties window, navigate to the Advanced and finally there uncheck the box Allow applications to take exclusive control of this device
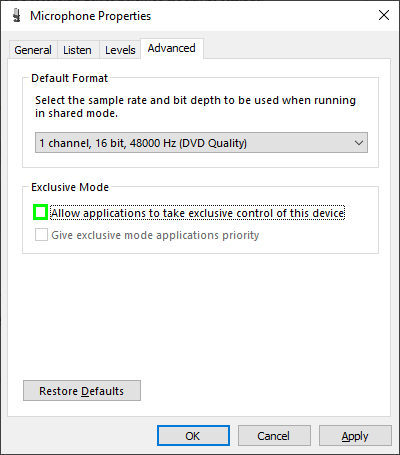
- Click on Apply to save the changes and launch Overwatch. Hopefully, when you try to use the voice chat, it will be working without issues
Method #3: Check In-Game Settings
On Overwatch, when you connect your headset, it will be configured by default, and you should be able to use the voice chat without issues, but in some cases, you need to configure the settings manually.
To do that you only need to open the Overwatch game and follow these steps:
- Open the Settings
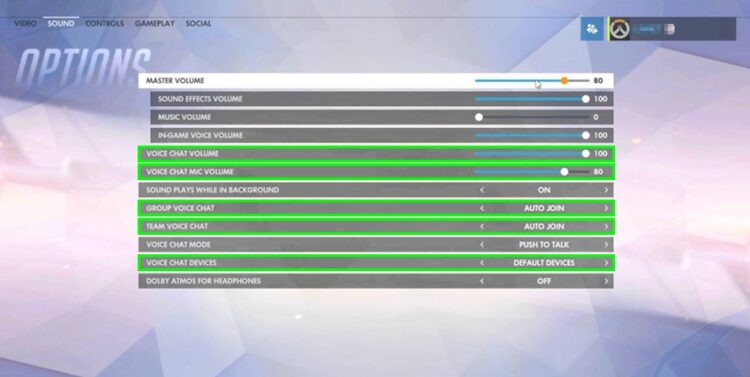
- Navigate to the Sound tab
- There you need to verify some settings. Voice Chat Volume and Voice Chat Mic Volume should be set to 100
- On Group and Team Voice Chat you need to choose the option Auto Join
- Finally, on Voice Chat Devices, select the option Default Devices
- Go back to the main game and now test the voice chat, surely this time you wouldn’t have any problem
Method #4: Close Background Apps
Multiple apps can make use of your microphone and headphones like Steam, Skype, or Discord.
If you still haven’t been able to use the voice chat so far, you may need to close these programs to fix the issue.
You can end those programs using the Task Manager quickly following these steps:
- Open the Task Manager pressing the keys Ctrl + Shift + Esc
- In the window that opens, click on the line More details
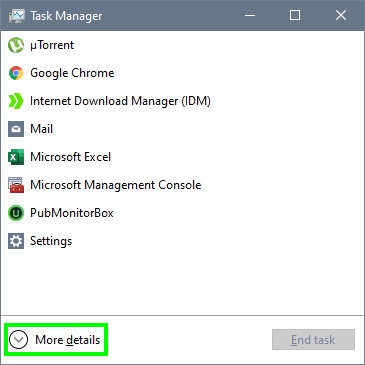
- Once there, you can see all the apps running on your computer, and you need to find all the unnecessary ones and click on the button End Task
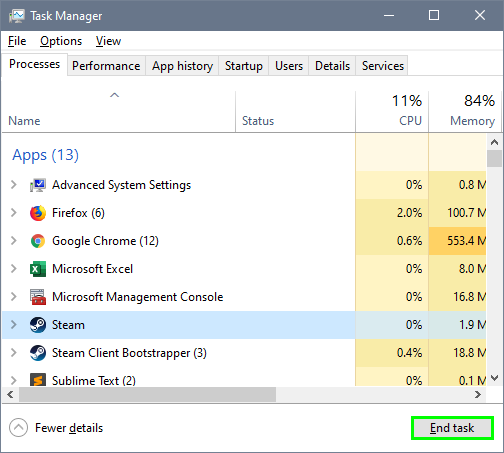
- When you finish, close the Task Manager and try to use the voice chat again to verify it is working
Method #5: Disable Firewall
Windows Firewall does a great job of protecting your computer from threats and connections that could harm your PC.
It also can block several features like the voice chat in Overwatch erroneously, and you can try to check this by disabling the Firewall temporarily while you play the game and use the voice chat.
To disable your Firewall on Windows follows these steps:
- You will need to press these keys at the same Win + R
- In the window that will open, copy the following command
control - Press Enter to open the Control Panel and there navigate to the section System and Security
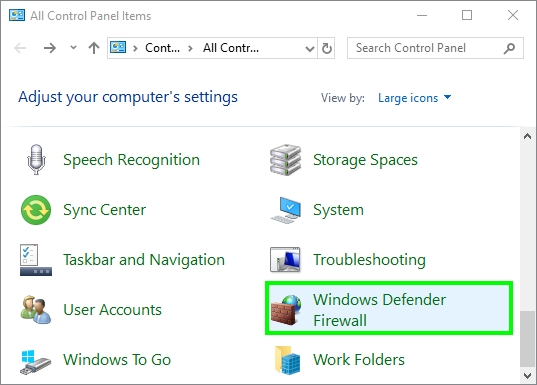
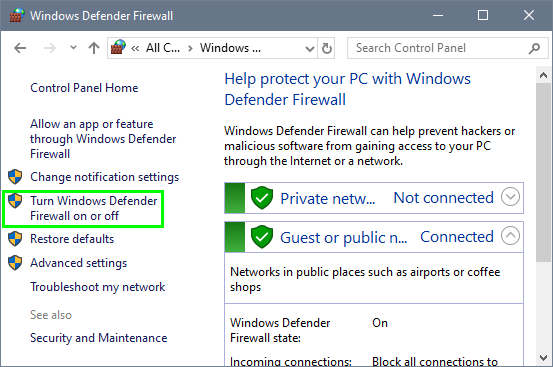
- Then click on Windows Defender Firewall. On the left you will see some settings, click on the one that says Turn Windows Defender Firewall on or off
- Finally, check the option Turn off Windows Defender Firewall in private and public networks
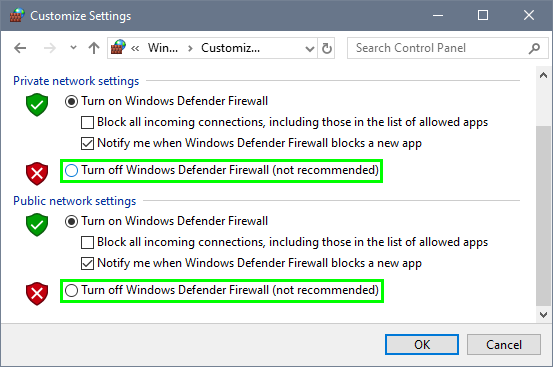
- Click on OK to apply the changes and restart your computer
- This time when you play Overwatch, you will be able to use the voice chat without problems
Method #6: Update Audio Drivers
You cant fix this voice chat not working on Overwatch issues with anything? Don’t panic; there is one ultimate solution that could be your lifesaver.
When you have corrupted or outdated audio drivers, you can experience multiple sound issues like this one, and one recommended solution is to update them.
You can update your drivers using the Device Manager, but in almost all cases, Windows doesn’t find drivers for audio devices. For these drivers, you can use to download them manually or use a driver updater.
- One of the most recommended driver updaters is Driver Booster
- Download the program and install it on your computer
- When you finish, launch the program, and you will see a big button that says SCAN, click on it
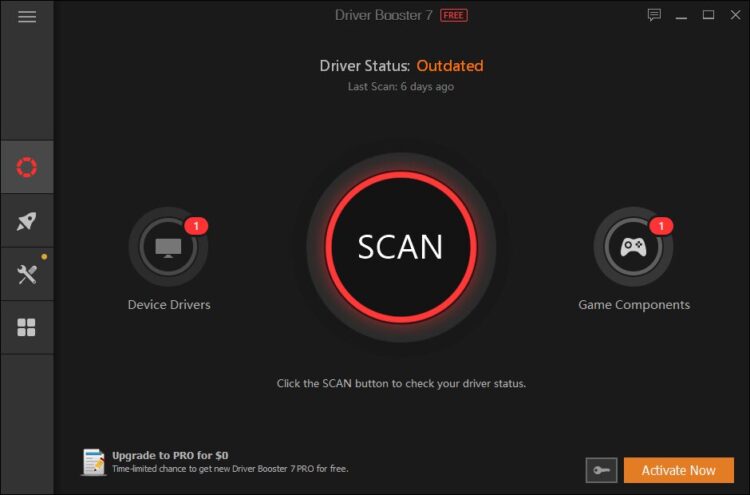
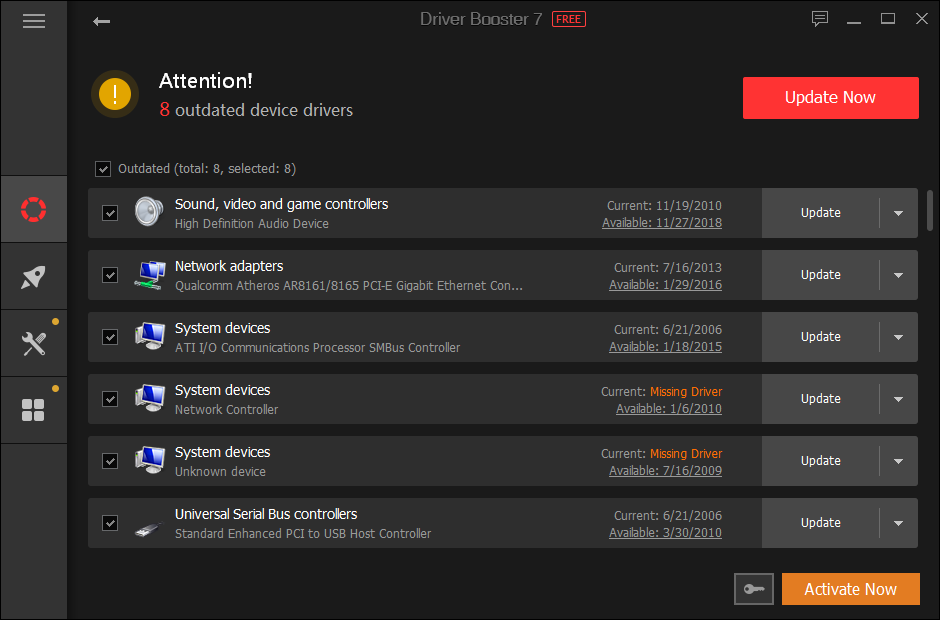
- Driver Booster will scan your devices, and it will find that your audio drivers are outdated, then it will show you the latest updates
- You can even see the release date and verify how old your drivers are installed. When you are ready, click on the button Update Now to start the process
- When the updating process finishes, restart your computer
- Finally, launch Overwatch and verify is the voice chat is working properly
Wrapping Up
Overwatch has become one of the most popular games and has millionaires competitions. The voice chat is one of their core features because it allows you to talk with your team, but when it is not working, you faced a terrible problem. Luckily, following this guide, you will be able to fix the voice chat quickly and continue enjoying this fantastic game.
If you need more help on this issue, here you have another Overwatch related issues: