You may have a good pair of headphones from where you enjoy your favorite music, but when you try to connect this device to your laptop, you find out the error that is not detecting your headphones? Well, this problem could have several reasons and also have multiple ways to fix it.
Laptops have become essential devices for most users since not only on a professional level but also on a personal level, they are handy. In addition to managing your documents and connecting to the network in a portable way, today, they have become the speakers for many applications such as YouTube or Spotify.
One of the things that you frequently carry out in Windows 10 operating systems is to listen to your favorite songs through a sound player or using headphones. Although, by default, your headphones should be working fine on your laptop, on certain occasions, it hasn’t able to detect your headphones, and you can hear anything.
Below I will leave all the tips and tricks that you can try on your laptop to fix this issue quickly.
Troubleshooting Hardware Issues
Before starting to change the settings and messing with Windows, you can try to troubleshoot the hardware issues that your headphones could have.
You may do this before, but it is always recommended to connect your headphones to another laptop and check if you can hear the music or sounds correctly.
After you rule out this, you can continue with the next methods.
Method #1: Enable your Headphones in the Sound Control Panel
Now are going to start the methods that will help you to fix this issue. The first thing you can try is to enable the headphones on the Sound Control Panel of your laptop. Follow these steps:
- Press the keys Win + R to open the Run window and there copy the command control
- Now, press Enter to open the Control Panel
- On this window, sort the view by icons like in the following image

- Then, scroll down and click on the section Sound
- You will see the Sound Control Panel, and by default, you will be placed in the Playback tab
- There, find and right-click on your headphones and in the menu click on Enable

- Finally, click on Apply to save the changes and check your headphones
Method #2: Set Headphones as Default
Your laptop is a portable device that you may move around on some occasions, and you may have connected to your laptop some other headphones that you borrow or use a long time ago.
Windows, by default, will set your latest headphones connected as the default ones, but on some occasions, it keeps using your old headphones to play the sounds.
So, you can try to set your headphones as default to fix the detection issue on Windows 10 following these steps:
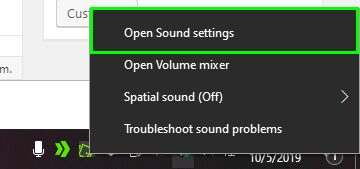
- Navigate to your taskbar and there right-click on the speaker icon
- In the menu that opens click on Open Sound settings
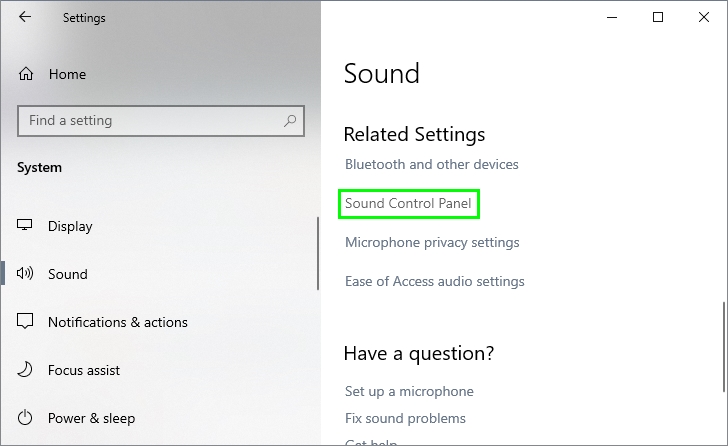
- Now, scroll down and click on the line Sound Control Panel
- You will be again in the Sound window like in the previous method
- There, make sure to be in Playback tab and right-click on your headphones, then in the menu click on Set as default
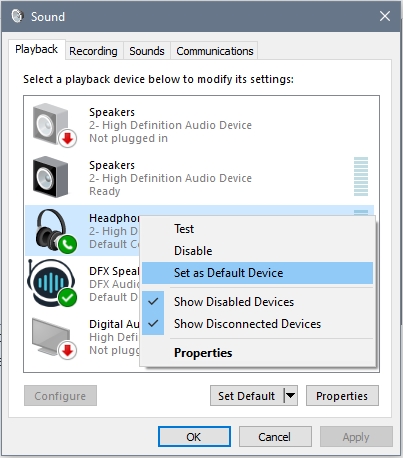
- Click on Apply to save the changes and later try to play some music to check if the headphones are detected correctly
Method #3: Change Sound Format
There is the last thing that you can try on the Sound Control Panel of your laptop.
- You know how to open the Sound Control Panel with the previous method, the quickest way is using the Run window Win + R
- There copy the command
control mmsys.cpl soundsand press Enter - Once in the Sounds window, right-click on your speakers and in the menu select Properties
- Now, navigate to the Advanced tab and in the dropdown menu choose another format
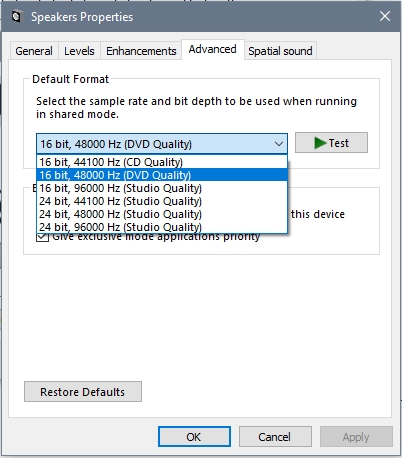
- Click on Apply and close the Windows
- Finally, connect your headphones, and hopefully, Windows will detect your device without problems
Method #4: Update Headphones Drivers
If you haven’t been able to connect and identify your headphones correctly on Windows 10, you may need to update the drivers to fix this issue. You can do that following these steps:
- Open the Run window using the keyboard shortcut Win + R and there copy the command
devmgmt.msc - Now, press Enter to open the Device Manager
- In the window that opens go to the Sound video and game controllers section, there right-click your headphones device or in High Definition Audio Device
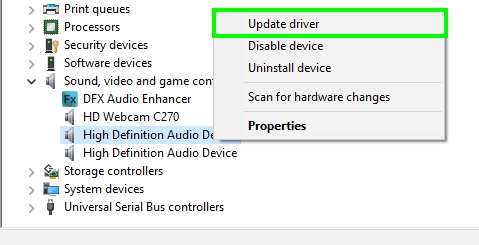
- There you will have the option to search for the most updated driver online or use one that you have downloaded directly from the manufacturer’s website.
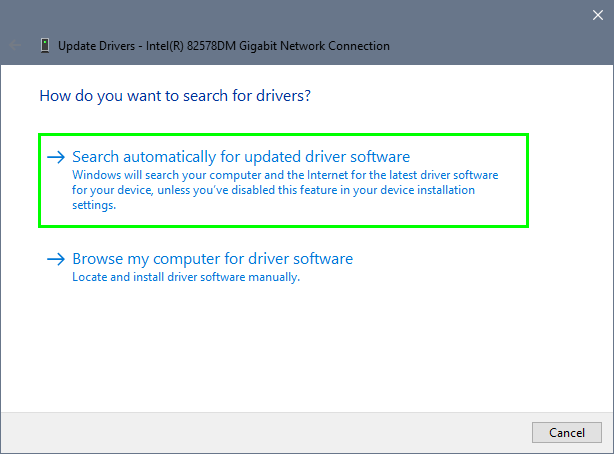
- Choose the first option, and if there is a newer driver, it will be downloaded and installed in the system.
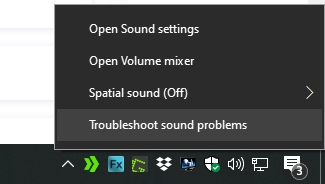
Method #5: Run the Troubleshooter
If your laptop is still not detecting your headphones, you can try to use a built-in utility on Windows that could fix this issue automatically.
- Navigate to your taskbar and right-click on the Speaker icon and in the menu click on Troubleshoot sound problems
- A new window will open, and the tool analysis will start, then the following will be displayed:
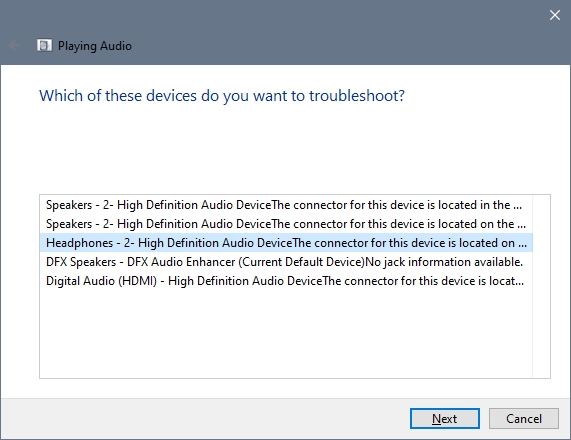
- There you need to select the headphones that could not be detected and click on the Next button, and it will automatically start the analysis
- Then you will see some recommendations associated with the possible device problem
- After following the wizard to the end, hopefully, your laptop will detect your headphones without problems
Method #6: Restart Audio Service
If your laptop can detect your headphones using all the tips and methods I show you above, the only thing left to do is to restart the Audio service. You can do that following these steps.
- Press the keys Win + R and there copy the command
services.msc - Now, press Enter to open the Services window
- In the window that opens, locate the service called Windows Audio and right-click on it, then select the option Restart

- Now, connect your headphones to your laptop, and hopefully, this problem will be fixed
So far, were the best methods that could help your laptop to detect your headphones correctly and continue enjoying the best music on Spotify, Youtube, or even watching some series on Netflix.
I hope the tutorial fix your laptop and if you have any question or problem, let me know in the comments section below.
Here, you have other articles about headphones issues: