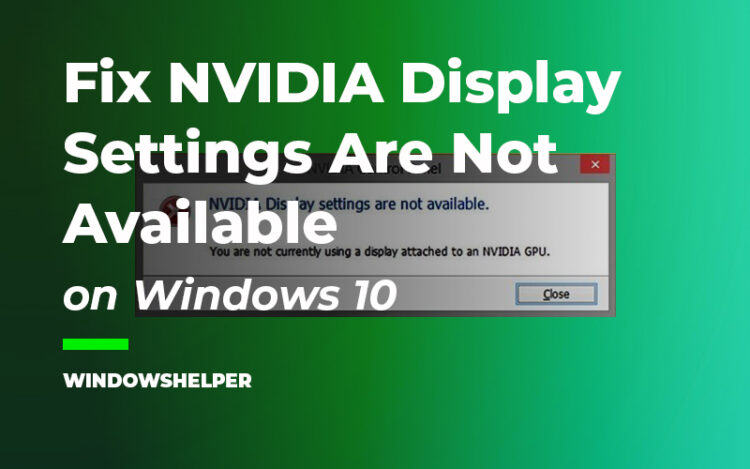
You want to change some settings on the NVIDIA Control Panel, but when you launch it, you see the following message: “NVIDIA Display settings are not available.”
This error usually appears when your NVidia graphic card isn’t detected on your computer and isn’t currently in use, although this problem could be caused because your drivers are corrupted or even by some service.
That’s why on this, I want to leave some of the best troubleshooting tips that you can use on your computer to fix this NVIDIA issue quickly and continue using the full power of your graphics cards.
Method #1: Troubleshoot Monitor Connection
Like I said above, this error usually appears when your computer doesn’t use your graphics card to show you the desktop.
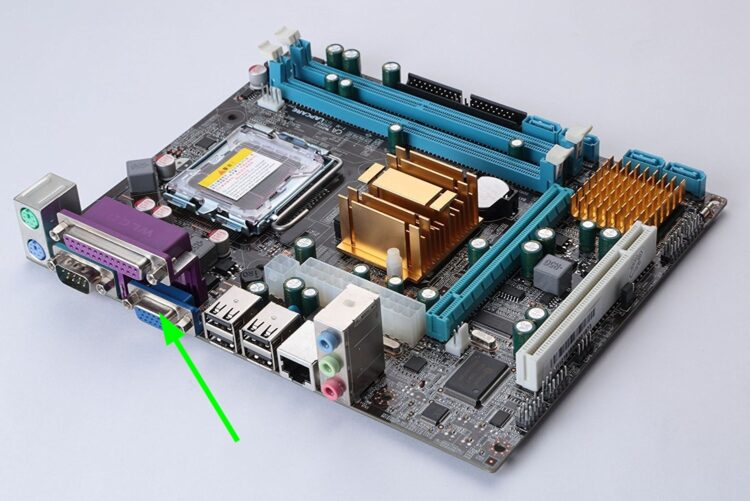
Why does this happen? Well, your computer has two connectors if you have installed the graphics cards. One connection is the default one that comes built on your motherboard, like in the image below:
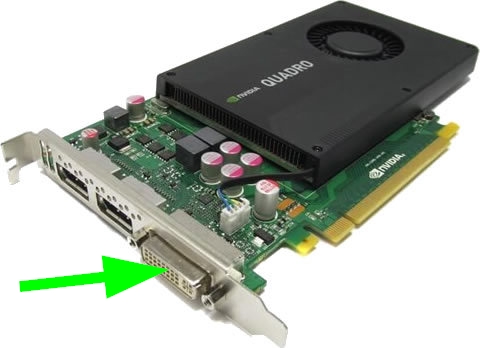
The other connection is the one that comes with your graphics cards like on this picture:
Now, you need to make sure that your monitor connected to your graphics card and not to your motherboard. To do that, you only need to check the back of your computer and change the connection.
But if you have a laptop, you can be sure that the connection is ok, so you need to try the following methods to fix this issue.
Method #2: Setup NVIDIA Service
NVIDIA install a particular service when you set up your graphics cards and install the latest drivers on your computer.
The services are essential for your graphics cards and need to be running to work properly.
If you recently find this error message about the settings not available in NVIDIA Control Panel, you need to make sure that his services are running without problems following these steps:
- Press the following to open the Run window Win + R
- In the box, copy the command
services.mscand press Enter - You will open the Services window and there scroll down until you find the service NVIDIA Display Driver Service, then right-click on it and select Properties
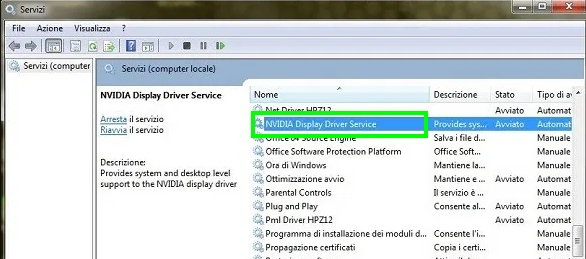
- On this window, you need to choose the option Automatic under the dropdown menu Startup type
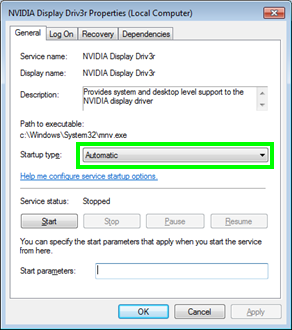
- Also, click on the button Start and then click on Apply to save the changes
- Restart your computer and when Windows start your NVIDIA graphics cards will be working again
Method #3: RollBack NVIDIA Graphics Cards
Another tip that you can try to fix this NVIDIA issue on Windows is rolling back the drivers to an earlier version where everything was working fine.
You can use this method when your graphics cards were working without problems before, but if this isn’t your case, you need to follow the next process.
- Press the keys Win + R and there copy the command
devmgmt.msc, then press Enter
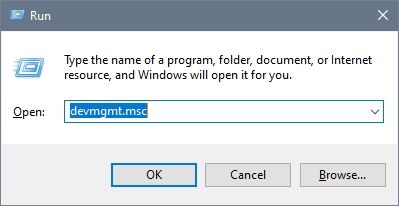
- You will be opening the Device Manager, there navigate to the section Display adapters
- Rightclick on your graphics cards and select Properties
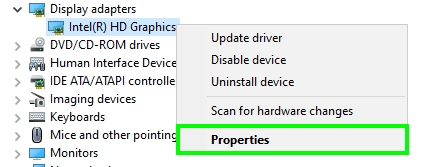
- Now, navigate to the Driver tab and there click on the button Roll Back Driver
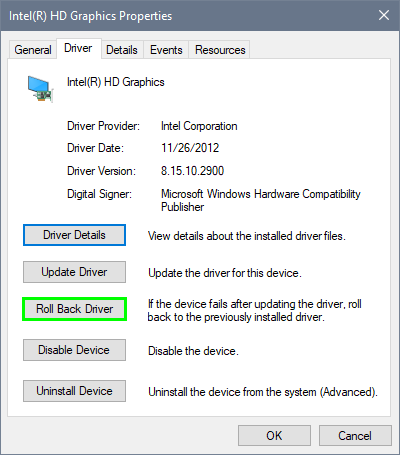
- In the window that opens, choose an option why you are rolling back the driver and then click on Yes
- Wait for the process to finish and then check if you can open the Nvidia display settings
Method #4: Update Graphics Card
If the previous methods don’t work for you, you can try to update the NVIDIA graphics cards to install any patch and bug fix that could solve this problem.
To install the latest drivers, I recommend you to download Driver Booster.
- Once download, open the file and install the program
- When finished, click on the button SCAN
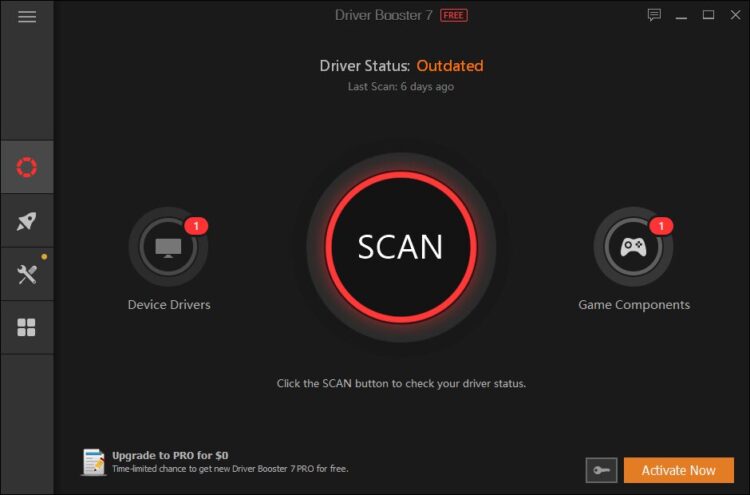
- Wait for the program to scan your graphic cards and then it will show you the latest available drivers
- There you only need to click on the button Update Now located in the section Display Adapters
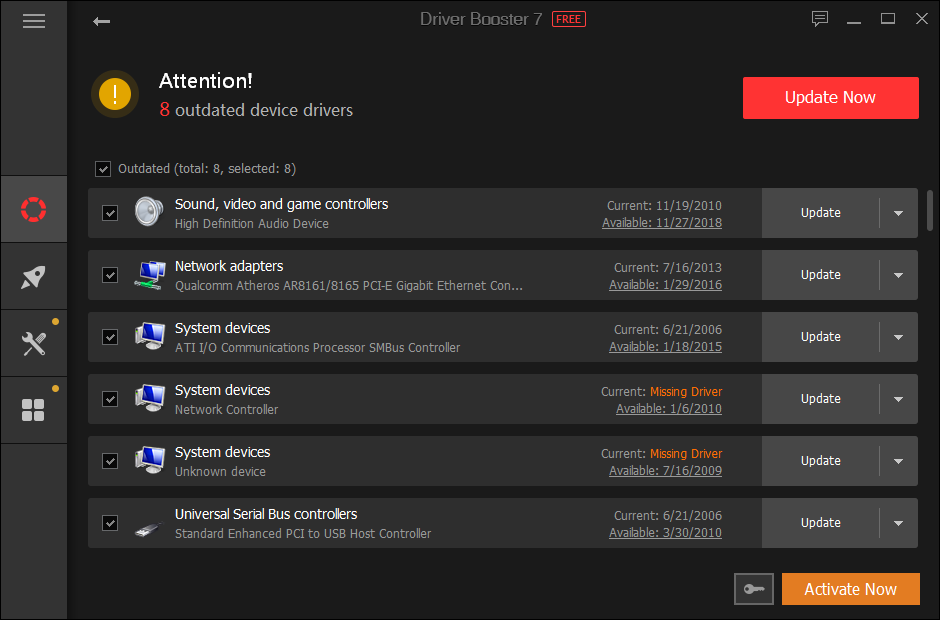
- Wait for Driver Booster to install the drivers and restart your computer
- Hopefully, when you open the NVIDIA display settings, it will be working without problems, and you can continue changing your preferences
Method #5: Clean Reinstall NVIDIA Drivers
You have followed the methods that I leave you above you still see the warning message about the NVIDIA display settings not available? Well, there is one ultimate solution to this problem that undoubtedly will work.
We are going to perform a clean uninstall of the NVIDIA drives. This means that you will use a tool called Display Driver Uninstaller that will remove all the information, drivers, software of NVIDIA from your computer.
After that, you cant install the latest drivers from scratch and hopefully fix this problem. Follow these steps:
- Click here to download Display Driver Uninstaller
- Save the file on your computer and run it, you will only need to choose a path to unzip the files
- Navigate to that path, and double click in the file Display Driver Uninstaller

- The first time you open the utility, you will see an options window, there you need to check the boxes: Remove “C:\NVIDIA” drivers folder and Remove PhysX. Then click on Close
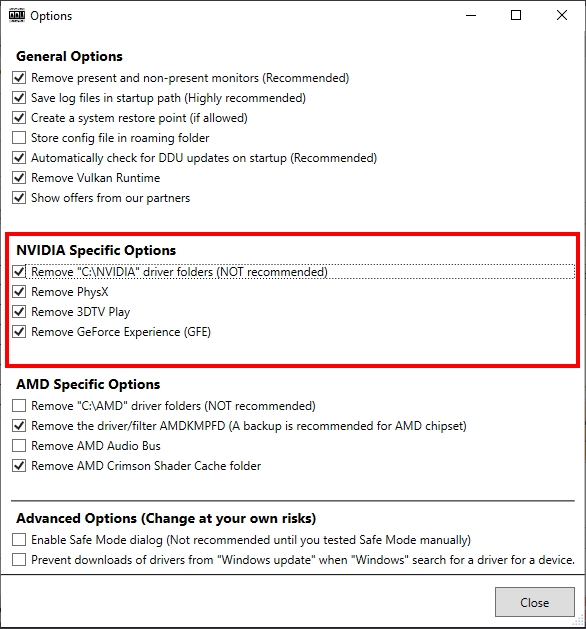
- Now, in the dropdown menu Select device type, choose the option GPU and below choose NVIDIA
- Then, you only need to click on the button Clean and restart to uninstall the NVIDIA drivers from your computer and remove all the leftover files
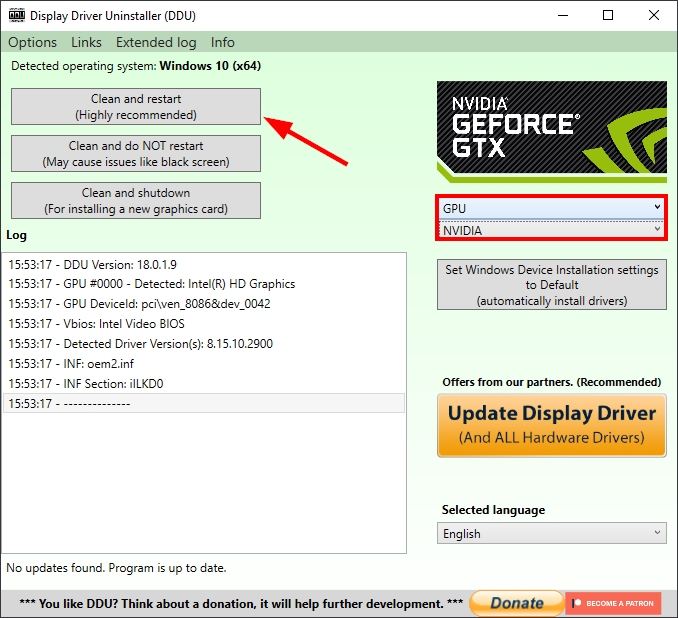
- When your computer restarts, you should see a lower screen resolution because you don’t have any driver on your PC anymore. Now open your browser and navigate to the NVIDIA Drivers page.
- There you can fill the details about your graphics card and download the latest version. Hopefully, when you finally install your drivers, this NVIDIA display settings error will be fixed.
Conclusions
So far, those were the best methods that I know could help you to fix this issue quickly on Windows. Remember always to verify the status of your graphics cards, and if you cant fix this problem, you can post your question in the NVIDIA Geforce Community Forums.
Thanks for reading, here you have other NVIDIA related problems:

