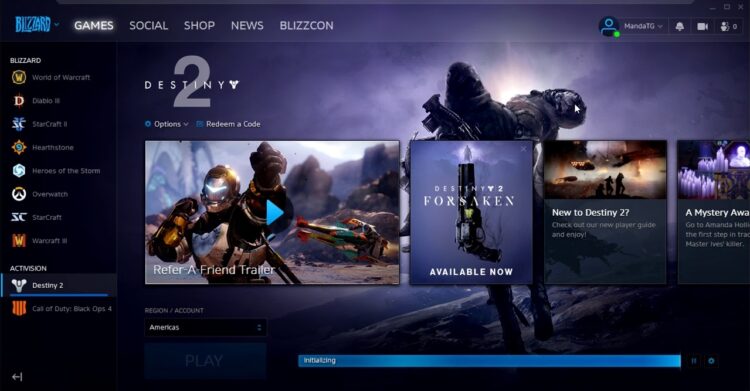
You recently have update Destiny 2, but it gets stuck on initializing? Well, that an awful experience that may keep you off the game for several hours.
Although this error doesn’t give you some code or clue about what is wrong, there are some tips and solutions that have been proved to work to succeed with this update stuck on initializing issue.
In this post, I will leave some of the best tips, solutions, and hacks that will help you to fix Destiny 2 and continue playing without problems.
Troubleshoot Internet Connection
This is my first advice and should be the first thing that you check. Sometimes there are problems in your internet connection, and that’s why the update stuck because it cannot download the files.
To troubleshoot this issue, you can open a web browser and try to download some files to verify that your internet is in good standing. If you any problem, you can try to restart your router to troubleshoot this issue.
Method #1: Rename Folder Name Hack
This was the first hack or solution that appear on the internet to fix this stuck update issue. Adrian provided this hack on Gamepur, and the steps are as follow:
- Pause the Download and close Battle.net and all its processes. You can do that from the Task Manager Ctrl + Shift + Esc
- Now, open the file explorer and navigate to the Programs files folder, usually is in the following path:
C:\Program Files (x86) - There, right-click on the Destiny 2 folder and rename it to something else like Destiny 2 OLD

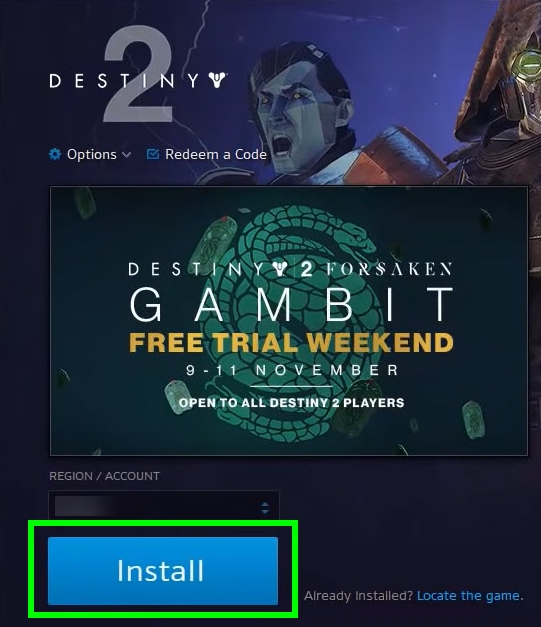
- Now, launch Battle.Net and this time instead of an Update button there would be and Install button that you need to click
- Before the installation process begins, go back to the Destiny 2 folder and remove the OLD in the name
- Now you can click on the button Start Install
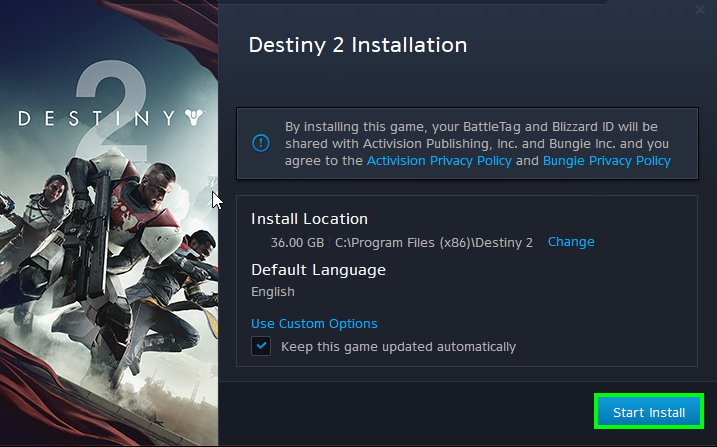
- Finally, the process will start, and Batlle.net will detect your Destiny 2 files and will update anything that could be corrupted or missing.
- Once done, you can try to launch the game, and hopefully, the issue will be fixed successfully.
Method #2: Increase Max Download Rate
On the Battle.net launcher, you can set a max download rate that will help you if you want to limit the amount of internet connection that this program should use.
Although that feature is useful when you have issues like update stuck on initializing, you need to remove this limit following these steps:
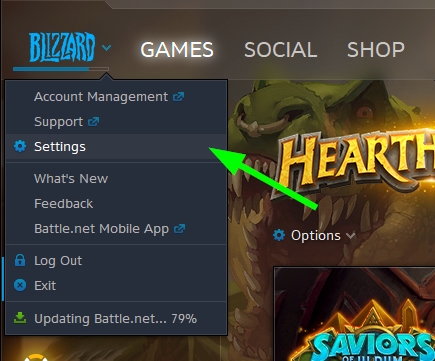
- Launch Battle.net
- Click on the Blizzard menu and select the option Settings
- On the left side menu, go to the section Game Install/Update
- Now, on the right, scroll down until the section Network Bandwith
- There you need to set the value 0 on the Latest updates settings. This will set the maximum download rate to unlimited, and now Destiny 2 could download the updates faster
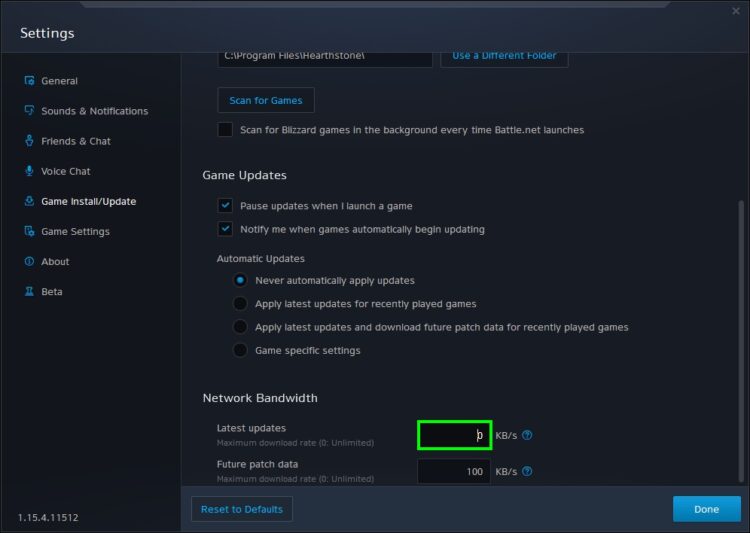
- Click on Done to apply the changes and then try to update Destiny 2 again
Method #3: Run Battle.net as Administrator
Battle.net launcher requires reading and writing permission to be able to install or update your games. Usually, those permission are granted when you install the software and never are denied, but there are some cases where you need to force this permission by running the program as administrator.
First, you need to verify if the problem is this permission, running Battle.net as admin like this:
- Close Battle.net
- Go to your desktop and right-click on the Battle.net shortcut
- Finally, in the menu select Run as administrator
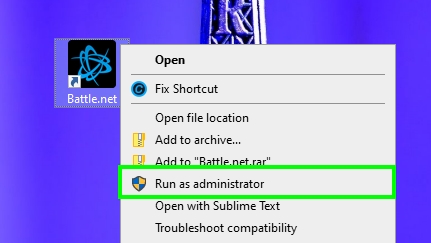
- Now, try to update Destiny 2 and verify that the update doesn’t get stuck on initializing
When you check that the problem has been fixed, you can set the admin rights permanently following these other steps:
- Navigate again to your desktop and right-click on the Battle.net shortcut, then in the menu that opens, select Properties
- Once there, navigate to the Compatibility tab
- Now, check the box that says Run this program as an administrator
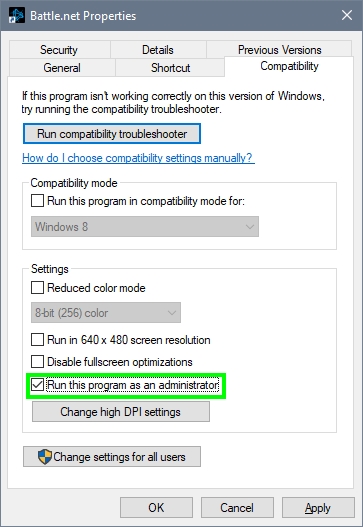
- Click on Apply to save the changes, and that it, now every time you launch Battle.net it will ask you directly for admin rights
Method #4: Disable Antivirus
If the Destiny 2 update gets stuck on initializing and you haven’t been able to fix it with the methods above, your problem may be your security software.
Your antivirus is the one that protects your computer from threats and viruses that could damage your files or even steal all your private data. In most cases, this friend will help you and never bother you with errors, but there are some cases when this software blocks inoffensive files and programs like Battle.net when you are updating Destiny 2.
There have been reported multiple cases about this issue and one easy, and a quick fix is to disable your antivirus temporarily while you finish the update.
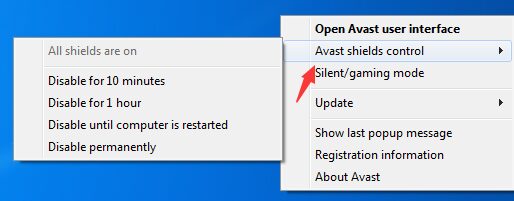
To disable Avast antivirus follow these steps:
- Navigate to the taskbar and right-click on the Avast icon
- In the menu select the option Disable shield
- Finally, choose the option Disable temporarily for x hours
- Now, you can open Batle.net and update Destiny 2 without problems
- Once the updating process finishes, you can go back to your avast settings in the taskbar and enable the shield
If you have another antivirus, the steps should be similar; only make sure to disable the shields for enough time to let Battle.net complete the update process.
Method #5: Reinstall Destiny 2
Well, the time has come, and may you were considering this before as your last resource.
Destiny 2 is a well-developed game that never should give you problems, but there are some cases when the issues can be fixed with anything, and your last option is to reinstall the game completely.
You may not want to perform this long process, but after this, surely all your issues will be fixed, and the stuck update will be gone.
To uninstall Destiny 2 follow these steps:
- Launch Battle.net and navigate to the Destiny 2 section
- There click on the Options button and then in the menu choose Uninstall game
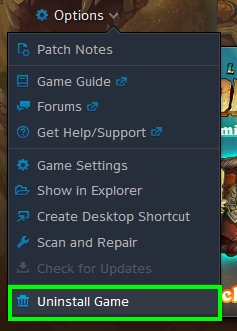
- Once uninstalled, you can reinstall the game, and when it finishes, you will be able to play the game without problems
So far, those were the best tips and solutions that will help when Destiny 2 update gets stuck on initializing. If you know another way to fix this issue or have any questions, leave a message below in the comments section.
Here, I leave some other Blizzard-related issues that may help you: