You have some RAM to spare, but Minecraft doesn’t use it? In this tutorial, you will learn an easy way to allocate more RAM to Minecraft.
If you are a Minecraft player, you may have noticed that you use minimal RAM. Still, when you decide to install mods to increase the game’s properties and improve the gameplay by adding new objects or new mobs or world generators, the game may close automatically, and that is because it needs more RAM than you allow.
Minecraft is developed in Java, so you must have both the standard 32-bit and 64-bit version installed in Java so you can increase the available RAM of the game.
Increasing the RAM available for Minecraft is very simple, but you should take into account the RAM of your device since you should not give up more than half of the memory of your device. If you have a computer with 4 GB of RAM you should not give more than 2 GB.

How to Allocate More RAM to Minecraft
On this guide, I will show you how to increase the RAM used by Minecraft step by step in the latest Minecraft launcher version currently.
If you have some old Minecraft launcher version or use another launcher besides the official, you can follow the same steps, but you will need to find the arguments options by yourself.
Without further delay, let’s start with the process.
Step 1: Check Available Memory
This should be the first thing you should, but if you already know how much memory you have available on your computer, you can continue with the next step.
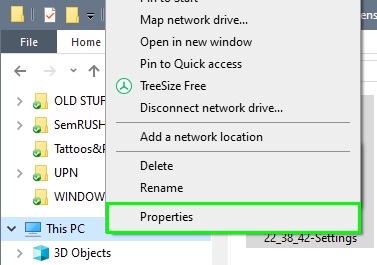
Open the File Explorer and right-click on “This PC” then in the menu click on Properties.
A new window will open, and there you need to navigate to the section System. You can see the available memory on your computer in the line Installed memory (RAM)
Now, something that you need to take into account is not using too much memory on Minecraft.
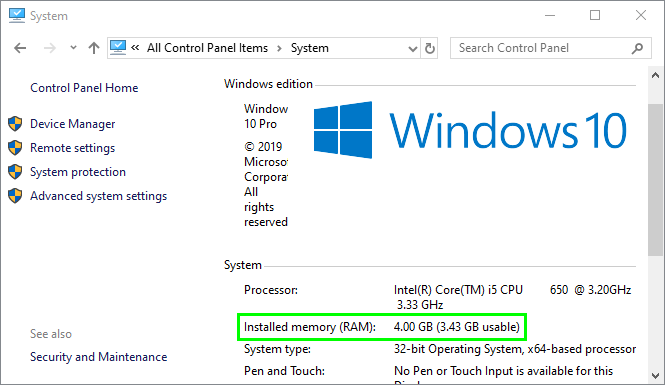
Some recommended option is using half of your memory. Therefore, in this case, I will use 2GB from my 4GB Ram.
Step 2: Allocate More Memory
On these steps, I will show you how to increase the ram on Minecraft using the official launcher.
- Open the Minecraft Launcher and login into your account
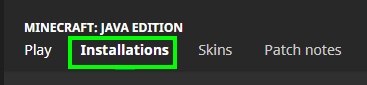
- Now you need to navigate to the Installations tab
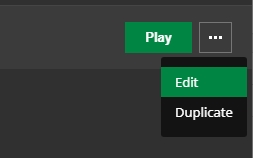
- There find the Latest release line and click on the three dots button to open the menu, there click on Edit
- In the Edit Installation window, you need to go to the bottom and click on More Options
- Now locate the cursor in the section JVM ARGUMENTS

- There you need to change the argument
-Xmx2Gto the amount of memory, you want to allocate. If you’re going to use 8GB, you need to change it like this:-Xmx8G - Click on the Save button to apply the changes, and now you can click on the Play button to launch Minecraft
- Once in the game, you need to verify that you have allocated the memory by pressing the key F3
Conclusions
Minecraft is a fun game that has several mods that you can install in it, but when you do that, you may face some RAM issues because, by default, the game only allocated 2GB.
Thanks to this tutorial, you will be able to add more RAM to this game and continue playing Minecraft without any issues.
If you need help with Minecraft problems, check these other articles: