You are surfing the internet, and suddenly you see the ERR_NETWORK_CHANGED error? In this post, I will show you some ways to fix it.
Every day you use Google Chrome to access thousands of websites either for personal or work issues, and when you visit a website, your computer connects to a server to show you the page, but sometimes this process has errors.
What is ERR_NETWORK_CHANGED?
Sometimes when there is a problem with your computer, you may find this error, however, even when you try to reload the website, the connection is impossible.
This error may be associated with your hardware (such as modem, router or network card failures) as well as software (viruses, service errors, etc.).
That’s why on this post I will show you some of the best ways to fix this error quickly.
Method #1: Clear Google Chrome History
When you surf hundreds of web pages, the history is gradually filled, and this can finally hurt the overall behavior of Google Chrome since some of these websites can affect the natural access to your network.
So, to fix this Chrome error, you can try to delete the Chrome history.
Note: This method will reset all your passwords, so make sure to back up that information before trying these steps.
- Open Google Chrome
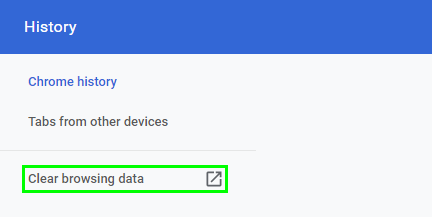
- Open the Chrome History using the keyboard shortcut: Ctrl + H
- On the left menu, click on the option Clear browsing data
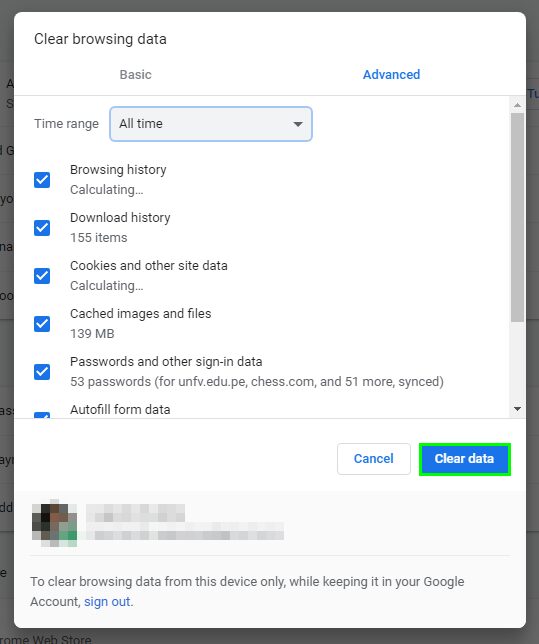
- On the pop-up navigate to the Advanced tab
- Now, on Time range choose the option All Time
- Check all the boxes below and finally click Clear data
- After this, you can restart your computer and try to surf the web on Google Chrome.
Method #2: Disable Proxy
Currently, due to security issues, many users and organizations make use of proxy servers to protect their privacy on the internet since this way they browse privately and anonymously, but in specific situations, the proxy configuration can affect the optimal performance of Google Chrome.
So, you can try to disable the proxy to fix the error. On Windows 10, follow these steps:
- Open the Run window using the keyboard shortcut: Win + R
- On the box copy and paste the following command:
inetcpl.cpl
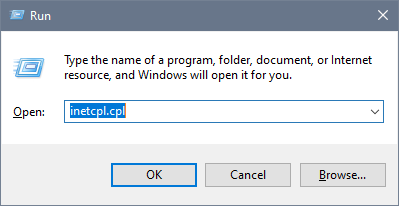
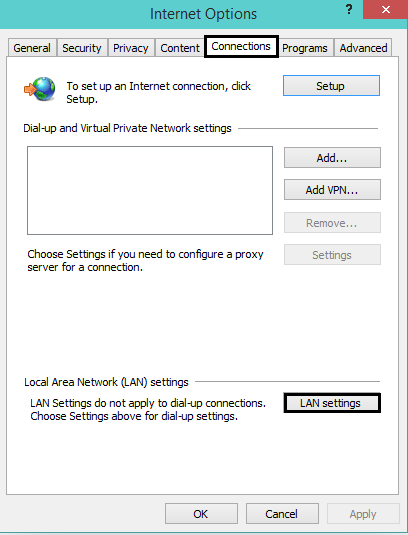
- Press Enter to open Internet Properties and once there, navigate to the Connections tab.
- There click on the button LAN Settings
- In the window that opens, uncheck the box: Use a proxy server for your LAN
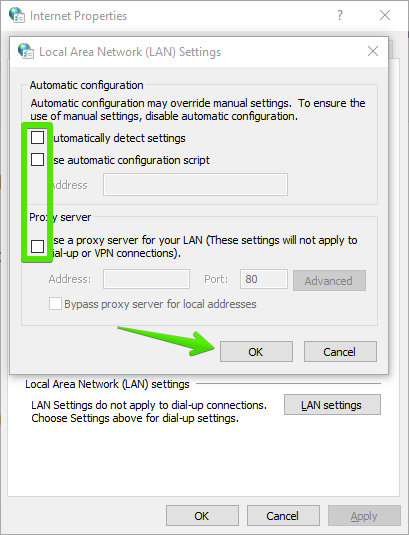
- Click on OK to and Apply to save the changes and try to surf the web again.
Method #3: Restart Router
Your Router is responsible for connecting you with the Internet, but sometimes these devices have problems to do it.
So an easy way to fix this Chrome error is to restart your Router.
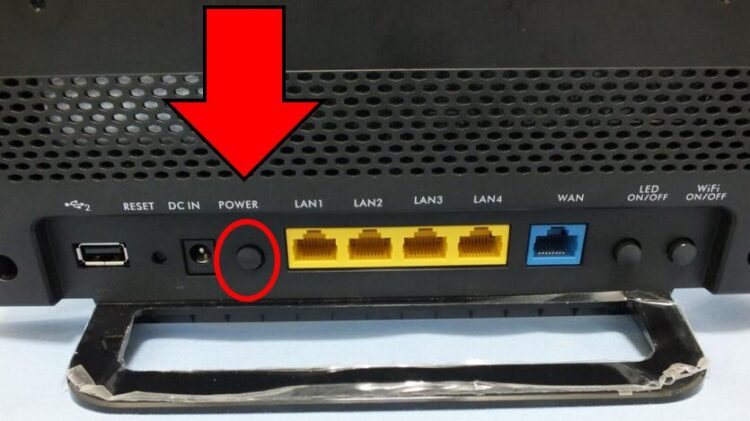
Just turn off the Router (unplug the power supply) and leave it like that for a few seconds. Wait at least 5 seconds and then plug it in, turn it on and wait until it is fully turned on and the lights start blinking.
Now, try to surf the internet again with Google Chrome.
Method #4: Empty DNS Cache
If you weren’t able to fix the error with the methods above, try to empty the DNS cache and reset the TCP/IP protocols. Follow these steps on Windows:
Empty DNS:
- Open the Windows Search using the keyboard shortcut: Win + S
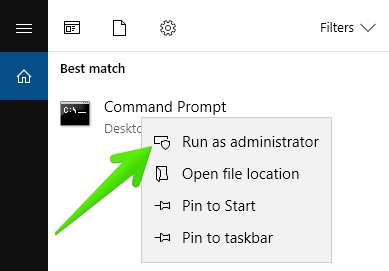
- Type the word “CMD” in the box.
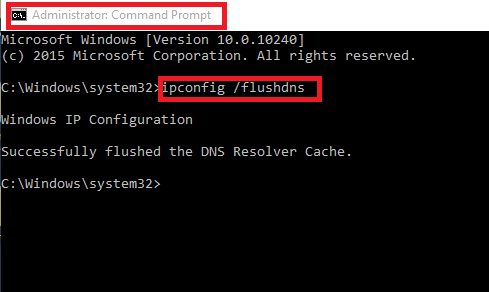
- Rightclick on the result Command Prompt and in the menu select the option Run as Administrator
- Now, copy and run these commands one by one:
ipconfig /release
ipconfig /flushdns
ipconfig /renew
Reset TCP/IP protocols:
You need the Command Prompt as administrator again for these commands
Once opened, copy and run these commands one by one:
nbtstat -r
netsh int ip reset
netsh winsock reset
Once you finished with the steps above, restart your computer and then try to surf the web again.
Method #5: Change DNS Server
DNS servers are responsible for converting the IP addresses into a domain name and vice versa, but when you use the default DNS of your provider, you can reach a point where failures occur either due to services, processes or demand.
In this case, it is best to configure a free DNS such as Google’s public DNS. To do this on Windows, follow these steps:
- Open the Windows Search using the keyboard shortcut: Win + S
- Type the word control and then click on the option Control Panel

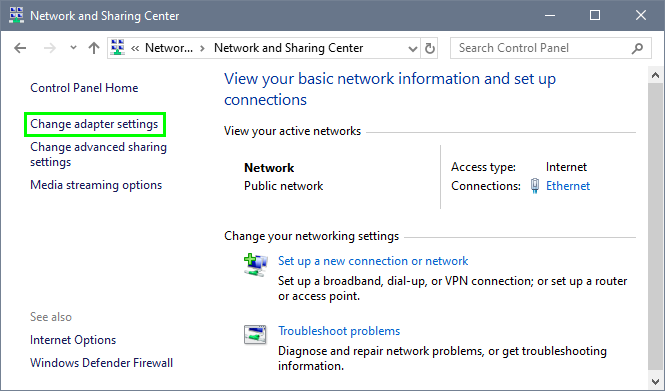
- Once there click on Network and Internet and later on Network and Sharing Center
- On the left menu, click on the option Change adapter settings
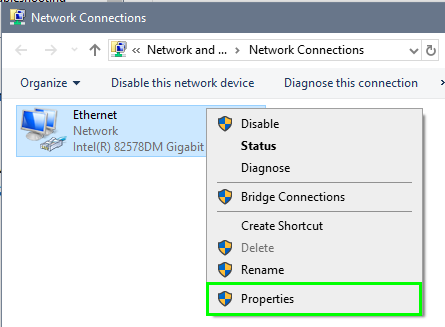
- There you will see your network adapter, click on your default adapter and in the menu select the option Properties.
- On the window that opens, double click on the option Internet Protocol Version 4
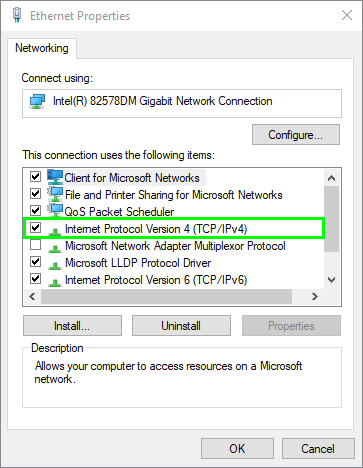
- At the bottom of this window, click on the option: Use the following DNS server addresses.
- On Preferred DNS server use this 8.8.8.8
- In Alternate DNS server use this one: 8.8.4.4
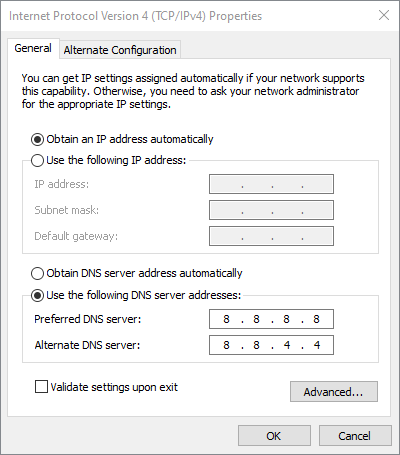
- Click on the Apply button to save the changes
Now, try to surf the internet again to verify that the error has been fixed.
Method #6: Remove WLAN Profiles
If your computer has a wireless interface, every time you connect to a new Wi-Fi network, a profile of that network will be created with a series of configuration variables, so that if something changes in such profile may cause the error.
To remove your WLAN profiles on Windows, follow these simple steps:
- Open the Command Prompt as Administrator
- Once the CMD, copy and paste this command, then press Enter:
netsh wlan show profiles - There you will see a list of all your WLAN profiles
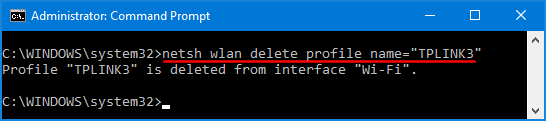
- You need to remove these profiles one by one using the following command:
netsh wlan delete profile name="[PROFILE]"
After this process, restart Windows and try to surf the web again on Google Chromevity in Google Chrome.
Method #7: Reinstall Network Adapter Driver
Some network driver failures are associated with configuration failures or not applied updates, so maybe reinstall your network adapter driver can solve the error.
To reinstall your network adapter drivers on Windows follow these steps:
- Open the Run window using the keyboard shortcut: Win + R
- There copy and paste the following command:
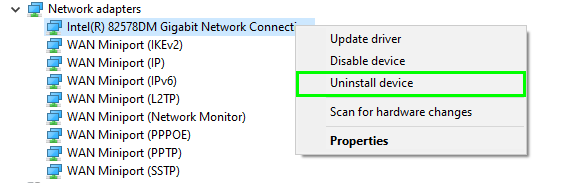
devmgmt.mscand press Enter - Once in the Device Manager, open the section Network Adapter
- There right-click on your default adapter and in the menu select the option Uninstall device
- The following message will be displayed. Click on Uninstall again to complete the action.
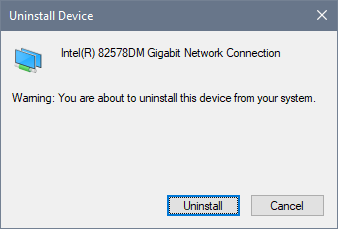
- Now restart Windows and your network adapter will be uninstalled.
If Windows fails to install the driver, download the latest driver from the manufacturer’s website of your network adapter.
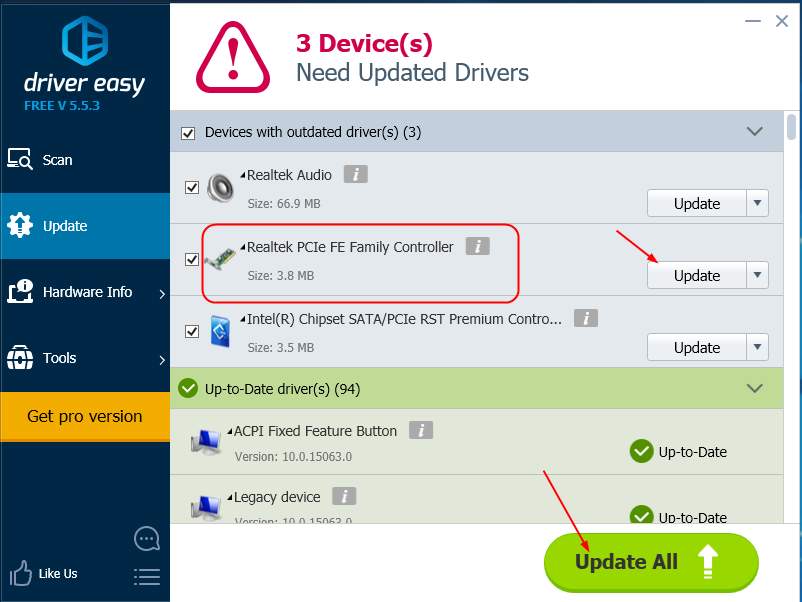
If you aren’t sure what’s your manufacturer website, you can update the driver efficiently using Driver Easy
Driver Easy will automatically recognize your system and find the drivers for it. So you don’t need to risk downloading and installing the wrong driver, and you don’t have to worry about making an error when installing.
You can update the drivers automatically, either with the Free or Pro version of the Driver Easy.
- Download and install Driver Easy
- Run Driver Easy and click on the Scan Now button. Easy Driver will scan your computer and detect any outdated drivers.
- Click on the Update button located next to your adapter network driver to download and install the correct version of this driver automatically.
- You can also click on Update all to download and automatically install the correct version of all the missing or outdated drivers in your computer.
https://www.drivereasy.com/help55/offline-scan/
Method #8: Update Google Chrome
Some updates of Google Chrome are designed to optimize the use and experience of the browser and therefore integrate general improvements, so it is ideal always to be checking if you have updates available.
To check the updates on Google Chrome, follow these steps:
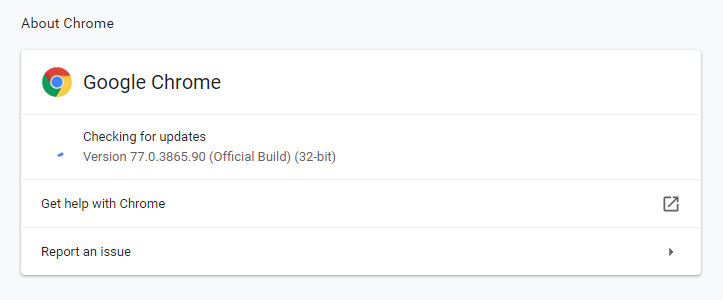
- Open Google Chrome
- Click on the three dots menu and click on the option Help and then on About Google Chrome
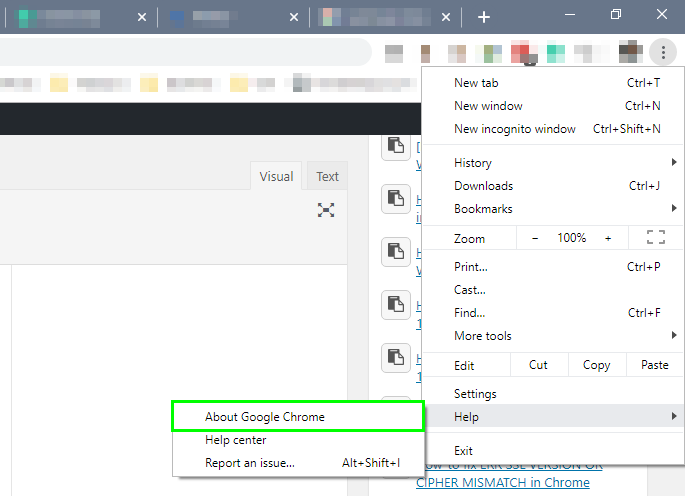
- There you only need to wait, and if there is any update, it will be automatically applied to Google Chrome.
Method #9: Reinstall Google Chrome
This is the last method that you can try, and although it is a hard one, this can be your ultimate resource to fix the error.
- To Uninstall Google Chrome, follow these steps:
- Press the keys Win + R to open the Run window
- Type the command:
appwiz.cpl - Click on OK to open Programs and Features
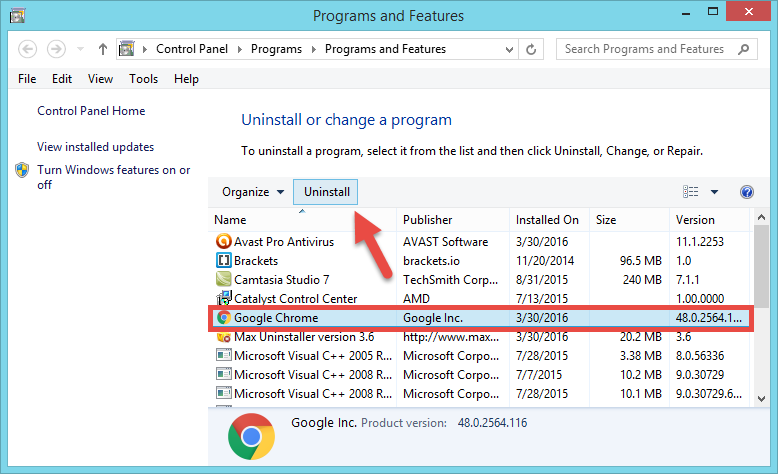
- There, search for Google Chrome and click on Uninstall
- Now, to Reinstall Google Chrome, download the installer from here.
- Run the installer and automatically will install Google Chrome
https://www.google.com/intl/en_us/chrome/
Wrapping Up: ERR_NETWORK_CHANGED
Those were the best methods that you can try to fix the error on Google Chrome. Another thing that you can do is clean your computer; this can wipe your Google Chrome data, cookies, and cache. You can use CCleaner to do it.
Must read: How to fix ERR_NAME_RESOLUTION_FAILED on Google Chrome
I hope this tutorial helps you to solve the problem, if you have any question or problem, leave me a comment below and will try to answer you the soonest I can. Thanks for reading.