Google Chrome is one of the modern web browsers that everybody uses thanks to his simple interface and easy configuration settings. In some cases, when the server takes too long to respond, an error code appears on the Chrome tab: ERR_CONNECTION_TIMED_OUT.
This error will prevent you from accessing your favorite websites; therefore, you need to follow these easy steps to fix this issue quickly.
Method #1: Check Hosts File
The hosts’ file is a text-based document that your operating system used to assign custom hosts to IP addresses. This file helps you, in some cases, to block certain ads or change the server from some website when you are developing some web app, but it can be misconfigured or corrupted because you have some virus before.
You need to check this file and verify that everything is correctly setup using the Notepad as an administrator.
- Search in the Start Menu the notepad and rightclick on it to choose the option Run as administrator
- Now open the menu File and then click on Open
- Locate the hosts file in the path: C:\Windows\System32\drivers\etc
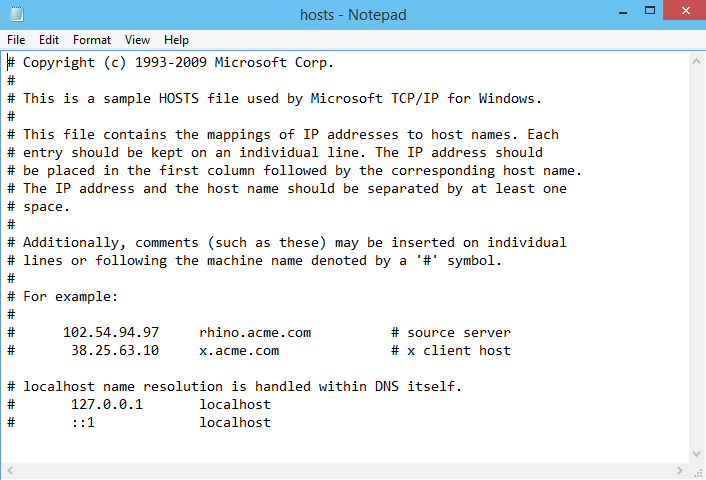
- There you must verify that the website that you want to access has a # at the beginning of the line. If the line says something like 127.0.0.1, you won’t be able to access it from anywhere.
- If there is any known address there without # in the beginning, proceed to delete it since this prevents the site from being reached, or it has been redirected to some IP address.
- Press the keys Ctrl + S to save the changes and restart your computer to apply the changes
Method #2: Delete Chrome Browsing History
Another reason why the ERR_CONNECTION_TIMED_OUT appears is that you have stored a high amount of data like cookies, thumbnails which could be impacting the browser behavior.
To fix this, you only need to clear your browsing data following these steps:
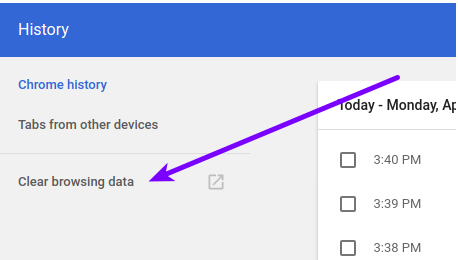
- Open Google Chrome and press the keys Ctrl + H
- In the left sidebar, you should see a menu, and there click on Clear Browsing Data
- Now, in the new windows that pops up, select the Time Range: All-Time and click on CLEAR DATA
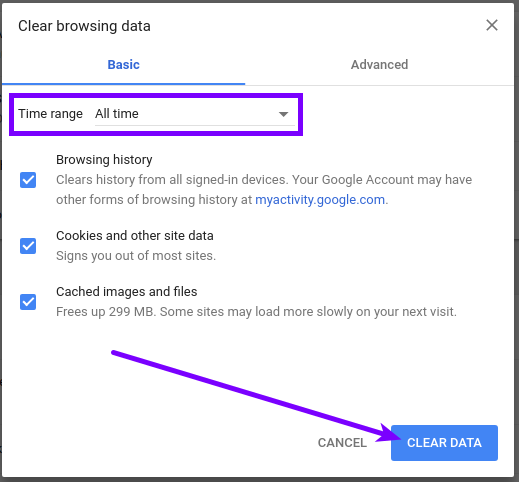
- This will clear all your browsing history, cookies, and cache that maybe are causing that error.
Method #3. Configure LAN Settings in Windows 10
Some wrong settings in the network parameters in your Ethernet or WIfi connection could also generate this error on Google Chrome because it wasn’t able to connect correctly to the server.
This issue mostly appears because you had configured some proxy or VPN before that left some misconfiguration parameters. To verify that, follow these steps:
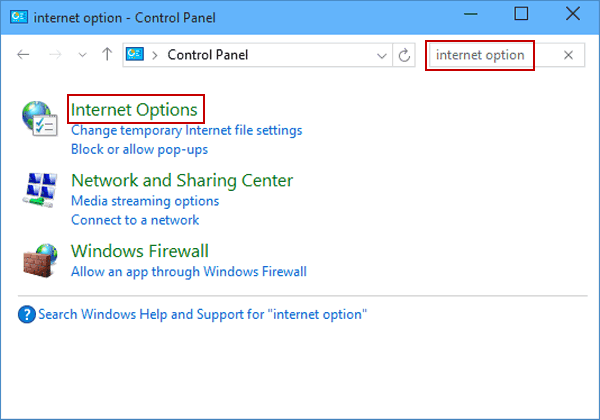
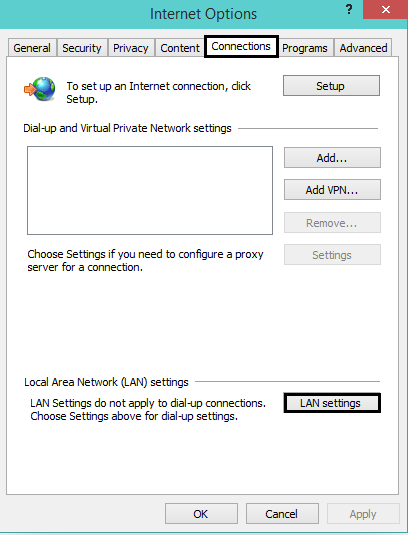
- Open the Control Panel and navigate to the section Network and Intneret
- There click on the option Internet Options
- In the Internet Options window, navigate to the Connections tab and there click on the button Lan Settings
- Finally, uncheck all the boxes in the LAN settings window
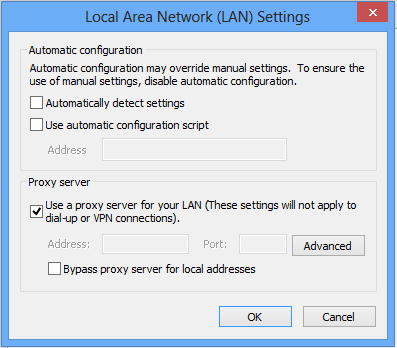
- Click on OK to apply the changes.
Method #4: Update Network Drivers
A cause of multiple network errors is an obsolete or outdated driver because it doesn’t fully comply with the minimum network requirements required, especially when the operating system is updated.
To update the drivers, you have two options.
Option #1: Driver Booster
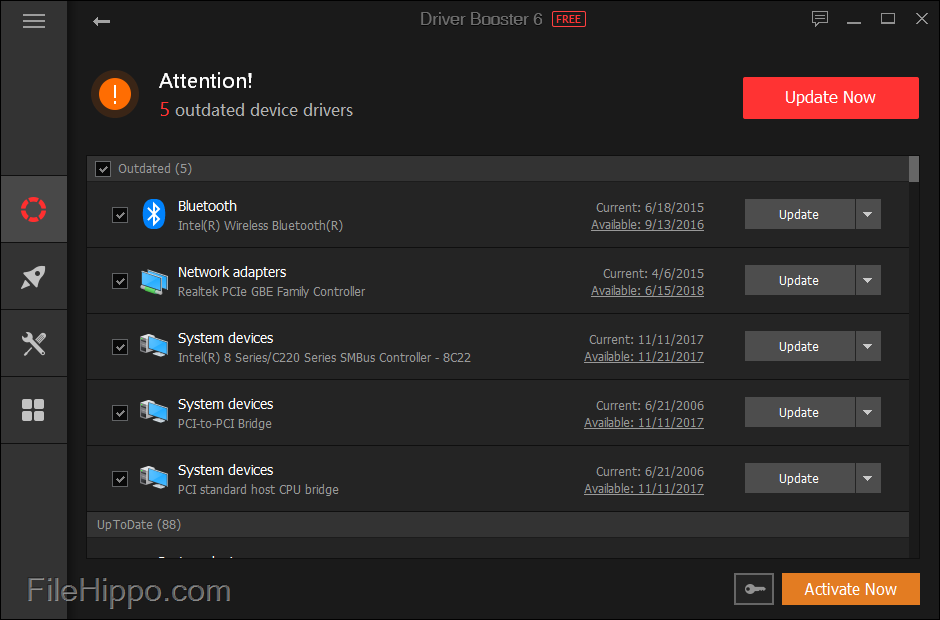
If you don’t know what your network card is or you want some easy way to update your drivers, I recommend the software Driver Booster.
Driver Booster helps you to update all your old drivers easily and without too much effort.
First, download Driver Booster. Run the installer and then open Driver Booster. Once opened, click on the big SCAN button to find old drivers.
Finally, click on the button Update Now to update all your old drivers, then only wait for the process to end.
Option #3: Update Drivers from the Device Manager
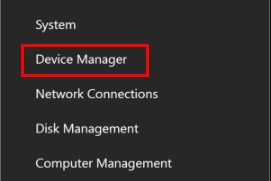
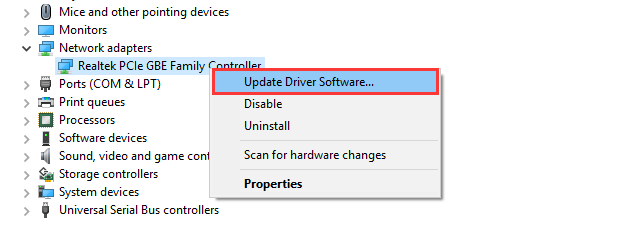
The last option to update your old network card is from the Device Manager. To open it, right-click on the Start Menu and in the contextual menu select Device Manager
In the Device Manager, find the section Network Adapters and make right-click on the current adapter, then in the contextual menu select Update driver software
Once you click on Update driver software you will see the following window:
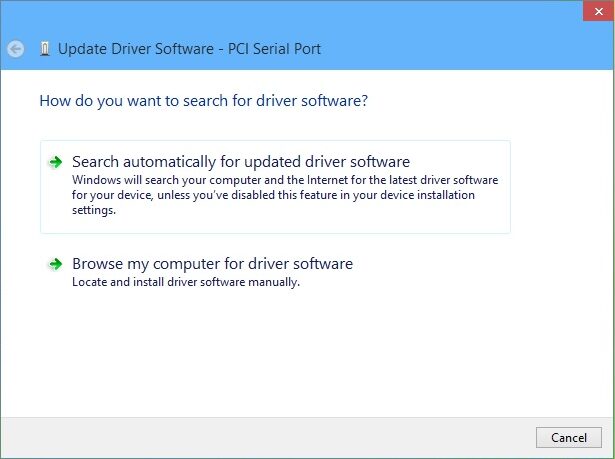
There, you can search for the latest driver automatically online or locally once it has been downloaded from the manufacturer’s website.
A recommended option is to search for the latest driver online since Windows 10 has an extensive repository of drivers, but if you have some newest driver downloaded directly from your manufacturer’s website, use that instead.
Method #5: Flush DNS & Renew IP Address
When you navigate the internet each day, WIndows 10 stores several information about servers, most visited websites, and some other things that allow you to browse faster the next time. This data called cache something gets too bloated and to fix that, you need to flush the cache following these steps:
Search in the Start Menu the Command Prompt and right-click on it to select the option Run as Administrator. Once opened, you need to run the following commands one by one:
ipconfig /flushdns
ipconfig /registerdns
ipconfig /release
ipconfig /renew
netsh winsock reset

If you have followed all the methods above, surely you will be able to revisit your favorite websites without any problem. Do you need more help? Let me know in the comments section below. Thanks for visiting WindowsHelper.