You are playing a match on PUBG, but a message appears in the middle of the screen that says “Network Lag Detected”? In this post, I will show you how to fix this issue on Windows.
The gaming experience from one computer to another can vary substantially. And even if it seems unfair, a player worse than you can have a lot of advantage if his PC is more optimized for the same game. PUBG is no exception, and sometimes you experience problems that affect the performance of the game.
There is nothing worse than being in the middle of an online game and starting to experience the “Network Lag Detected” error or performance problems in the graphics. This can mean a considerable loss of advantage, and you may see the bullet in your head before hearing the shot.
To avoid these performance problems related to the dreaded lag or similar, you can always change individual settings to try to fix the problem or improve your performance to a better gaming experience.
In this tutorial, you will learn some of the best tips and solutions to the network lag detected issue on PUBG quickly.
Solution 1: Update PUBG
PUBG is a game that is continuously releasing new updates and bug fixes trought the official launcher, but if you have installed the Steam version, you may need to check that you have installed all the latest updates.
Steam is known for delaying updates and problems with the game servers, and that could be your case. Therefore to verify that there isn’t any update available for PUBG, you can restart your computer and then relaunch the game.

This process will refresh the Steam services, and surely it will find some update that could fix the network lag detected message on PUBG.
Solution 2: Flush DNS Servers
Like I said before, the problem could also appear when you have a network issue, and maybe the problem is that DNS servers are in high load. One way to fix this issue is by flushing the DNS from the Command Prompt on Windows.
- First, you need to open the Start Menu and there search the word cmd
- Right-click on the result Command Prompt and in the menu select Run as Administrator
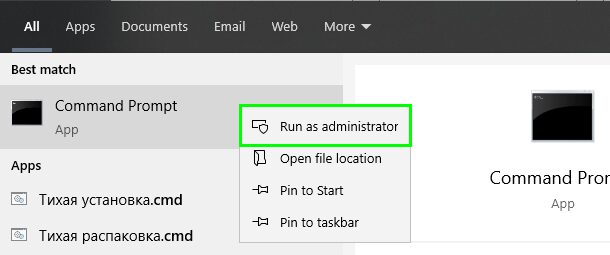
- You have opened the CMD with admin rights, and now you need to run the following command one by one:
ipconfig /release
ipconfig /renew
netsh winsock reset
- When you finish, close the Command Prompt and launch PUBG, surely this time you should no see any network lag message
Solution 3: Change DNS Servers
If the problem persists and the message network lag detected appears randomly on PUBG, you can try to change your DNS server to fix the problem.
DNS Servers are the ones that let you connect to the game servers, but when your default ones are saturated, you will experience some lag issues on PUBG.
To fix this, you can change your DNS servers to other ones like the Google Public DNS.
- On Windows 10, right-click on the network icon located in the taskbar and, on the menu, choose the option Open Network & Internet Settings
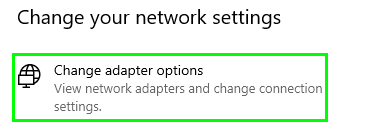
- You will be opening the Settings window, there scroll down and click on the option Change adapter options
- A new window will appear, there right-click on your default network adapter and choose the option Properties
- In the Properties window, double-click in the line Internet Protocol Version 4
- Now, in the bottom part, check the option Use the following DNS server addresses and in the empty boxes type the following numbers:
8.8.8.8and8.8.4.4
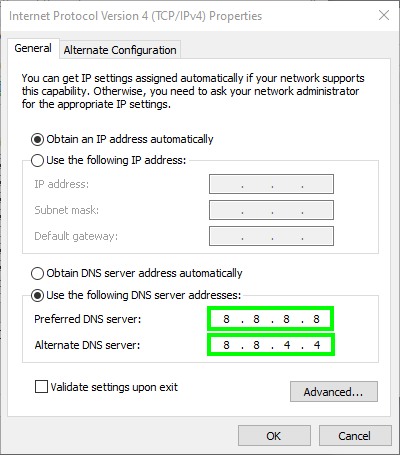
- Click on OK to save the changes and launch PUBG to verify that the network lag detected problem had been fixed.
Solution 4: Add PUBG to Firewall
Another reason why you see that message on PUBG could be that your firewall is blocking some connections, and the game can’t run smoothly.
If you have installed a third-party firewall, you need to follow the documentation from his website to add PUBG to the whitelist. If you are using the Windows FIrewall, you can follow these steps:
- Open the Run dialog Win + R and copy the command
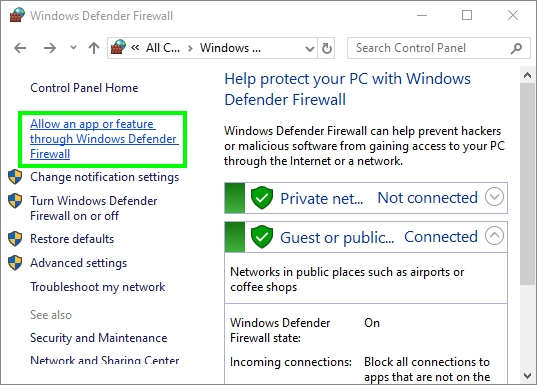
control. Hit Enter to open the Control Panel - Now you need open the section System and Security and there click on Windows Defender Firewall
- On the left side of the window that opens you should see some lines, click on the one that says Allow app trought Firewall
- Now, you need to click on the button Change settings to be able to modify the apps
- In the list, scroll down and find the game PUBG, then check the boxes Public and Private
- If you can’t find the game, you need to click on the button below Allow another app
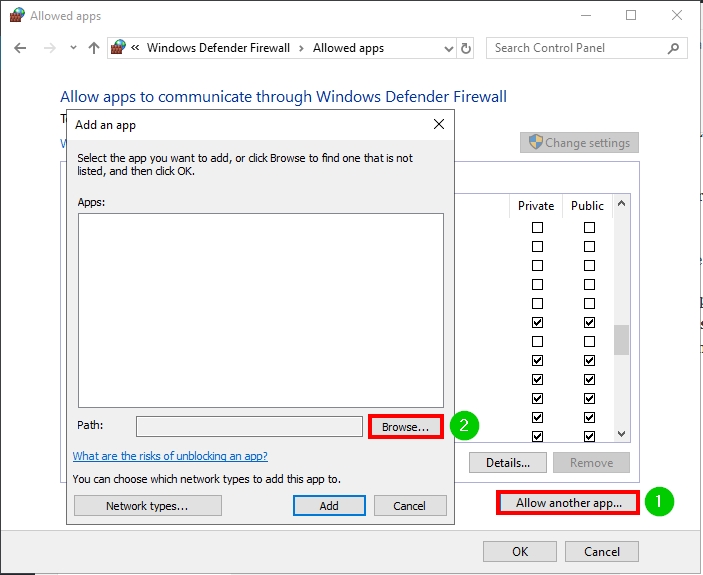
- Click on the Browse button and find the PUBG executable file. Then click on Add and on OK to save the changes. Remember to check the boxes Public and Private
- Finally, launch PUBG and the network lag issue should be fixed
Solution 5: Kill High Network Apps
If you want to play any online game, you need to close all the other programs and processes that could use your internet connection.
In some cases, some background processes use your internet connection without telling you, like Skype or Discord. Some way to verify this is using the Task Manager; from there, you can check all the apps with high network usage.
- From Windows 7, you can use the Ctrl + Shift + Esc shortcut to open the Task Manager, there click on More details.
- You will see a list of all the programs and processes running on your computer, click on the Network line to sort the view

- Now you will see all the applications running on your computer by network usage.
- To close a process, select it and click on the button End Task.
Solution 6: Verify PUBG Files
Maybe the problem isn’t your internet, but your game files that have been corrupted or have some missing components. If you have the Steam version, you can try to use a useful utility that lets you verify the game integrity to fix any missing file or corrupted data.
- Launch the Steam client and navigate to your Games library.
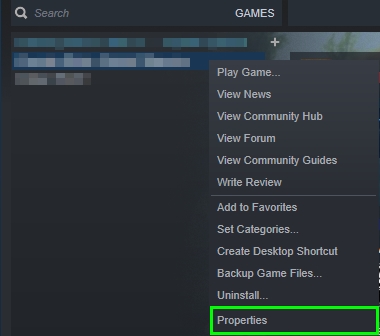
- Right-click on PLAYERUNKNOWN’S BATTLEGROUNDS and in the menu select Properties
- You will open the PUBG properties, navigate to the Local Files and there click on the button Verify Integrity of Game Files
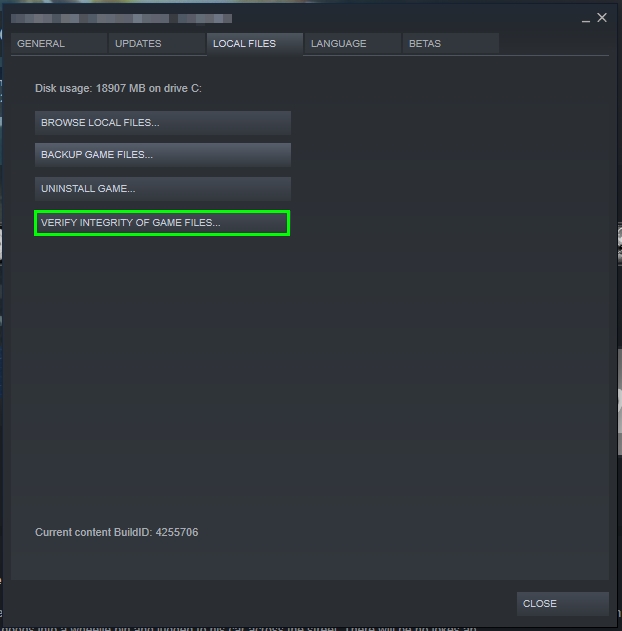
- A new window will appear where you can see the progress. Wait until Steam repair all your damaged files and then close the Properties window
- Now, you can launch PUBG and verify if the network lag detected issue had been fixed successfully
Solution 7: Change Refresh Rate
A Reddit user reported a useful tip that could help you to fix the “network lag detected” issue.
If you have a 4K monitor, you may be using the 144 Hz screen refresh rate, but if you continue experiencing this lag problem, you can try to change that to 60 Hz.
On Windows 10, you can change the screen refresh rate following these steps:
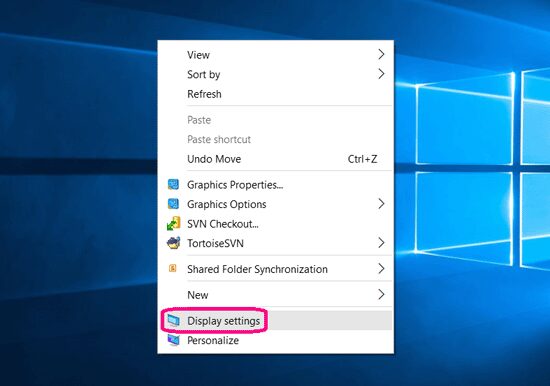
- Navigate to your Windows 10 Desktop and right-click on it. In the menu, click on the option Display settings
- In the Settings utility, scroll down and click on the line Display adapter properties
- Navigate to the Monitor tab, and there open the dropdown menu screen refresh rate. There choose the option 60Hz and click on Apply to save the changes
- Now close the Properties window and launch PUBG. In most cases, the network lag problem will be solved.
Wrapping Up
Thanks for visiting the blog. I hope the tutorial helps you to fix this issue on PUBG. If you need more help, you can contact me using the comments section below.
Here you have some other PUBG lag related articles that may help you: