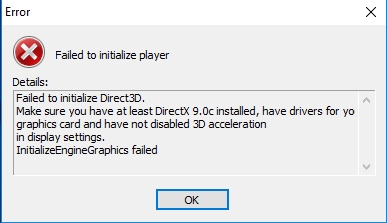
When you launch some game or program, you see the error Failed to initialize Direct3D? Well, don’t worry, in the following lines, I will talk about this issue and how to fix it.
Direct3D is a component of Microsoft DirectX technology. Direct3D is used to represent three-dimensional sequences. An old version of DirectX may cause a Direct3D error. In other cases, the Direct3D component simply needs to be enabled.
If you are facing this annoying error recently, you can check in the following methods that I will leave you below some easy ways to fix this issue on Windows 10.
Method #1: Check DirectX Version
The first thing that you should check is if you have installed the latest version of DirectX on your computer and also if the Direct3D Acceleration is enabled, otherwise that could be the reason why you are facing this error.
To do that you can follow these steps on Windows:
- Open the Start Menu and search the word Run, then click on the first result
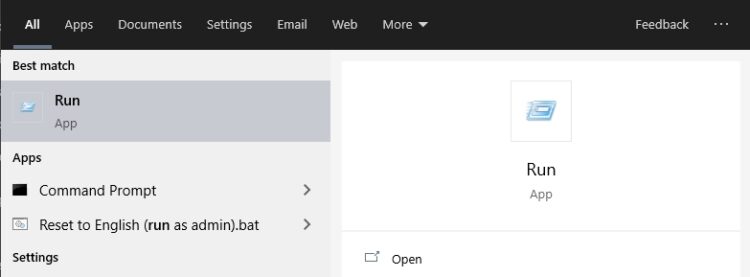
- On the window that opens copy the command
dxdiagand press Enter - A new window will appear, click on YES
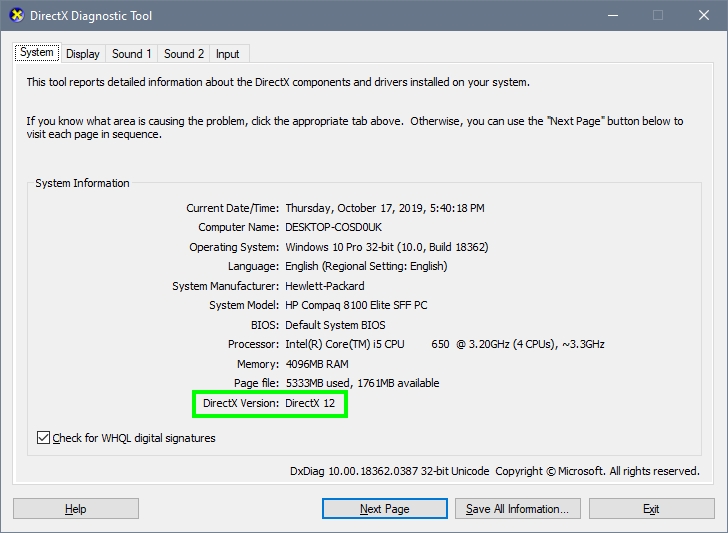
- Once in the DirectX Diagnostic Tool, find the line DirectX Version and check if you installed the latest one
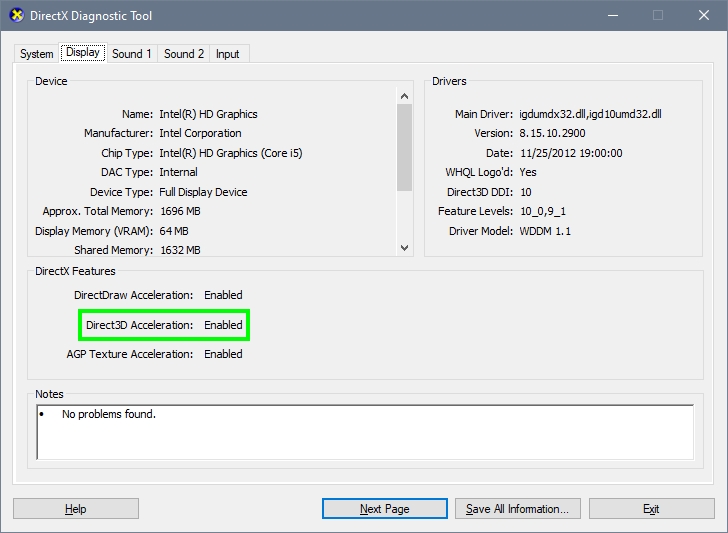
- Now, navigate to the Display tab
- There verify that you enabled the Direct3D Acceleration under the section DirectX Features
Method #2: Force DirectX11
This error can appear when your game uses DirectX9 instead of the latest version, DirectX11. The vast majority of games don’t let you change what DirectX version you can use, but some workarounds will help you to force the game to the DirectX11 version.
I know two ways to do this depending, if you play Steam or non-Steam games, follow these steps:
Non-Steam Games
- Go to your desktop and right-click on the shortcut of your videogame
- In the menu that opens, click on Properties
- Once in the Properties window, find the Target box and add the following command at the end:
-force-d3d11
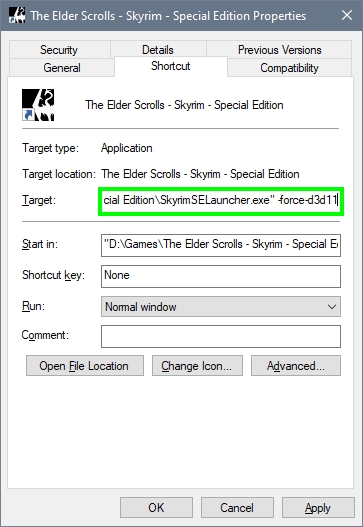
- Click on Apply to save the changes and close the windows
- Now, you can try to open the game, and hopefully, you wouldn’t see the Direct3D error
Steam Games
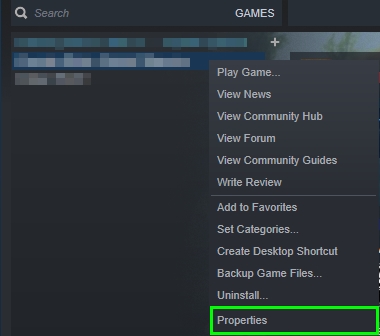
- Open the Steam client
- Navigate to your games Library
- Rightclick on your game and in the menu select Properties
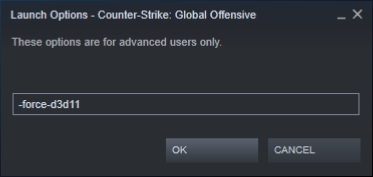
- In the window that opens, click on the button SET LAUNCH OPTIONS
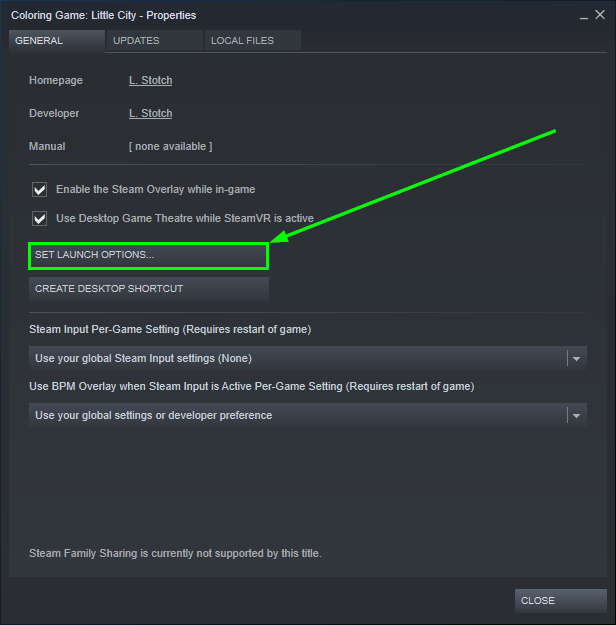
- On this new window, copy the command
-force-d3d11and click on OK
- Close the Properties and now launch your game, this will force the Steam game to run through Directx11, and the issue will be fixed successfully
Method #3: Install DirectX9
If your game isn’t compatible with DirectX11, by default, it will search for DirectX9, but if your computer doesn’t have installed because there is a newer version (Directx12), the game will crash and show you that message.
You need to install DirectX9 to fix this issue following these steps:
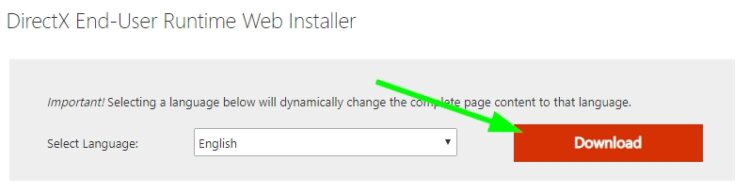
- Click here to download DirectX9
- On that webpage, click on the button orange Download button
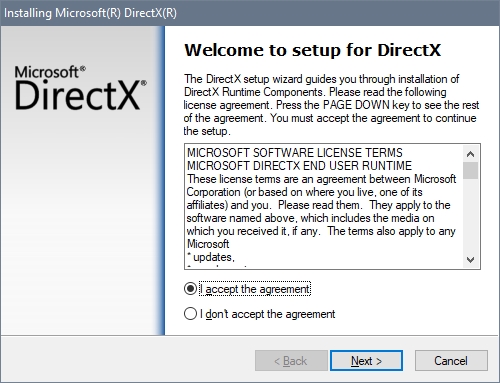
- Save the file to your computer and then double click on it
- The installer will ask you to agree to the terms, click on Next
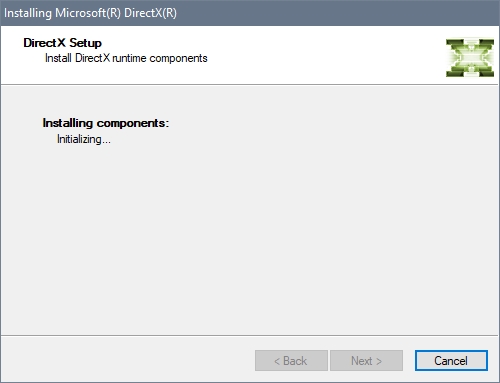
- Now, the web installer will search all the missing files on your computer and install DirectX9
- Finally, open your game or program, and now the error message will be fixed
Method #4: Update DirectX
On Windows 10, the latest version of DirectX needs to be updated through Windows Update.
If you recently have been faced this problem, you can try to fix it by updating DirectX following these steps:
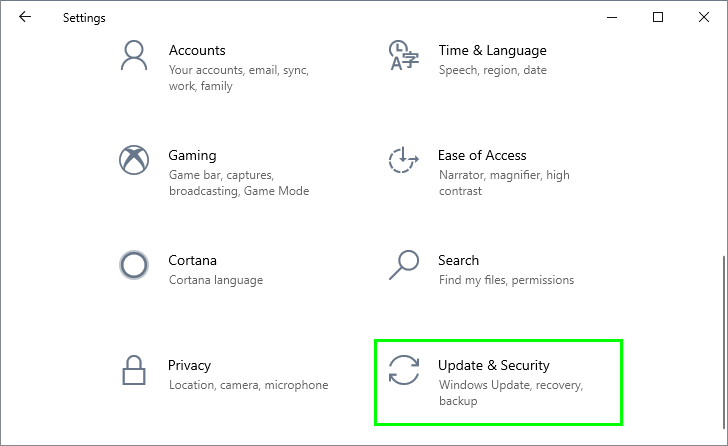
- Like I said above, DirectX 11 and 12 only can be updated through Windows Update, so open the Settings utility pressing the keys Win + I
- Click on the section Update & Security
- There, check if there isn’t any update available for DirectX
- You can also click on the button Check for updates to search those updates
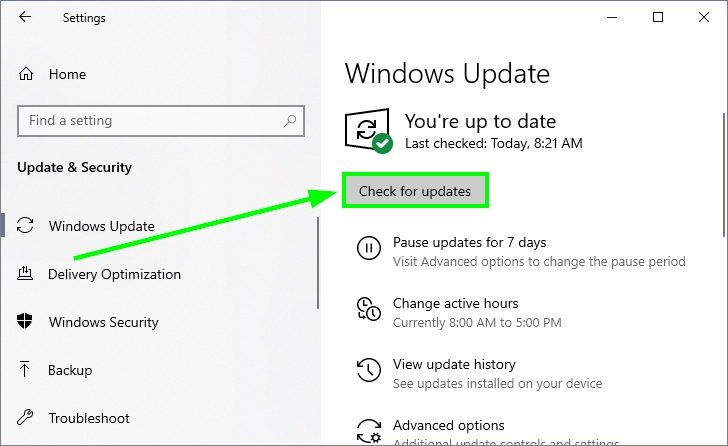
- Once updated DirectX, you can try to start your game or program to verify if the problem has been fixed
Method #5: Update Graphics Card
If you haven’t been able to fix the Direct3D issue with the methods above, one las thing that you can try is to update your graphics card.
You can do that like in the previous step from the Windows Update utility, but here I will show you a way to install the latest available drivers automatically and also update DirectX at once.
We will be using a driver updater, specifically Driver Booster that you can download from the following link.
- Download the software and run the installer, then follow the wizards’ instructions
- Once installed, click on the button SCAN
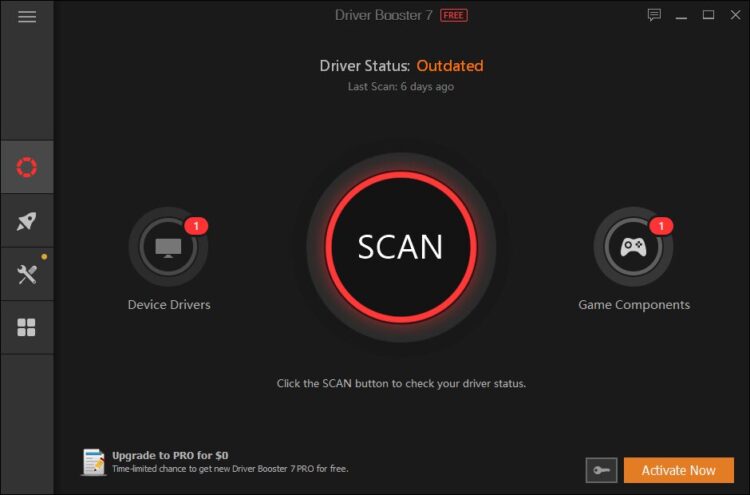
- This software will scan your devices like the GPU but also your missing components like DirectX and some Visual C++ packages
- If you buy the pro version, you will be able to update all these things at once
- To update the graphics cards, click on the button Update Now
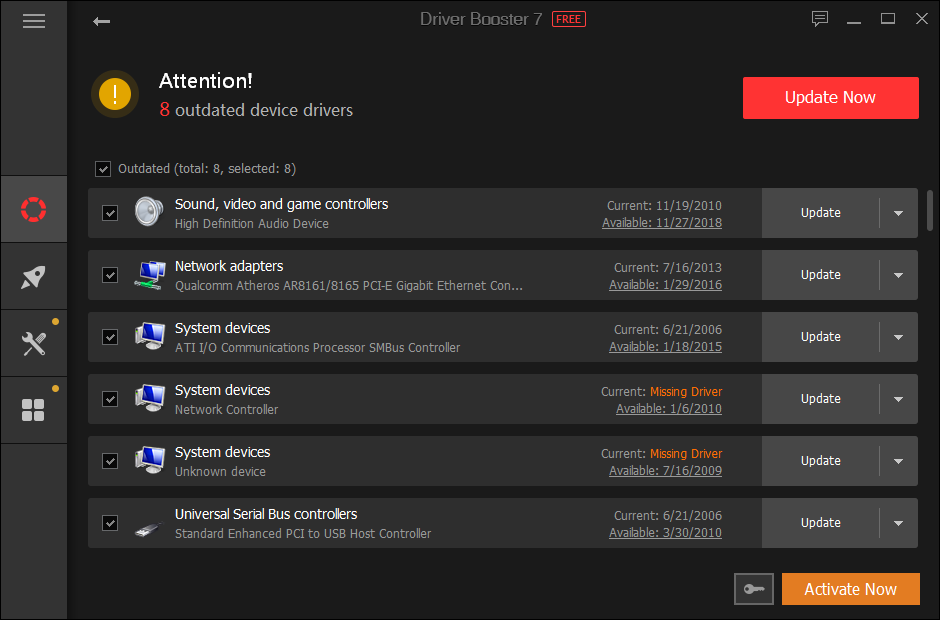
- Wait for Driver Booster until it finishes, and restart your computer
- Now, you can try to open the game or program again; hopefully, this Direct3d issue will be solved
Wrapping Up
DirectX is one of the most used API for Windows Games, multiples games like Skyrim or GTA V use this API, therefore, when some error like the Direct3D issue arrives on your PC, it can be an unpleasant experience.
Luckily now, you will be able to repair your computer by yourself, following these simple tips and solutions. If you have any questions or need more help, leave a message below.
Here, I will leave other gaming-related issues that could help you: