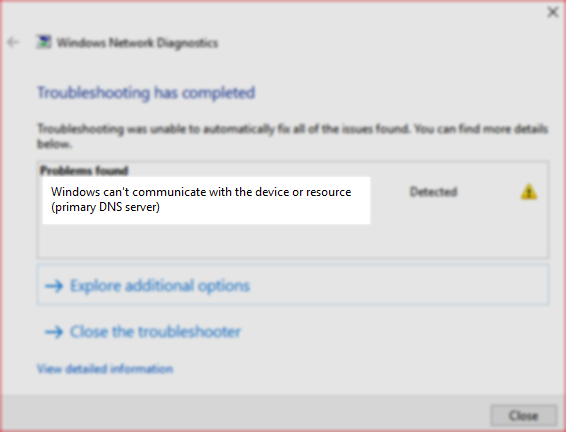
You are surfing the Internet smoothly, and suddenly the connection stops working. You decide to run the network troubleshooter to fix this issue. After a few seconds, the diagnosis is precise: “Windows can’t communicate with the device or resource (primary DNS server).” And now what you should do to have the Internet again?
DNS servers are essential to surf the Internet and have an influence on several aspects of the connection, such as its speed, stability, access to “blocked” sites, security, parental filters, and much more. Automatically, your Internet provider assigns you DNS servers by default.
On this, I want to leave some of the best tips and tricks to fix the primary DNS server issue quickly and recover your internet connection.
Method #1: Flush DNS and Renew IP
This is one of the first recommended tricks when you have a problem with the primary DNS server. Flushing the DNS will remove any old cache that could be the reason for this problem, and by the way, you can also try to renew your IP to fix this issue.
To do that, follow these steps:
- Open the Start Menu and search the word cmd
- Right-click on the first result and select the option Run as Administrator
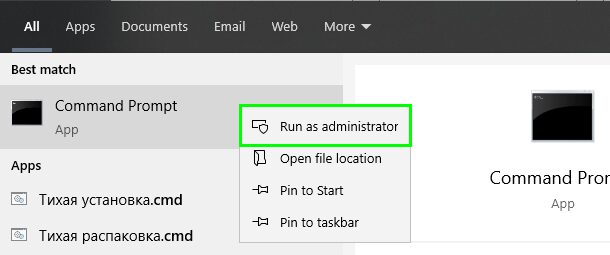
- You will be opening the Command Prompt as an administrator, now there copy and run the following commands one by one:
ipconfig /flushdns
ipconfig /registerdns
ipconfig /release
ipconfig /renew
Method #2: Restart Router
This is the second method that you should try to fix this issue. When you have a problem with DNS servers, you can perform a quick tip that restarts the router.
- Turn off your router and unplug it from the power source
- Wait for about 60 seconds and then plug it again
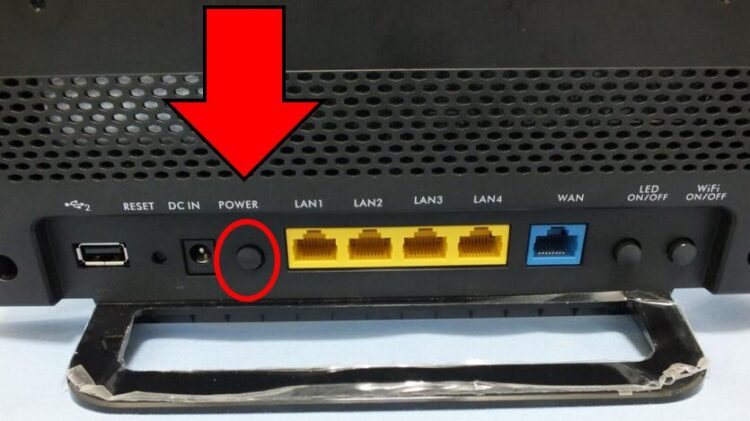
- Turn on the router and wait for all the lights to stop blinking
- Once finished, try to open the network troubleshooter again on Windows, and hopefully, this Windows communication issue will be fixed
Method #3: Changer DNS Servers
Like I said in the beginning, by default, you will be using the DNS servers that your ISP provides you. Those servers in almost all cases work fine, but in some cases, they get oversaturated, and that could be the reason why this primary DNS server error on Windows.
Luckily, there are multiple DNS servers on the internet that you can use to fix this issue. To do that, follow these steps:
- Open the Settings utility using the keyboard shortcut Win + I
- Click on the section Network & Internet
- In the list on the left, click on Ethernet or Wi-fi
- Now, on the right, click on Change adapter options
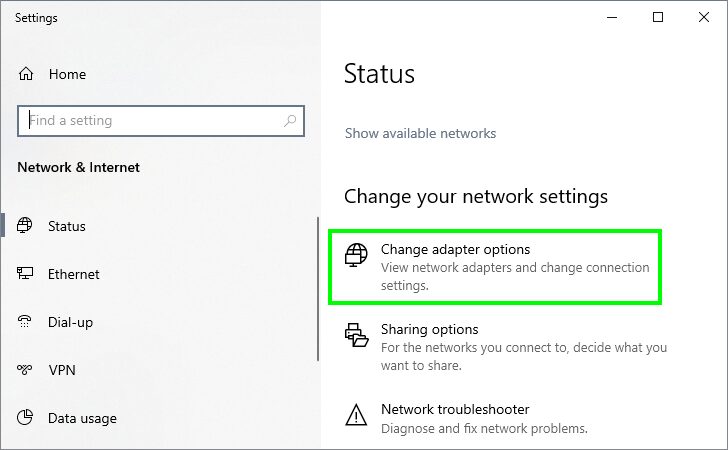
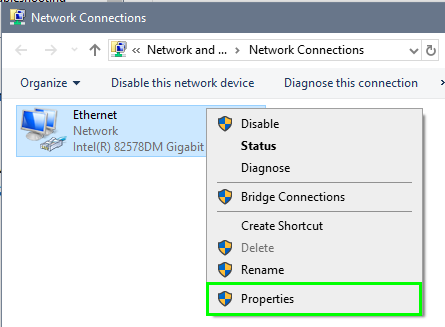
- You will be opening the Network Connections window, and there right-click on your default network adapter and select Properties
- Doubleclick on the line Internet Protocol Version 4
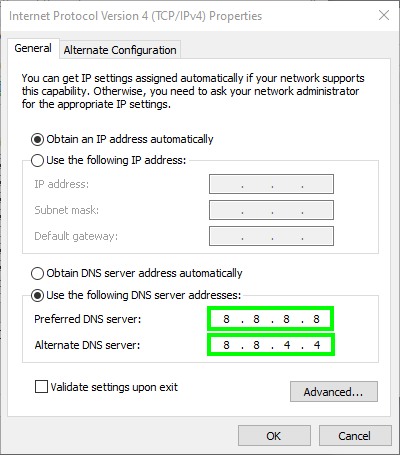
- In this window, check the option Use the following DNS server addresses
- Now in the boxes, you can use the Google DNS servers:
8.8.8.8and8.8.4.4
- Click on Apply and OK to save the changes and restart your computer
- After this process, when you try to connect to the internet, it will be working again
Method #4: Update Network Drivers
Outdated network drivers could be the reason for several internet connection problems. Therefore, it is always recommended to update these drivers periodically, and you can do that in two different ways.
Update Driver Manually from Device Manager
Follow these steps to update your network drivers using the Device Manager.
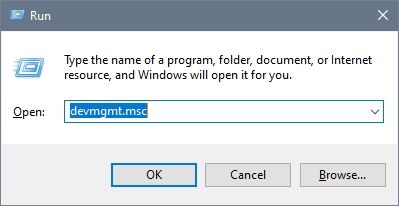
- Open the Run window Win + R and there copy the command
devmgmt.msc, then press Enter
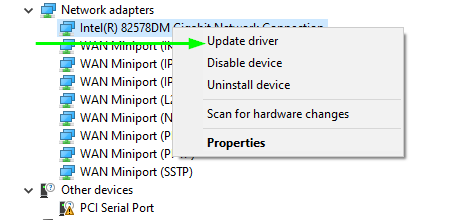
- You will see the Device Manager, go to the section Network adapters and right-click on your default adapter, then in the menu click on Update driver
- Now, you have two options, and I recommend you to use the first one to let Windows search the latest drivers
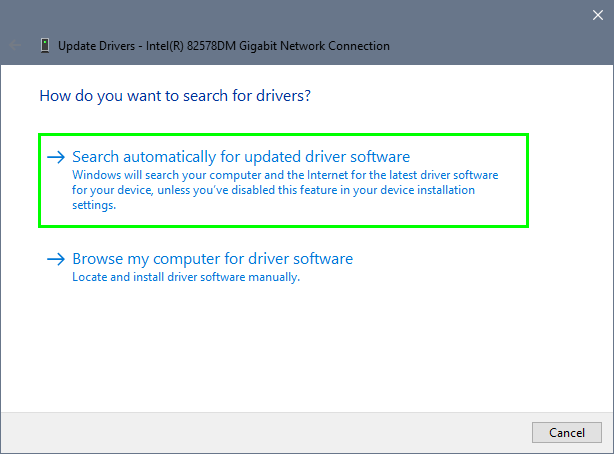
- If you have downloaded some drivers previously from your manufacturer website, you can use the second option
- Once finished, restart your computer
- Open your favorite browser and check if the internet is working again
Update Drivers Automatically
There is a chance that the Device Manager doesn’t find any drivers for your network adapter; in that case, you can use Driver Booster.
This program will scan your network adapters and search available updates in multiple manufacturer websites. Finally, it will update it for you automatically.
- Once download, install the program
- Click on the button SCAN
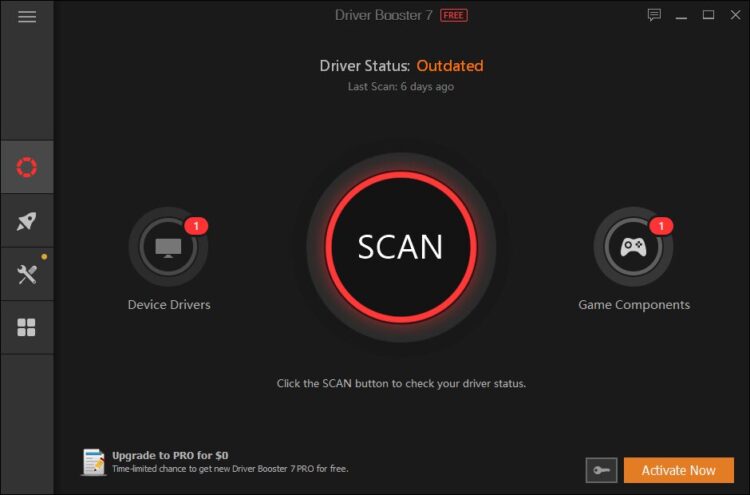
- Wait for Driver Booster to detect your network card and then click on the button Update Now, next to the section network adapter
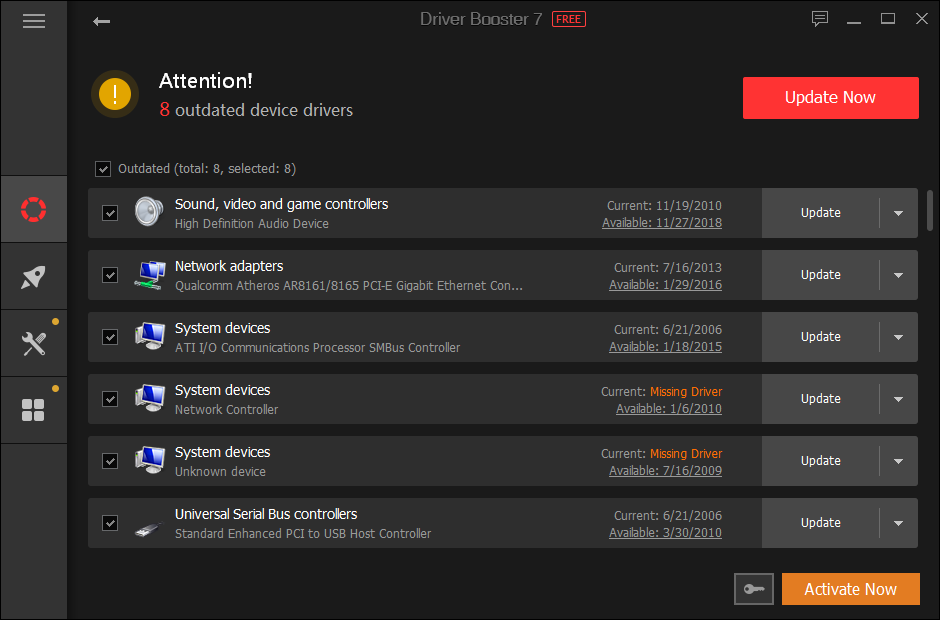
- When the updating process finishes, restart your computer as requested
- When your computer starts, you can try to use the troubleshooter, and the error will be gone
Method #5: Clear Hosts File
On Windows and other operating systems, exists a particular file named hosts.
On this file, you can set some unique network parameters that could change some name servers and even can block the connection to specific websites.
If you have a problem with the primary DNS server message, it is recommendable to clear this file to fix the issue. You can do that following these steps:
- Open the Start menu and search the word Notepad
- Rightclick on the Notepad and in the list select Run as administrator
- Now, click on the menu File > Open and find the hosts file in the following path: C:\Windows\System32\drivers\etc
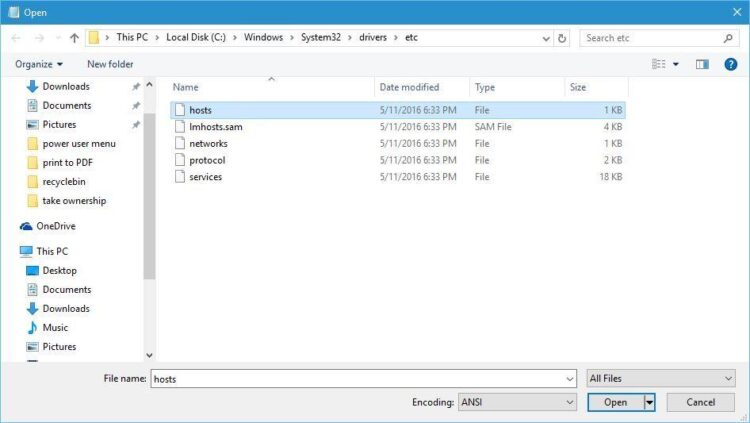
- On this file you will see multiple lines, there only select all the content and press the Del key
Press the keys Ctrl + S to save the changes and close the Notepad - Restart your computer, and surely your internet connection will be working again without problems
Method #6: Scan for Viruses
There is a high probability that this issue could be happening because some virus or malware is modifying your network settings to damage your system or, even worse, steal your data.
On Windows 10, you have, by default, enabled the Windows Security antivirus that you can use to scan your system, but I recommend you download Malwarebytes on another computer and move the installer to this computer.
This program doesn’t need to be connected to the internet to work and could help you to remove this threat quickly before using the Windows Security antivirus.
- Once downloaded Malwarebytes, open the file and install it as usual
- Open the program, and go to the section Scan and there choose the option Threat Scan
- Now click on the button Start Scan
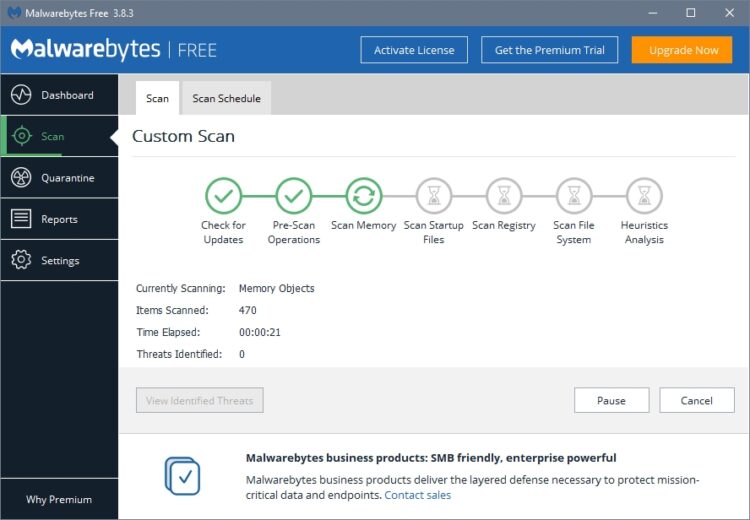
- Finally, only wait for the tool to scan your system for any possible antivirus
- If this option doesn’t work, you can use the Custom Scan and check all the boxes
- When you recover your internet connection, you can uninstall the program or leave it there for another occasion
Method #2: Rollback Network Drivers
On Windows, you have a useful feature that lets you roll back your drivers to an old version where everything was working fine.
If this error appears on your computer after some update, you can try to use this method to fix this issue following these steps:
- Open the Run window using the keyboard shortcut Win + R
- There copy the command
devmgmt.mscand press Enter - Once in the Device Manager, go to the section network adapters
- Rightclick on your network adapter and select Properties
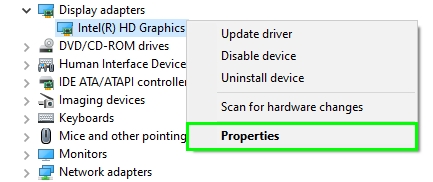
- Now, go to the Driver tab and click on the button Roll back driver
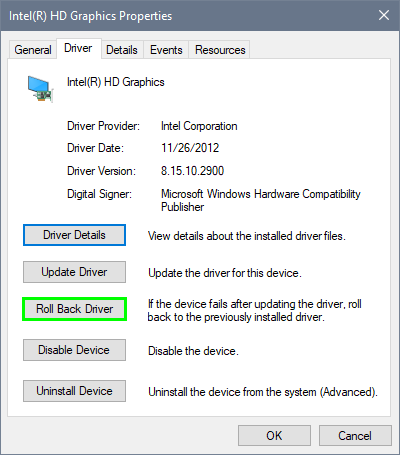
- Choose an option and then click on Yes
- Once you drivers rollback, try to connect again to the internet to check if the problem has been fixed
Those were the best tips and tricks that I know will help you to fix this primary DNS server issue successfully. Remember that if you don’t fix this issue, you can try to use the System Restore.
If you have any questions, let me know in the comments section below. Here, I will leave some other articles that could help you:

