Have you recently see the red window that tells that you “This app can’t run on your PC”? In this tutorial, you will learn that it is something pretty easy to fix.
On Windows 10, besides a lot of improvements that help you to perform all your daily tasks quickly, some bugs make your life a hell.
One of those bugs or errors is the one that says: This app can’t run on your PC.
What Means This Error?
In simple words, it’s trying to say that there are some incompatibility issues with the application that you want to install.

When this error appears, it means that you are trying to install some program because it never shows up from installed apps.
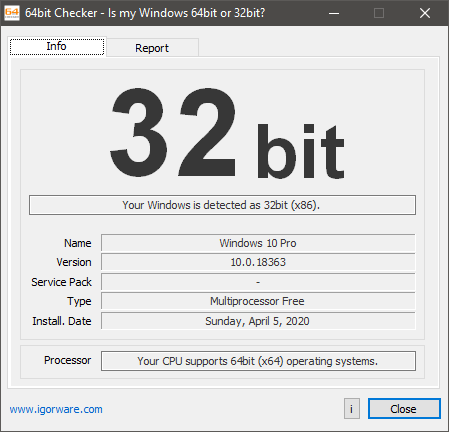
Verify 32 or 64 bits
This is the most common reason for this error. Maybe you are trying to install a 64-bit application in a 32-bit operating system.
If you don’t know which is your Windows architecture, you can try running this little tool from Igor Ware.
Run as Administrator
In many cases, when you use Windows 10, you are inside a regular user that doesn’t have administrator rights. That is something useful if you want to avoid virus infections and problems with wrong configurations, but when you need to install apps, it would be required.
If your user has administrator rights, you can try to use them by right-clicking in the installer shortcut and selecting the option: Run as Administrator.
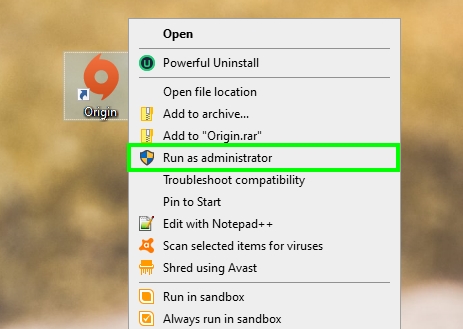
Those steps should be enough to install the app correctly.
Disable SmartScreen
If you are here is because unfortunately, the previous methods don’t fix the issue. In that case, maybe the reason is SmartScreen.
SmartScreen is designed to make your computer safer, but sometimes it is a little rough.
If you want to install the application anyway, you can try to disable this feature and reenable it when you have done it.
- Open the Start Menu and search the words Security and maintenance. In the results, choose the first option.
- On the left sidebar, click on the option Change Windows SmartScreen configuration.
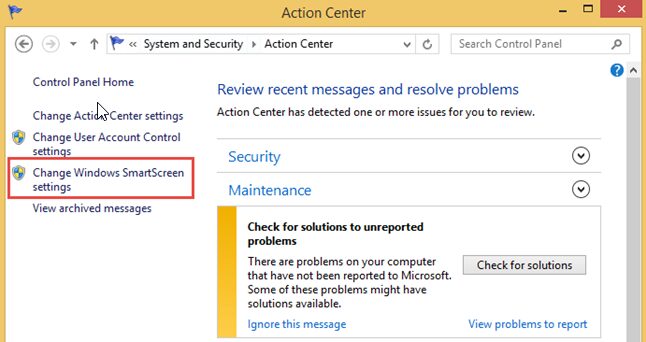
- In the window that opens, choose the option Don’t do anything and click on OK.
After performing those steps, you can try again to install the program. Remember to enable SmartScreen when you finished the installation process.
Further reading: Fix Right Click Not Working on Windows 10