Do you use several monitors on your computer and want to set one as your default screen? On this post, I will talk about the monitor and how to change your primary monitor on Windows 10.
The monitor is the central part regarding the visuals of your computer because it is through it where you see anything, and that is how you interact with your CPU demanding continuous tasks.
The quality of your monitor will denote a better or worse clarity and definition of your texts and images when viewed through it depending on the quality of it.
For this, there is the concept of screen resolution, which is the number of pixels that can be shown on a screen and that arise from the result of multiplying the width and length of a screen measured in pixels.
If you have a reduced resolution, you will tend to see the larger but more pixelated elements, that is, with less resolution or sharpness.
On the contrary, if you have a screen with high resolution, the elements that can be seen on it are smaller but have much more definition and sharpness. It is normal to have the maximum possible resolution that your monitor supports to navigate or play with higher quality.
As you know, Windows 10 has brought a lot of news with it to make things much more comfortable. By default, Windows 10 tends to set the highest maximum resolution recommended when you proceed to install it automatically.
This means that in most cases, the user will not have to make changes related to his resolution because he will have the most optimal settings for his monitor.
Your monitor is also essential in more specific tasks such as editing work or professional conferences where you need to connect several screens for better viewing.
The connection of the cable of both devices doesn’t usually have difficulties but to configure the primary monitor can be hard. In these cases, you do not have to stress because everything has a solution, and in this post, I will show you how to change your primary monitor on Windows 10.
How to Change Primary Monitor on Windows 10
Windows 10 allows you to choose the monitor you want to use as the primary monitor when you have multiple monitors connected in the extended desktop mode. The primary monitor will always show the Windows navigation, such as the Start menu and Taskbar. To start, follow these simple steps:
- Click on the Start Menu and click on the Settings icon or use the keyboard shortcut: Winkey + I
- Click on the System menu.
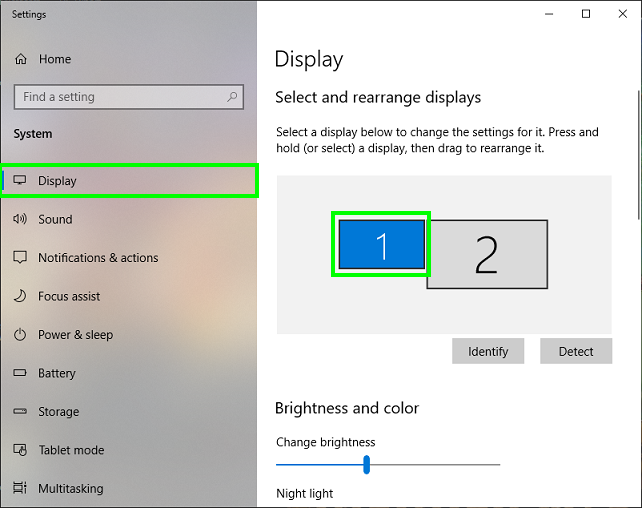
- Click on Display in the menu on the left and then click on the monitor you want to set as the primary monitor.
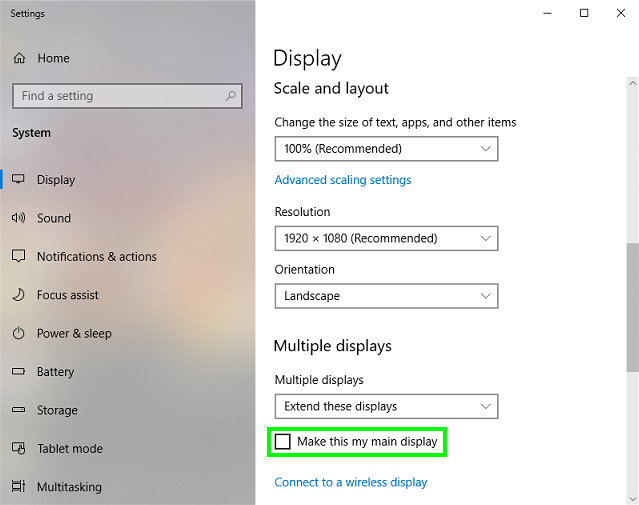
- Scroll down and click on the Make this my main display.
Wrapping Up
As you can see, setting up your primary monitor isn’t a hard as you think and you will now be able to change your default screen every time you need.
If you cant change your primary monitor, leave your case in the comments section to be able to help you in your problem.
Thanks for reading this post, don’t forget to share it in your social networks.
Must read: [FIX] This Blu-ray Disc Needs a Library for AACS Decoding