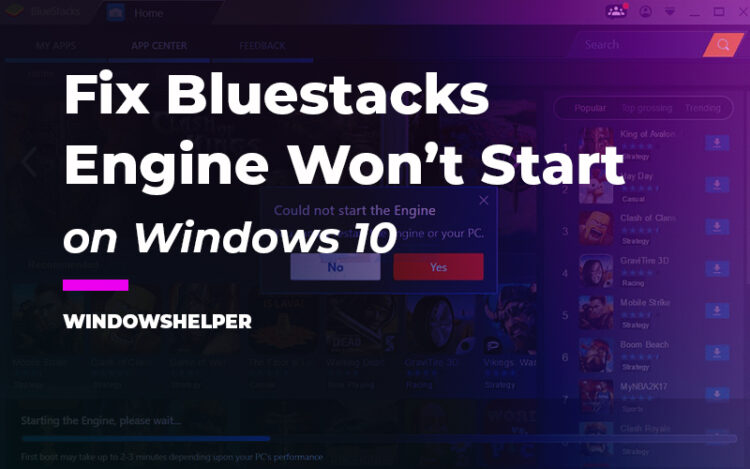
Sometimes when you want to play an Android game, the Bluestacks engine won’t start error appears. In this post, I will show you some ways to fix it.
Bluestack is a free emulator software that allows you to run an Android instance on your computer. This emulator will enable you to enjoy all Android games taking advantage of the power and screen of a PC.
Bluestack is a very stable Android emulator that is continuously updated, frequently adding new features to its repertoire, and correcting any possible errors that may arise.
How to Fix Bluestacks Engine Won’t Start
The minimum system requirements to run the current version of Bluestack are:
- Microsoft Windows 7 or higher
- Intel or AMD processor
- 2 GB of RAM
- 4GB of free disk space
- PC with administrator rights
- PC compatible with support VT-x technology or AMD-V technology
In theory, if you meet the requirements, everything should work correctly and without problems, but sometimes, depending on the PC computer on which you are going to install Bluestack, a somewhat frustrating error occurs like Bluestacks engine won’t start.
Shortly after installing and running bluestack, you receive an error message that tells you that Bluestacks Could not start the Engine.
Well, in this post, I will talk about some methods to fix this annoying error.
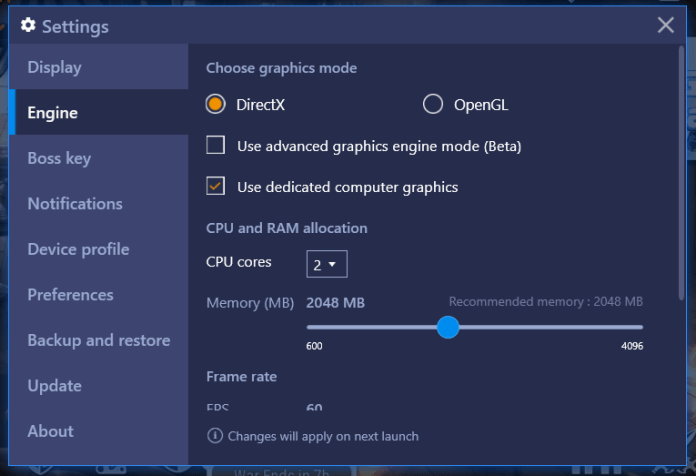
Method #1: Change Graphics Libraries
Bluestacks can work with two packages of graphic libraries, DirectX and OpenGL, and the graphics cards of the computers can work better with one or the other of these modes, depending on their compatibility.
Therefore this directly influences the capacity of the Bluestacks Engine.
The solution to this error is based on modifying the preference of these libraries, modifying the one established by default in Bluestack, DirectX for the OpenGL mode.
To change the Graphics Mode Settings on Bluestacks, follow these simple steps:
- The first thing to do is close the window of this warning, without restarting the PC or the Engine. Note: You have to close this window as many times as necessary until it no longer appears.
- Then click on the cogwheel in the upper right corner and select Settings > Engine
- There change the engine mode to OpenGL, or on the contrary, if the error occurred in OpenGL, changed it to DirectX.
- And finally, press the Restart button now and that all, Bluestack will restart and load without any problem.
With this method, you can quickly fix the error Bluestacks engine won’t start, but if the problem persists, you may want to try to add more ram to Bluestacks.
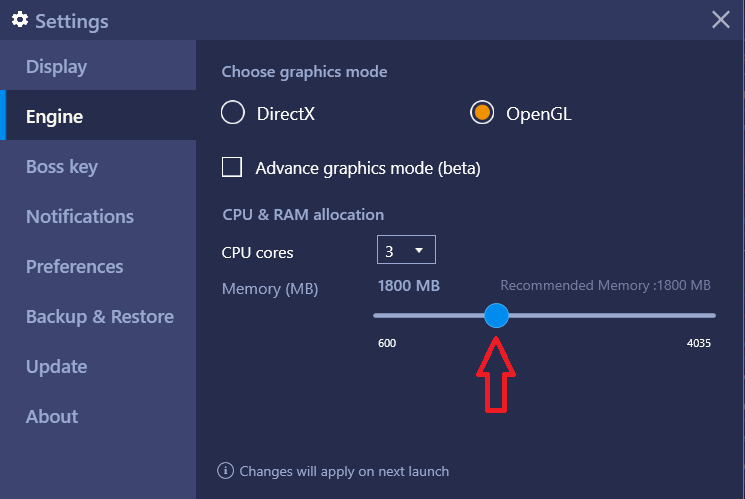
Method #2: Increase RAM on Bluestacks
Most Android games that are available in the Google Play Store work entirely in any Android emulator because they don’t require a large amount of RAM to work.
The situation isn’t the same if we talk about a demanding video game since it also requires a powerful graphics card; it also needs additional RAM.
Very few people know that Bluestacks takes just 768 MB of the RAM of their personal computer, which must necessarily be increased to save better compatibility with Android video games.
If you want to increase the RAM follow these steps:
- Open Bluestacks
- Click on the cogwheel icon in the upper right corner of the window.
- Navigate to the section Engine
- There you will find a slider that let you choose the amount of RAM that you can use on Bluestacks, make sure to use all the RAM available to troubleshoot the error.
- Click on the button Restart Now and try to start Bluestacks.
Hopefully, the error Bluestacks engine won’t start would be fixed, and if not, you can try to update your graphics cards.
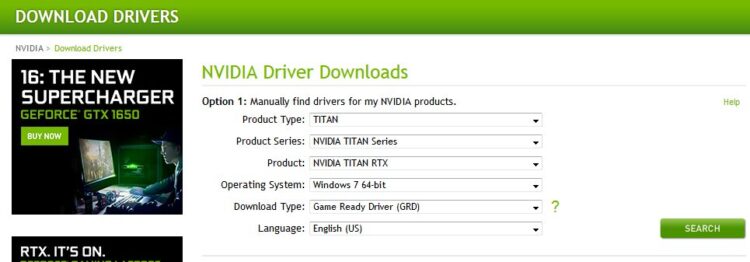
Method #3: Update Graphics Card
Sometimes a wrong installed update of your graphics card can produce errors in Bluestacks. You can try to update your graphic cards manually to make sure that everything is correctly setup.
To update your graphics card on Windows, follow these steps:
- First, you need the name of your graphics card, and you can use a tool like GPU-Z to find it.
- Once you have the name and vendor of your graphics card, go to the drivers’ website according to your GPU: NVidia Drivers, AMD Drivers, Intel Drivers.
- In the website, you can search your graphics card by name, type and even language.
- When you find an update for your Graphics, download it and run it to start the process.
- Once you finish installing the update, try to start Bluestacks again.
https://www.nvidia.com/Download/index.aspx
https://www.amd.com/en/support
https://downloadcenter.intel.com/
Sometimes updating your graphics card fix the error Bluestacks engine won’t start. But if you continue having problems, try to disable your Antivirus.
Method #4: Disable your Antivirus
Antivirus and Software like emulators have a terrible relationship since the beginning of the internet era. One thing that you can do to troubleshoot your error is to disable your Antivirus protection or shield temporarily.
Note: Bitdefender is an antivirus that has reported too many problems with Bluestacks, some users even advice to uninstall it to fix the error.
To disable your protection temporarily follow these quick steps:
- Go to the taskbar and make right-click on your Antivirus icon
- A menu will appear and according to your Antivirus, find and select the option Disable protection temporarily.
Method #5: Plug in your Laptop
This is a quick fix that you can also try if you have a laptop. When you use the laptop’s battery, Windows will limit the power that could give to your processes.
So, try to connect your laptop to a full power source to troubleshoot the error Bluestacks engine won’t start.
Method #6: Enable Virtualization
Virtualization technology is needed when you want to run another operating system on your PC, like running Android on Windows.
Almost all the CPUs have this technology, but in some, this feature is disabled by default but first you need to verify that your CPU support this feature following these steps:
- To check if your CPU support this feature, you need to get their name. If you already know the name, you can skip these steps. First, open the Control Panel
- Navigate to the section System and Security and there click on System. In this window, you will see the model of your processor. Take note of that information.
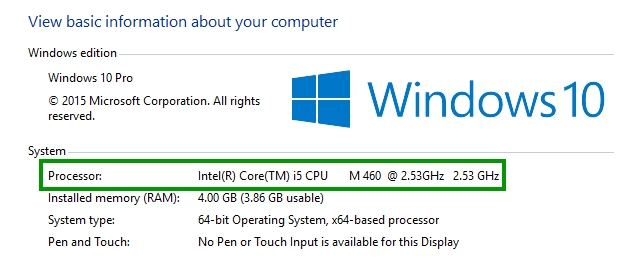
- Now, you need to open your favorite web browser and there paste the model of your CPU, for example, AMD A4-5300 APU
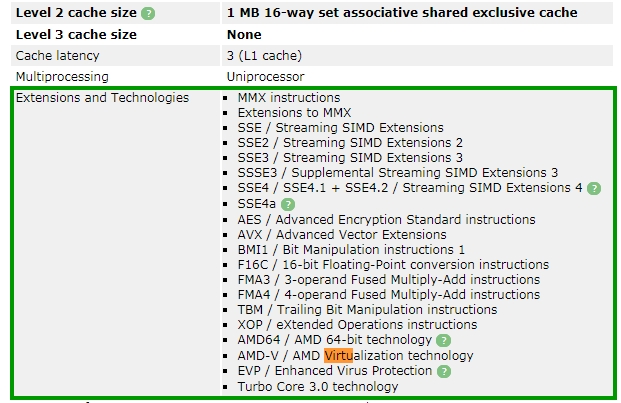
- In the results, open some websites that let you see features like CPUWorld. There, in the section Extensions and Technologies, I can see my CPU has the technology AMD-V (AMD Virtualization Technology)
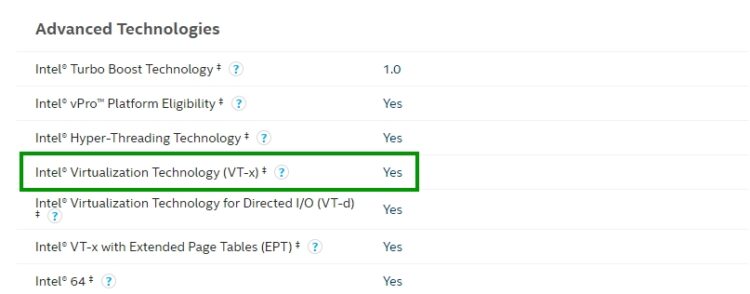
- If you have an Intel CPU, you can also get that information in the Advanced technologies section, in this example, you can see the option Yes in the Intel® Virtualization Technology
http://www.cpu-world.com/CPUs/Bulldozer/AMD-A4-Series%20A4-5300.html
Once you find that your CPU supports the virtualization, you can try to enable this feature from the BIOS because when you don’t have activated it, the Bluestacks Engine wouldn’t be able to start.
You can do that, following these steps:
- First, restart your computer, and while it is booting, you need to press the key F2 or F12 to open the BIOS settings. Note: Those keys could change depending on your manufacturer.
- On this HP Bios, you need to navigate to the Security and there move down to choose the option System Security. Finally there, you need to enable the option Virtualization Technology and save the changes pressing the key F10
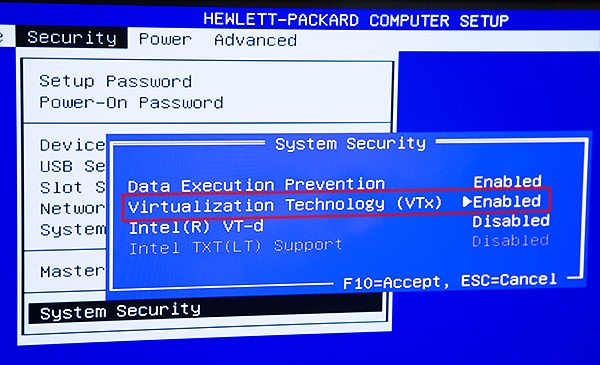
- Once your computer restarts, you need to launch Bluestacks to verify that the Engine is working correctly.
Wrapping Up: Bluestacks Engine Won’t Start
So far, those were the best methods that you can try to fix this annoying error on Windows PCs.
I hope that you could fix the problem quickly using any of these methods, if you have a question about this tutorial, leave it in the comments section.
Thanks for reading 🙂
Must read: