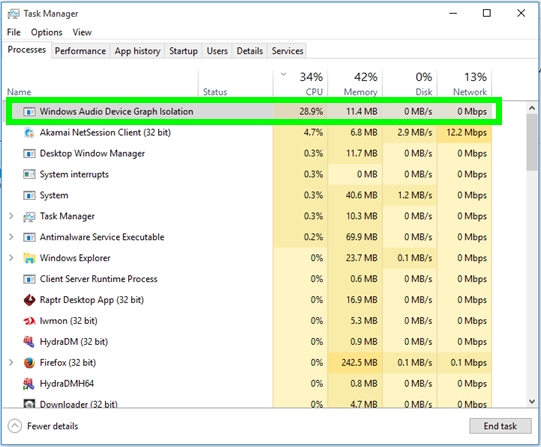
You recently have noticed in the Task Manager, a process called Windows Audio Device Graph Isolation with a high CPU usage? Well, that problem has been reported multiple times, and it is quite common in Microsoft Forums.
If you recently see some performance drop or slowness on your computer and see this high CPU usage, you may be wondering if some virus or unwanted software have infected you.
Well, first, don’t worry, because Windows Audio Device Graph Isolation is not a virus. This process is something essential to add sound effects to your computer and is part of the Windows Audio service.
If this high CPU usage has become a problem on your computer, you can try some of these solutions that will disable this process entirely or make it more CPU friendly for your computer. Let’s start with the methods.
Method #1: Disable Audio Enhancements
Like I said, in the beginning, this process Windows Audio Device Graph Isolation is the one that adds some sound effects to your audio, and if you have issues like high CPU usage, you can disable those effects following these steps:
Note: This process is for Windows 10, but it also works on Windows 7 and 8.
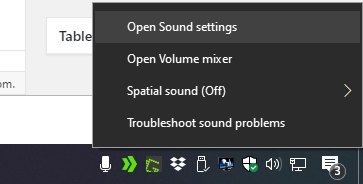
- Navigate to your taskbar and right-click on the speaker icon
- In the menu that opens click on Open Sound settings
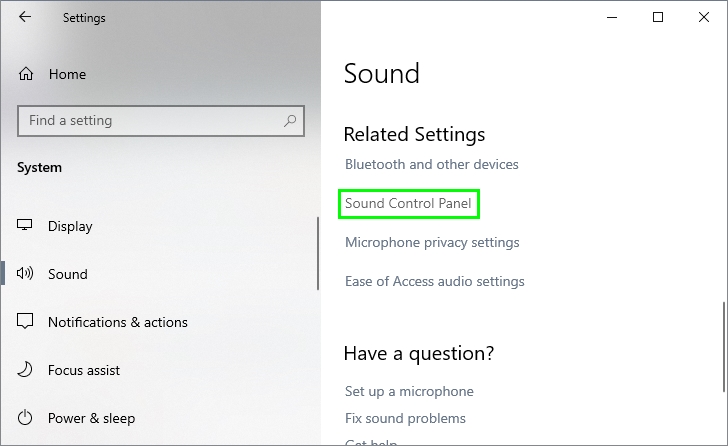
- You will be opening the Settings utility in the Sound section, there scroll down and click on the line Sound Control Panel
- A new window will open, there right-click on your default speakers and select Properties
- Now, navigate to the Enhancements tab and there check the box Disable all enhancements
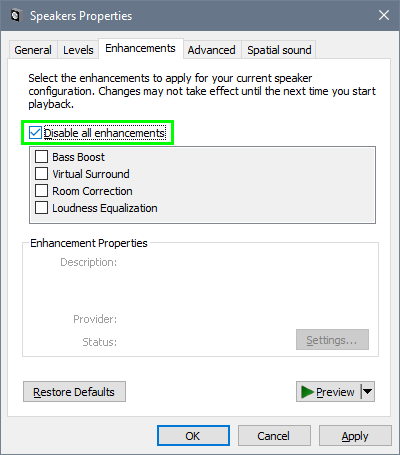
- Click on the button. Apply to save the changes and close all the windows.
- Now, you can restart your computer, and the next time, you wouldn’t see this process on the Task Manager.
Method #2: Scan for Viruses
I already told you that this Windows Audio Device Graph Isolation process isn’t a virus, but sometimes your computer has been infected with some virus that changes the original file for a fake one.
When you faced high CPU usage from this process, it is highly recommendable to scan your computer for viruses and malware. You can try to do that with your installed antivirus easily, make sure to perform a full scan.
If you don’t have any antivirus installed on your PC, I recommend you to perform a scan with Malwarebytes that you can download from here.
To perform a full scan on Malwarebytes free, follow these steps:
- Download the latest version from the link above and save the file to your computer
- Duble click on it and follow the wizard instructions to install the antivirus
- Once installed, open it and navigate to the SCAN section
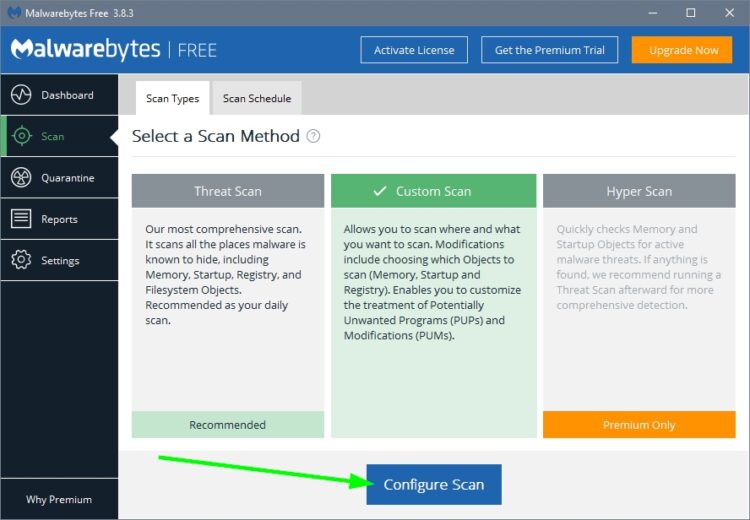
- There, choose the Custom Scan and click on the button Configure Scan
- Now on this window, check all the boxes and select the drives to scan. There you need to examine the drive where you have installed Windows.
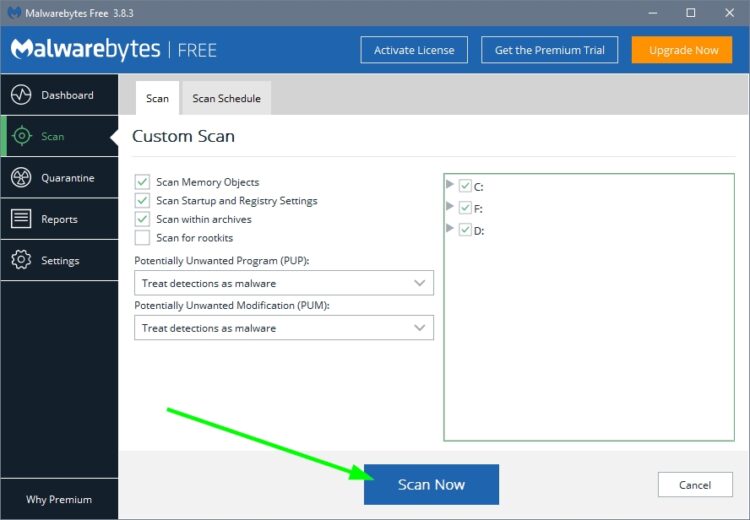
- Click on Scan Now and now wait. Malwarebytes will start downloading some database updates, and then it will scan your entire drive for common viruses and malware. When it examines your process, if it is a virus, it will block the software, and then you can choose if you want to remove it or leave it in quarantine
- This program is free, and you can use it on multiple occasions without problems, make sure to remove the virus and malware from your computer.
Method #3: Reinstall Audio Drivers
After scanning your system, the Windows Audio Device Graph Isolation still uses a high percentage of your CPU? Well, that should not be like that, and maybe there is something wrong with your audio drivers.
If you have issues like this one, you can try to reinstall the audio drivers to fix it. You can perform that following these steps:
- Press the keyboard shortcut Win + X to open the contextual menu and their select Device Manager
- Once opened, navigate to the section Sound, video and game controllers
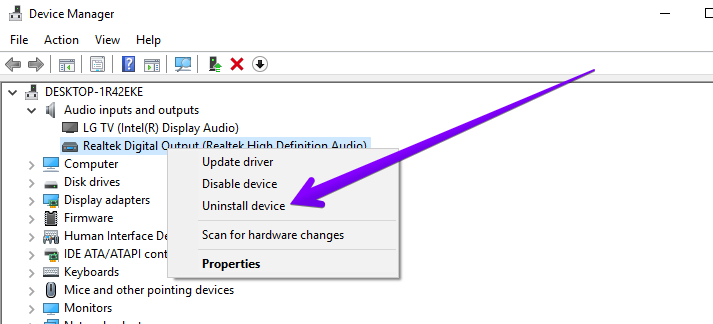
- There, right-click on the device Realtek High Definition Audio and click on the option Uninstall device
- Now, restart your computer, and after Windows boots, it will start automatically install the audio drivers, and hopefully, this issue be solved
Method #4: Update Audio Drivers
This will be the last resource if you haven’t been to fix this Windows Audio Device Graph Isolation high CPU usage problem on your computer so far.
You will need to download the latest audio drivers from Realtek and install them on your computer, although this process can be a little complicated because you will need to find your right drivers.
To avoid this long process, I recommend software that will detect your audio device and download the latest drivers for it automatically. I’m talking about Driver Booster, and you use like this:
- First, download the program from their website. Don’t worry because it is free
- You need to double click on the downloaded file to start the installing process. There you only need to follow the wizard and wait until the software install, usually fastly
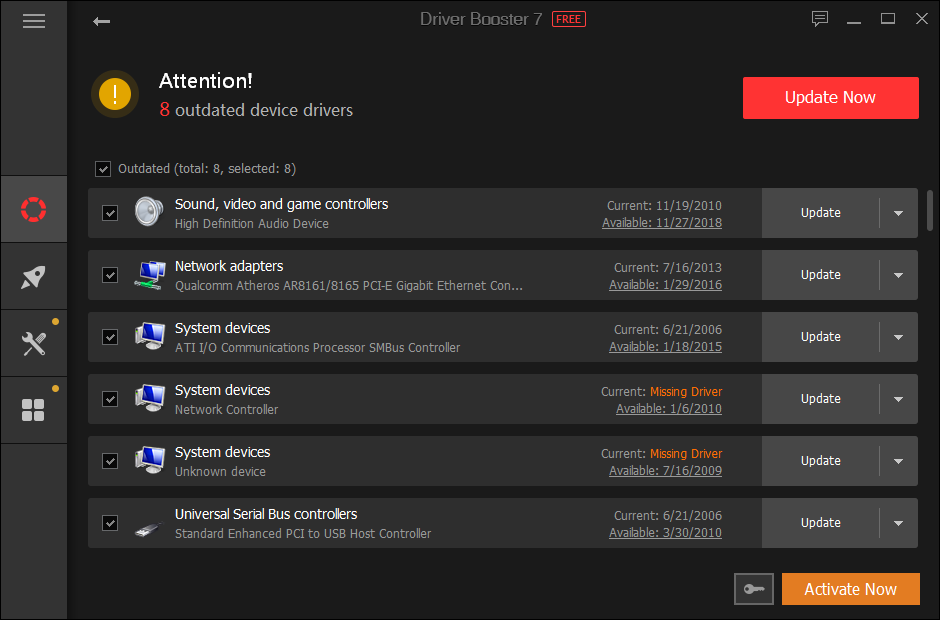
- Once installed, you will see a button that says Scan, click on it, and wait. Driver Booster will start scanning your devices, and it will detect your audio device.
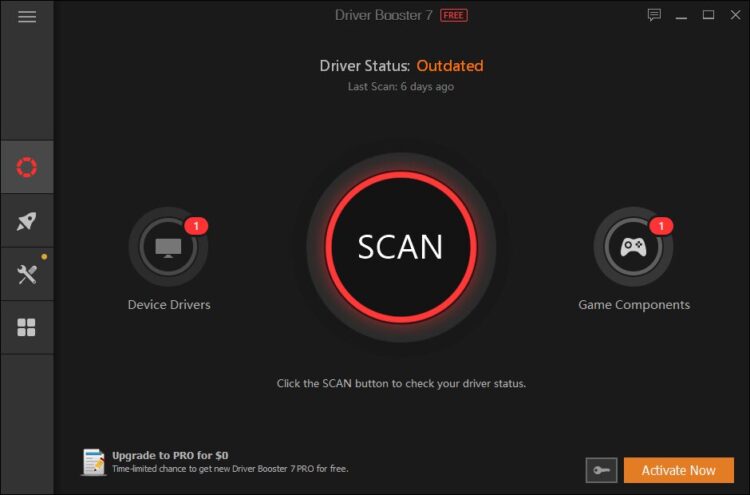
- When the programs finish, it will show you the latest available drivers for your audio device. When you are ready to install it, click on the button Update Now, next to the section Audio
- When the installation process finishes, restart your computer to apply the update
- Hopefully, after the restart process, you high CPU usage issue with this process will be fixed successfully, and you can continue playing or working without problems on your Windows PC
Wrapping Up
Audio Enhancements and sound effects are some of the Windows features that usually doesn’t give problems to the user, but in some cases, like this one, you will need to make some changes to be able to recover the optimal performance of your computer.
Thanks to those solutions, you can fix the high CPU usage from this process quickly.
Here, I will leave some other CPU usage related issues that may help you in this case: