You want to talk with your friends using your Razer Kraken headset, but the mic is not working? Well, that could be happening for several reasons, and here you will see some fixed that help you with this issue.
Razer Kraken is one of the most popular gaming headsets because it was designed for competition. So, one of the essential parts of this hardware is the microphone, because it will let you communicate with your friends.
So, when this part is not working, you will have problems communicating smoothly with the team, and that’s why on this post, I will leave some of the best tips to fix this issue.
Troubleshoot Hardware
The first thing that you should rule out is if there is nothing wrong with the headset hardware. Try to connect your Razer Kraken on another computer and check if there the microphone is working correctly.
You can also try to connect it to other devices, all the ones that you can, and once rule out any hardware issue, continue with the next methods.
Method #1: Check your Mic Settings
If you have used several headsets on your computer or laptop before, you will have installed multiple drivers of them.
Windows do a good job setting your microphone and get it ready to use in seconds, but sometimes it gets confused about what is your default mic.
If you have recently installed your Razer Kraken on your Windows 10, you can try to set it properly following these steps:
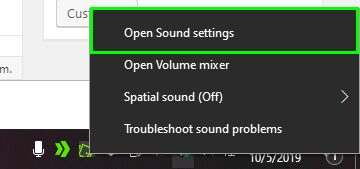
- Rightclick on the Speaker icon located in the taskbar and the menu click on Open sound settings
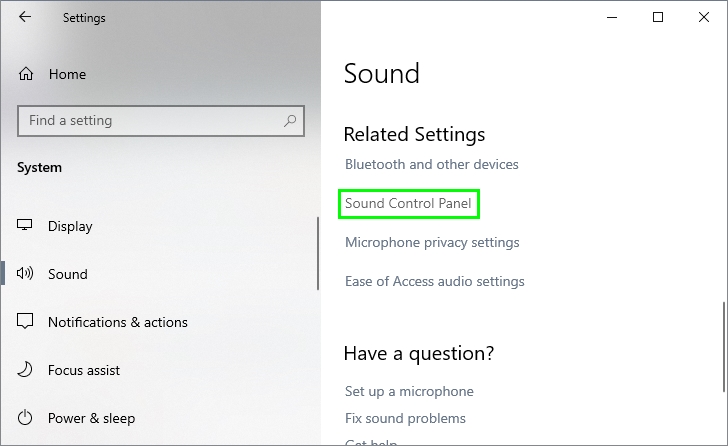
- A new window will open and there scroll down and click on the line Sound Control Panel
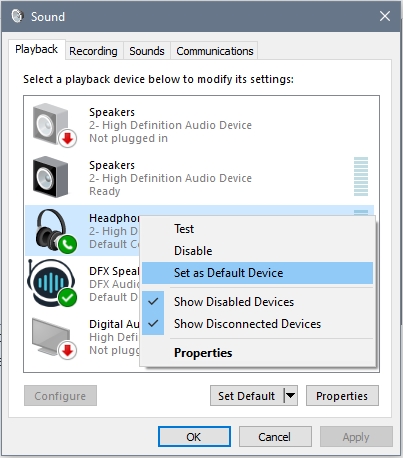
- On this other window, navigate to the tab Recording
- Once there, right-click on your Razer Kraken headset and choose the option Enable

- Once again, right-click on the headset and now select the option Set as Default
- Finally, there is one last thing you can change on your microphone settings, right-click again on the Razer Kraken headset and select Properties
- On this Properties navigate to the Levels tab and move the slider to the right
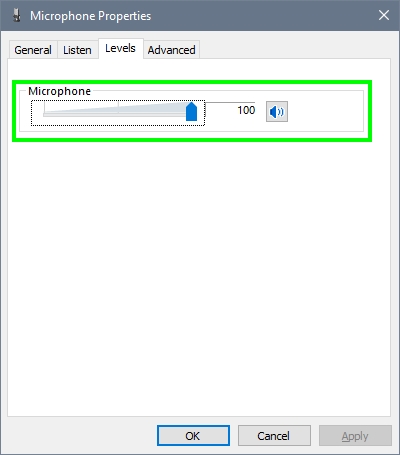
- Click on Apply and OK to save the changes
- Now, open the game or program and test the mic, hopefully, it will be working again
Method #2: Roll Back Realtek Driver
Realtek High Audio Definition is an audio standard developed to be compatible will all headphones and microphones on computers.
Sometimes this driver gets corrupted or needs some replacement, and sometimes that you can do to fix the issue is to roll back the drivers.
To do that, follow these steps:
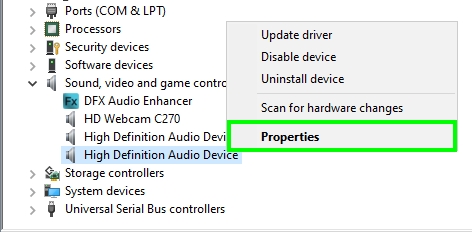
- Right-click on the Start Menu and in the menu click on Device Manager
- Once there, go to the section Sound, video and game controllers
- Now, right-click on High Definition Audio Device and select Properties
- Navigate to the Driver tab and click on the button Roll Back Driver
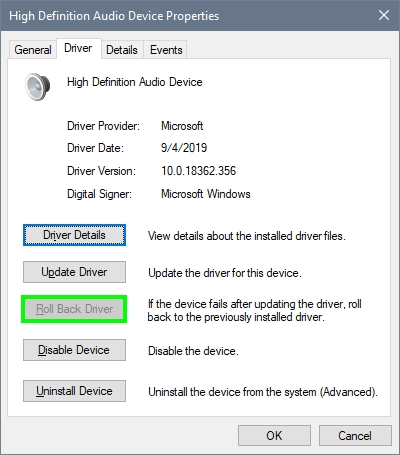
- Choose an option why you are doing this, maybe tell that your Razer Kraken mic is not working and click on YES
- Restart your computer, and hopefully, it will fix the issue
Method #3: Update Razer Kraken Driver
If you still have problems with the microphone, you can try to update the drivers of your Razer Kraken headset.
In almost all cases, you don’t need to update these drivers because, with the default installed on your computer, it will be enough. But you can try this if nothing works.
To update your Razer Kraken drivers, you have two options, the first one from the Razer Synapse:
- If you want to keep your Razer devices updated, you can download the software Razer Synapse from here.
- Save the file to your computer and then install the program as usual
- Once installed, restart your computer, and when Windows starts, the latest drivers will be installed
Another option that you can try to update your Razer Kraken drivers are using a specialized driver updater. The one I recommend to download is Driver Booster.
- Once you install Driver Booster on your computer, click on the button SCAN
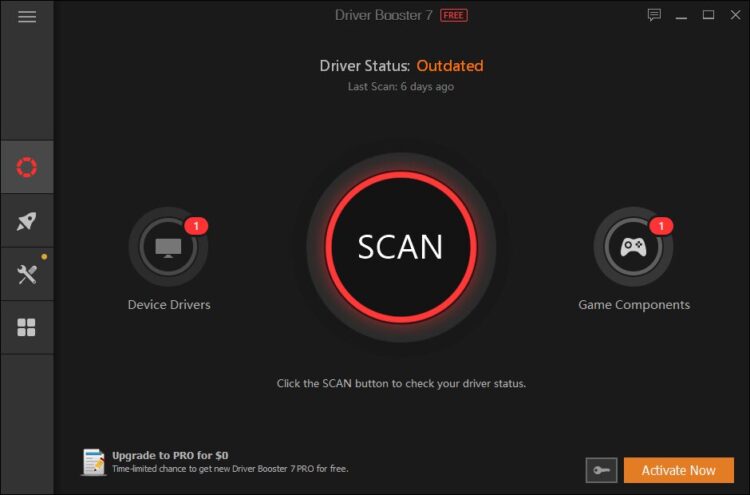
- The driver updater will start scanning your devices, and it will detect your Razer Kraken headset, make sure to connect it to the computer before that
- Then it will show you the latest drivers available for your headset and also the date
- To install it click on the button Update Now
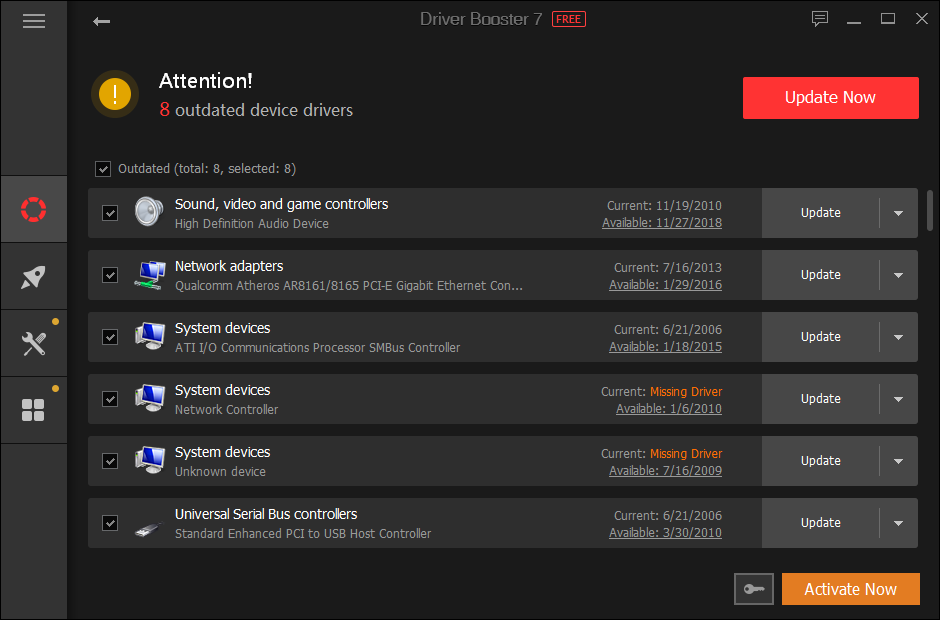
- Restart your computer to apply the changes, and then your microphone should be working without issues
Method #4: Check In-Game Settings
You need to check your in-game settings if your mic isn’t working when you try to play some videogame.
All the games have audio settings where you can set some settings, and even you can change the default microphone like in the case of CS:GO.
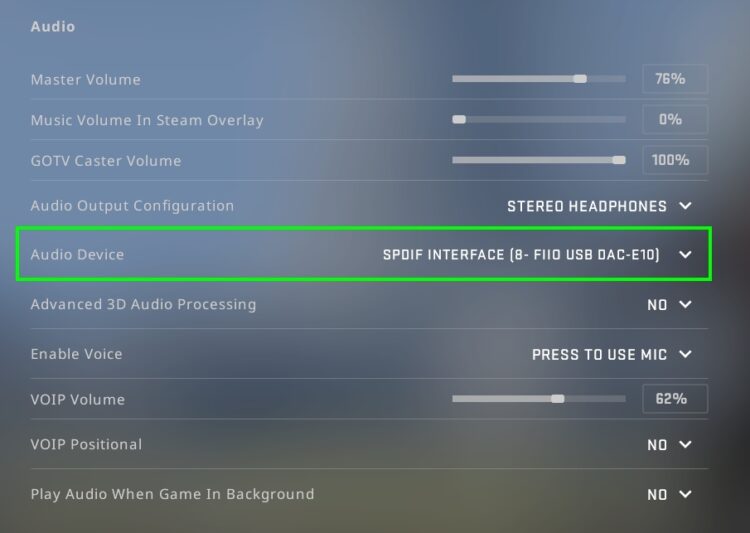
As you can see in the image above, there you need to choose under the option AUDIO DEVICE, your Razer Kraken, to use it in the game.
Method #5: Enable Access to Microphone
On Windows 10, there is a feature called Privacy that lets you choose what the apps that have access to specific devices and features of your computer are.
You need to give access to your microphone to the apps or games where you want to use your Razer Kraken headset. To do that, follow these steps:
- Open the Settings utility using the keyboard shortcut Win + I
- Click on the section Privacy
- Now, in the list of the left, click on the section Microphone
- On the right, enable the switch Allow apps to access your microphone
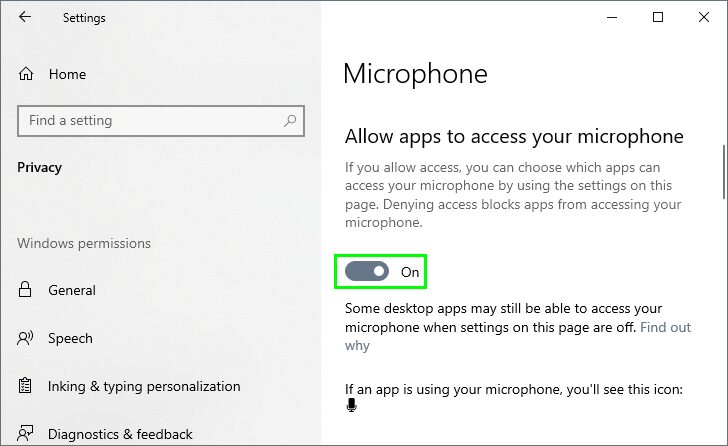
- Now, scroll down and there make sure that your app or game is enabled to use the mic
Method #5: Run Game with Admin Rights
You also can try one last quick workaround that will help you to fix this issue successfully.
If you want to use your devices like headset and microphone, the game will need some individual permission from Windows to be able to use them.
You can go to your desktop and right-click on the program or game, and in the menu, select the option Run as administrator. That should be enough to give the game the appropriate permission to use your Razer Kraken mic.
If you want to enable this permission permanently, follow these steps:
- Rightclick on the shortcut and select Properties
- Now, navigate to the Compatibility tab
- Finally, there check the box Run this program as an administrator
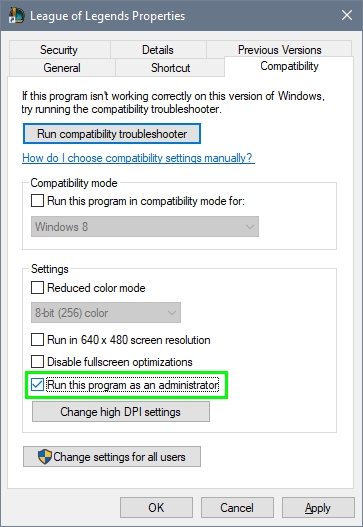
- Click on Apply to save the changes and now every time you open that application it will ask you for admin rights
I hope any of these tips help you to fix your Razer Kraken microphone and that you can continue enjoying your favorite games in a team or recording your voice for some gameplays.
Here, you have other articles about other Razer problems that could help you: