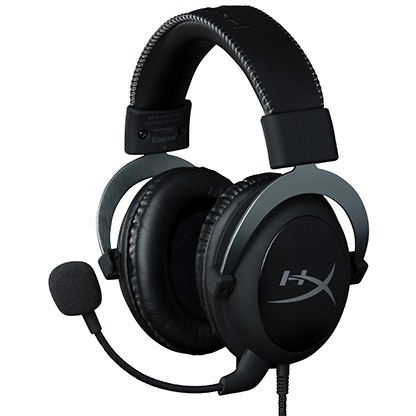
Do you want to record something, but suddenly your HyperX Cloud 2 mic is not working? In this post, I will talk about this problem and how to fix it.
Someago I bought a HyperX Cloud 2 headphone. After some time, the headphones themselves were perfect, the thing comes, with the microphone: the PC detects it correctly, but it didn’t work when I went to record audio to verify, I can’t hear anything.
After this, I went through a long process to fix my headphones mic from driver updating to modifying some special Windows features. So, if you have the same problem that I have before, here, I will leave some of the best ways that I try myself to fix your HyperX Cloud 2 microphone.
Method #1: Check Hardware Issues
Although you may think that your microphone doesn’t have any problem, you need to troubleshoot this first, to be able to continue with the next methods.
So, first, connect your headphones to another computer and try to record something in there. If you don’t know how to record on other computers, follow these steps:
- On Windows 10, you can search the Voice Recorder in the Start Menu, because it is installed by default
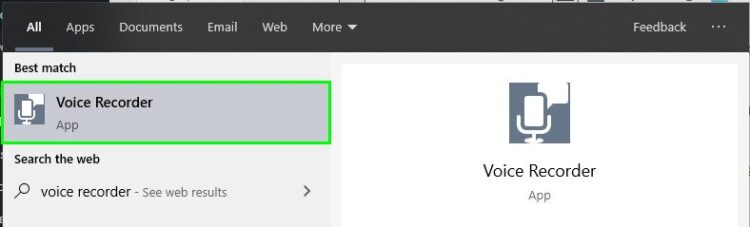
- Now, connect your headphones and click on the Record icon
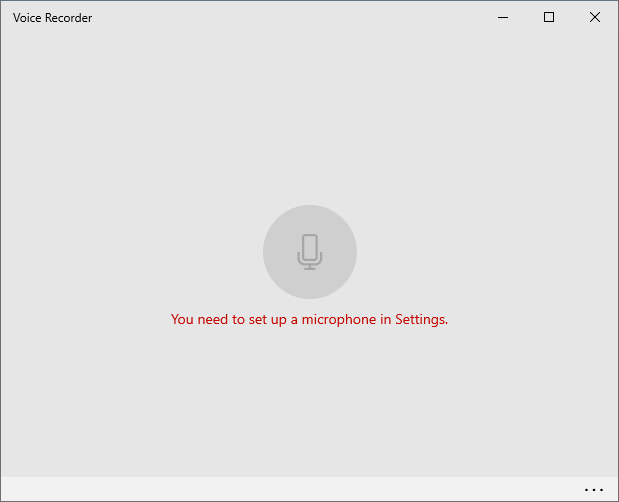
- Talk about something and then click on Stop
- If you can hear your voice on the recorded file, you can continue with the next methods
Method #2: Set HyperX Cloud 2 Microphone as Default
When you different microphones connected to your PC, Windows will choose the first one to be your default mic; the other ones will be active, but they can’t record anything.
Even if you don’t think that you have another microphone connected, you need to troubleshoot this because also the webcams have mics, and you can also have a built-in mic from your motherboard. To set your HyperX Cloud 2 Mic as default follow these steps:
- Press the Win key to open the Start menu and there search the word control
- There, on the results, click on Control Panel

- Once opened, sort the view by large icons, then scroll down and click on the section Sounds
- The Sounds window will open and there navigate to the Recording tab
- There you will see all the microphones available on your PC
- Now find and right-click your HyperX Cloud 2 mic and in the menu click on Set as default

- There you can see the voice bars, and if you talk or make a noise, those bars will be green, if you see the bars, your mic is now working properly
Method #3: Update Headphones Drivers
Another reason for your mic problems is outdated drivers because sometimes Windows updates some features, and your headphones become incompatible with that version. To update your drivers, you have two options:
Update Headphones from Windows Update
Windows Update let you download and install patches and bug fixed for your system, but you also can keep your drivers updated following these process:
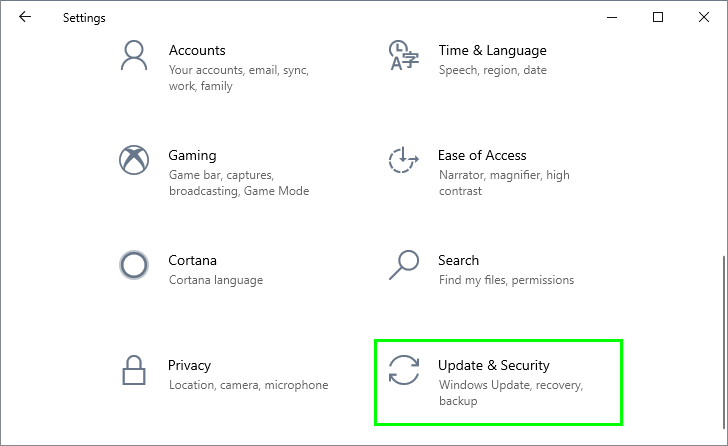
- Open the Start Menu and open the Settings
- Now, click on the section Update & Security
- Once there, on the left menu, click on Windows Update
- Finally, click on the button Check for updates that you have on the right side
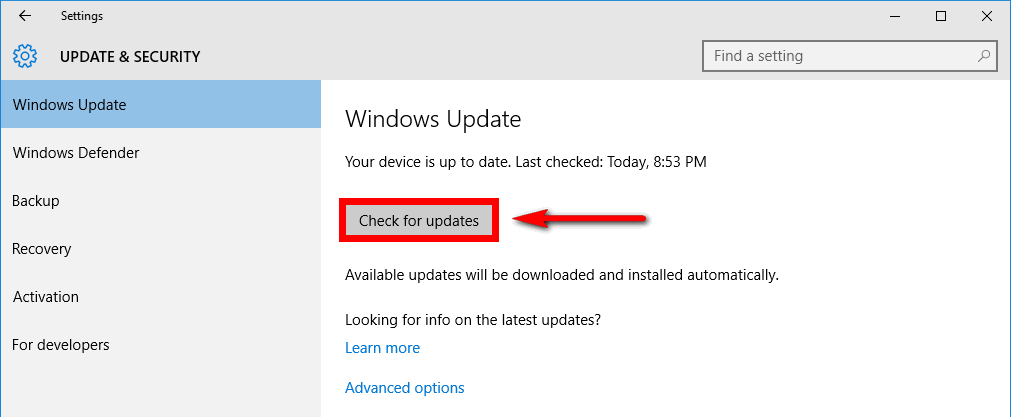
- Then, only wait for Windows to search and update all your drivers
Update Headphones from DriverBooster
Although you can use Windows Update to do this, I highly recommend downloading Driver Booster to update your drivers because it has several repositories from where it can download for your the latest compatible driver and fix the error. You can download Driver Bostter from here.
- Once downloaded, run the file to install the program
- When the installation process finishes, open the app and then click on button SCAN
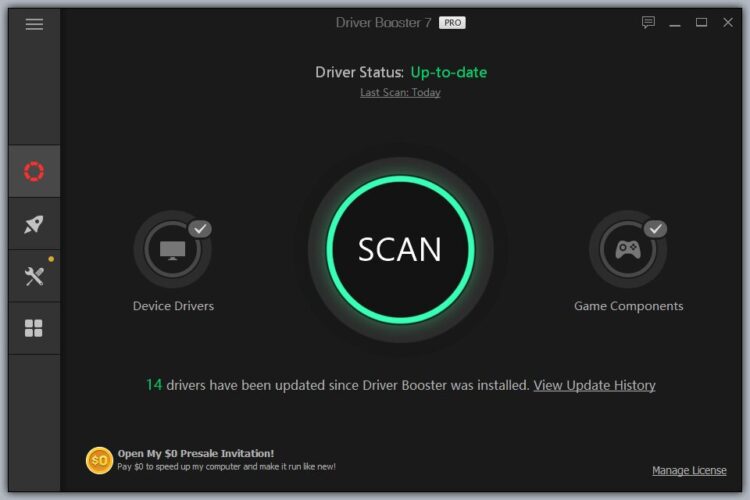
- Driver Booster will scan all your devices and then search for updates available, once it finishes you will see all the drivers that you can download, to do that click on the button Update Now
Hopefully, after you update your headphones drivers, your HyperX Cloud 2 microphone will be working again as usual.
Method #4: Run Recording Troubleshooter
If you haven’t able to fix your microphone with the methods above, but you already set the HyperX Cloud 2 headphone as default, you can try to run the troubleshooter to fix it. The troubleshooter will solve the error for you but also will give you more assistance to fix it manually.
- Open the Windows Settings using the keyboard shortcut Win + I
- Once there, navigate to the section Update & Security
- Now, you need to click on Troubleshoot located on the left side menu
- Scroll down and click on the option Recording Audio under the section Find and fix other problems
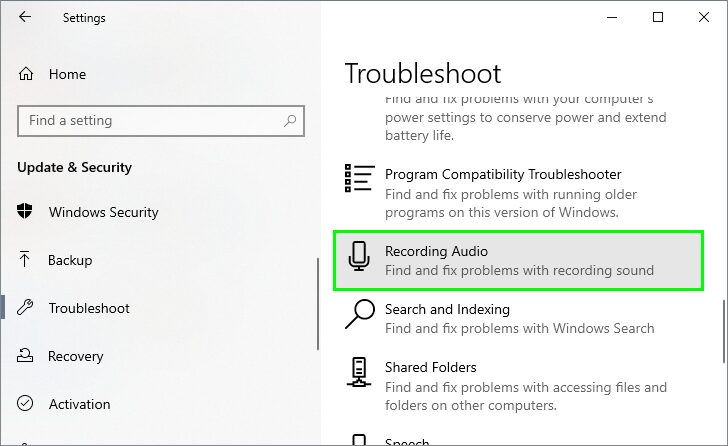
- Finally, click on the button Run the troubleshooter
- Automatically the utility will start detecting the problem, and then it will ask you what is your microphone
- Choose the HyperX Cloud 2 and then wait for the utility to fix the problem
Method #5: Change Privacy Settings
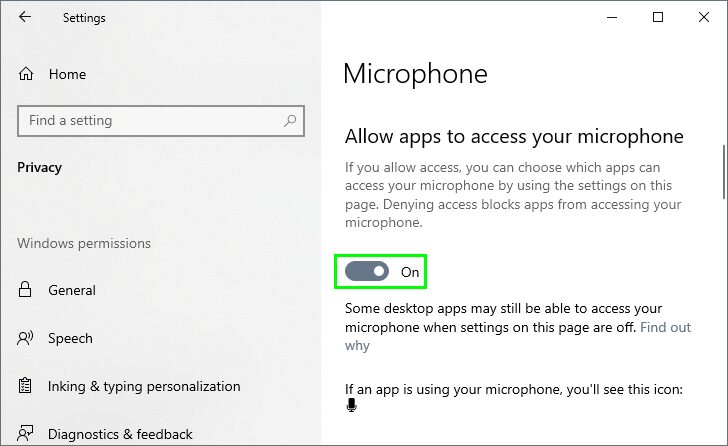
If you cant record with your microphone on Windows apps but not in your videogames, you may have disabled access to your microphone on the Privacy settings. To enable it, you can follow these steps:
- Open the Start menu and click on Settings
- Now, scroll down and click on Privacy
- There, on the left side menu, scroll down and click on Microphone
- Finally, move the switch Allow apps to access your microphone and then test your mic
Wrapping Up
So far, those were all the things that I try to fix this microphone problem. Now, you can record or talk in your favorite video games.
If you need more assistance to fix your HyperX device, you may need to contact the tech support from their website. Thanks for reading
Recommended articles: