Do you want to transfer some files over your network, but you are getting the error: The semaphore timeout period has expired (0x80070079)? In this post, I will show you how to fix it quickly.
The reasons why you see this error could be some problems in your network connection or even in your network adapter. This error seems to appear more often when you want to transfer big files over your local network but also when you want to copy files to some portable hard drive.
If you want to fix this issue, you can try one of these solutions that I will leave you below. Remember to follow each step carefully.
Solution 1: Update Network Drivers
If the problem appears when you want to transfer files over your network, you can try an easy fix that is updating the drivers.
The most common reason for the semaphore timeout period has expired error is outdated or damaged drivers.
You can update the drivers from the Device Manager, following these steps:
- On Windows 10, you can open the Device Manager from the contextual menu Win + X. You can also open that menu right-clicking on the Start Menu.
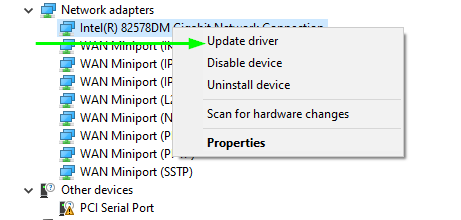
- Once there, you need to find the section where are located the network drivers, Network adapters
- Rightclick on your network adapter and chose the option Update Driver
- In the window that opens, you need to select the option Search automatically for drivers. Windows 10 will start searching for the latest drivers for your device.
Windows don’t find any driver for your network adapter. You can use specialized software that surely could find drivers. The one that I always recommend for this task is Driver Booster.
This driver updater is one of the most user-friendly and surely will find new drivers for your network adapter.
Solution 2: Change FAT32 to NTFS
If the semaphore error appears when you want to transfer some big files to your external device like your USB drive, maybe the problem is the format that usually is FAT32.
An easy way to fix this problem is changing your USB or external hard drive to the NTFS format.
- First, you need to open the File Explorer and locate the device that you need to change the format. Right-click on it and select the option Format
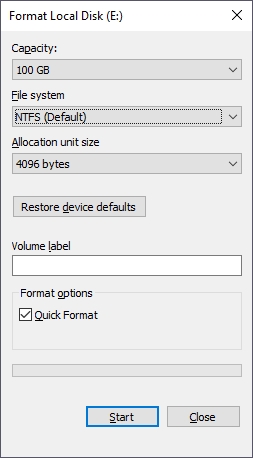
- You will open the Formatting tool, and there you need to open the drop-down menu File system and choose NTFS.
- To speed up this process check the box Quick format and click on Start
- Now, you can try to transfer your files and verify if the semaphore issue has been fixed
Solution 3: Disable Security Software
Do you continue experiencing this problem on your computer after trying the previous methods? Maybe the problem is your antivirus program that is creating conflict with your files because it detects some viruses or malware.
If you trust the files that you are transferring, you can try to disable your antivirus or firewall to fix this problem.
To disable a third-party antivirus, you can right-click on the icon located in the Taskbar and choose the option Shields Control and Disable protection for 1 hour.
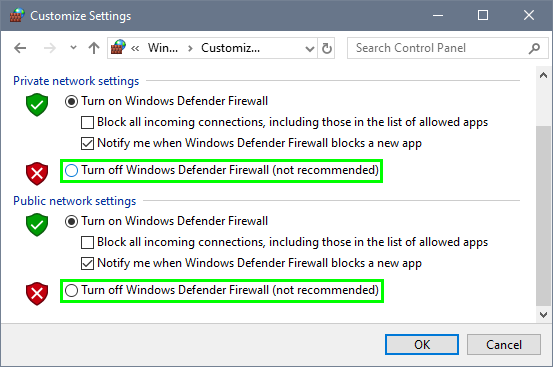
To disable your firewall, you can follow these steps:
- First, open the Control Panel from the Start menu and navigate to the section System and Security
- Now you need to click on the option Windows Firewall and in the left, click on Turn Windows Firewall on or off
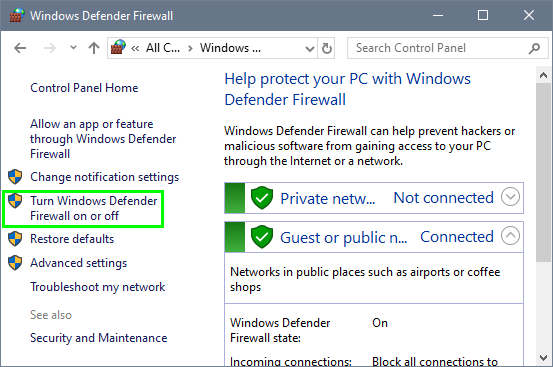
- Then check the option Turn Windows Firewall off in both public and private and click on the button OK to save the changes.
Solution 4: Clean Boot
One last option to fix this “semaphore timeout period has expired” error is to perform a clean boot.
On a clean boot, you will load only the necessary services and processes and try again to transfer your files to the other drive, and then you can continue with the usual system.
If the problem isn’t fixed with a clean boot, you need to check some hardware issues in your devices.
- Open the Run dialog pressing the keys Win + R
- There copy the command
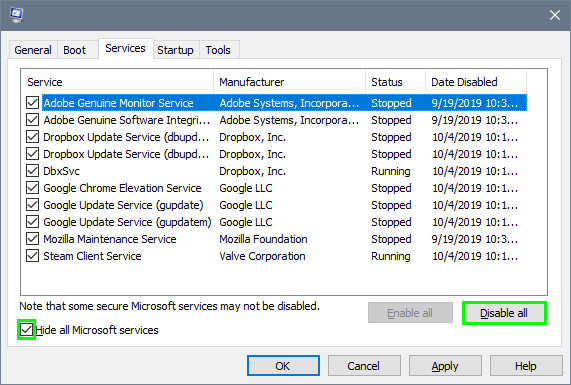
msconfigand hit Enter to open the System Configuration utility - In the window that opens, navigate to the Services tab and now check the box Hide all Microsoft services
- Now you need to disable all the services by clicking on the button Disable all
- Navigate to the Startup tab and there click on the line Open Task Manager
- In the Task Manager, you need to disable all the programs that run at startup clicking on the button Disable

- Close all the window that you have opened and restart your computer
- When your computer boots you should see only some services and programs running on your computer. Now you can try to transfer your files and check if the semaphore problem is fixed
- To go back to the previous state, you need to reopen the System Configuration utility and there enable all the Services and Programs that you have disabled
Wrapping Up
I hope that these steps and methods that I just show you help you to fix this semaphore error on your Windows 10. If you have any other questions or need more help, don’t hesitate to contact me using the comments section below.
Anyway, here you have some other articles that may help you: