Do you need to create a Windows 10 Recovery Disk or USB? In this tutorial, you will learn an easy way to do it.
Windows 10 is an operating system that has improved several things from his predecessors and now has some builtin recovery tools that you can use when you can’t access your system like always… well, in almost all cases.
There are some situations when the data of your computer have been corrupted, or there is some failure in your hard drive. When Windows 10 finds any problem to boot the system, it will show you directly the Recovery tools that you can use to fix it.
In most cases, you should be able to fix your computer with those tools, but on cases, it is required an external Windows 10 recovery disk or USB to perform some advanced troubleshooting methods.
To create that recovery disk, you will need another computer running Windows 10 already because you need to run a tool that allows you to create the disk or USB.
Another thing that you need is a Pendrive USB with at least 8GB of disk space; that something that you can find online for 5$.
As I said, you wouldn’t need to download any external tool because Windows 10 has a built-in utility that helps you to create the recovery disk automatically without needing to download anything else.
You need to follow the steps if you want to create a Windows 10 recovery or USB
Create Windows 10 Recovery USB
- First, you need to open the utility. For that, open the Start Menu pressing the key Win
- In the Start Menu, search the words “create a recovery drive”
- Now, in the results, you need to choose the one that says the same thing: Create a recovery drive

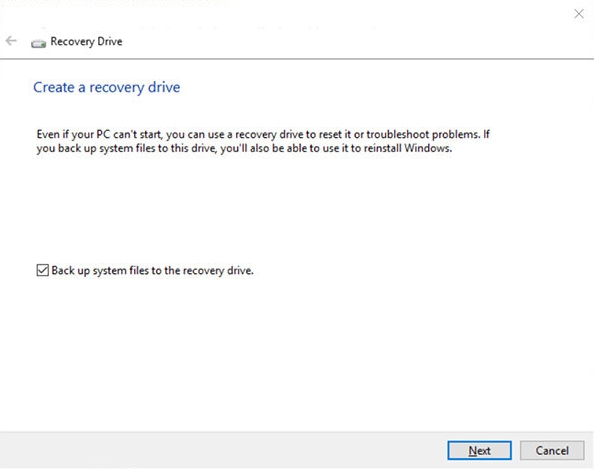
- The utility will appear, and there you can check the box Back up system files to the recovery drive. This option will import additional files to the Windows 10 Recovery Drive. Click on Next
- Now Windows 10 will start collecting all the information on the computer and checking also your available drives
- Once finished, Windows will show you all the available drives from where you can choose the create the recovery disk.
- You must have at least 8GB of available space in the USB drive that you choose and be careful because this utility will remove all the data that you have in it
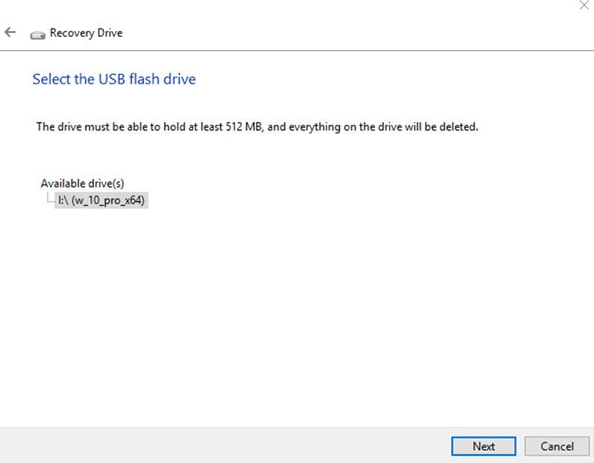
- Click on Next and wait until the utility copy all the files to the USB
- When finished, you can close the utility
- Now you can unplug the USB from the computer and use it when you want to recover your Windows system
Create Windows 10 Recovery Disk
If you don’t have a USB available, but you have some blank DVDs, you can also create the recovery disk and burn it to the disc.
- First, open the Control Panel, you can search it in the Start Menu like in the previous steps

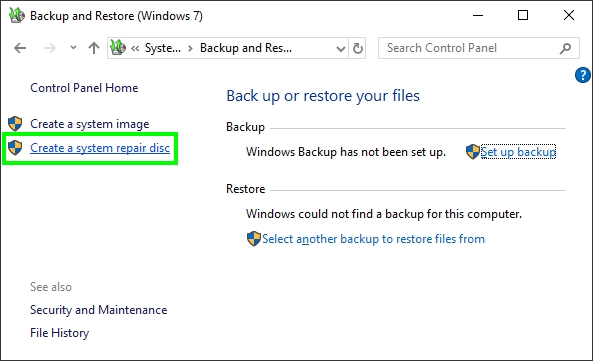
- Once there you need to navigate to the section System and Security and there click on Backup and Restore (Windows 7)
- On the left sidebar you will see some options, there click on Create a system repair disc
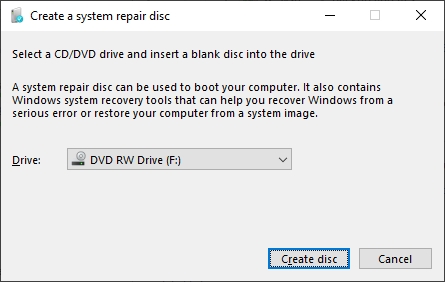
- A window will appear, and there you need to open the dropdown menu Drive. There choose the DVD that you had to insert on your computer
- To start the process, click on the button Create disc
- Wait until the utility do his job and then click on Close
- Now you can use the Windows 10 Recovery Disk on any computer with a CD/DVD reader.
Wrapping Up
I hope this quick tutorial helps you to create your recovery disk and fix any problem on your computer when you can’t find any solution.
Remember that you can ask me anything in the comments section. Thanks for visiting the blog.