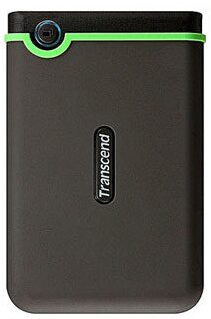
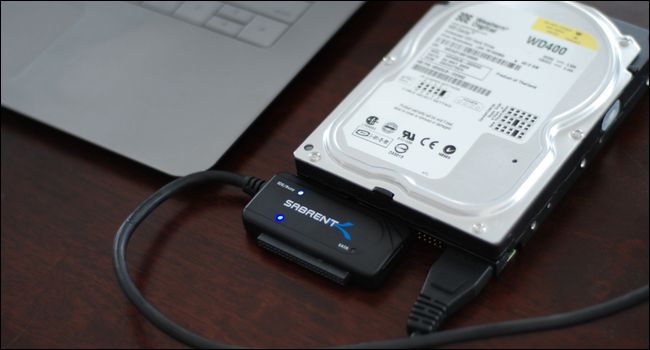
You have likely finished buying an external hard drive, but when you connected to the computer, the hard drive is not showing up in disk management.
https://en.wikipedia.org/wiki/External_storage
It may also be the case that it is a hard drive disk with some time already in use, but when connecting it to the computer or search for some file on it, the computer doesn’t want to recognize it.
Even worse sometimes the hard drive is not showing up in the disk management, making the error more complex.
It is essential to mention that this type of problem is usually a bit common in storage units such as USB sticks and hard disk drives.
Some of the main reasons why this happens can be failures in the USB port, the disk software, not assigned a letter, an unformatted disk, among many other things that may be generating this problem.
On this post, I’m going to teach you how to fix this kind of inconvenience that may arise with your storage unit, and that can leave you unable to see any of your data stored in it. For this, you must follow the steps that I will explain below.
Before: Make Sure Properly Hard Drive Connection
It is essential that before starting to perform any method to try to fix this type of problem, you need to be sure that the computer doesn’t recognize the hard disk for any reason.
In the case that you continue connecting the hard drive to the Windows 10 system and is still not showing in the disk management, it will be necessary to try the following options to be able to detect the problem of all this.
Light or Sound when Connection HDD
When connecting this storage unit, you must observe if any light from the box is turned on or if its mechanical components begin to generate some sound. So, if you turn on and rings or something, you can rule out that the problem is in the hardware or connection.
Device Manager
In this case, you have to make sure that the computer is recognizing this unit. For this, it will be necessary to open the Device Manager and check that said device is in the list.
- On Windows 10, right-click on the Start Menu and select the option Device Manager to open it.
- Once open, you can see a list of all the devices you have connected or installed on your computer. There you need to open the section Disk Drivers
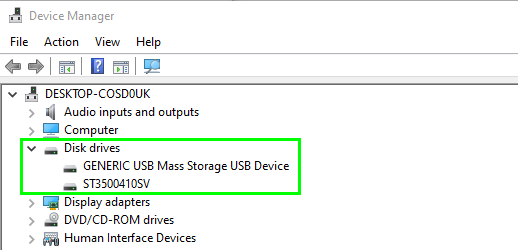
- Now the hard disk must appear in the list, keep in mind that if it appears with an exclamation point, it will be necessary to right-click on it and select the option Update Driver.
System Sound
Every time you connect a new unit in Windows 10 a sound is emitted that indicates that new hardware has been detected.
Although it is many times this sound you don’t hear it, when connecting the disc you must pay attention if it sounds or not, in case it doesn’t sound, it may be a problem in the USB port or the USB cable.
How to Fix Hard Drive Not Showing Up In Disk Management
In the case that it has been verified that the computer doesn’t recognize the hard disk, either because it does not emit any sound at the time of connecting it, the unit is not recognized by the system or the device doesn’t turn on any light, then it will be necessary to try other methods in order to solve this kind of problem.
Method #1: Test Hard Drive on Another PC
If your computer doesn’t recognize the storage unit when it is connected to one of the USB ports, whether it does not generate any sound or does not appear in the list of new devices, it may be because the port is damaged and therefore It has no operation.
Try connecting it to the other ports of the computer, and if this unit remains unrecognized in Windows 10, it is best to try to connect it to another computer.
Keep in mind that if the box doesn’t turn on any light or sound is emitted, it is most likely that the hard drive itself is the problem. If so, you will need to look for an expert, either in the same store where you purchased it.
However, if your unit is recognized and appears in the list of devices in the Device Manager, you will need to try the other method.
Method #2: Hard Drive Software
Another method that you can try to detect the problem in the computer will be to test the hard disk software. For this, it is necessary to enter the Device Manager and check if it appears with an exclamation point. ⚠
In most external disks, there is an internal software that can be installed to increase the functionality of the unit. However, in many cases these aren’t installed correctly and begin to generate a problem, thus avoiding the Windows system cant recognize you.
In this case, you will need to completely uninstall the driver and try to install it again to see if the problem is corrected.
Method #3: Hard Drive without Format
This happens when the hard drive is new. Therefore, this may come without formatting. In this case, it will be necessary to perform the following steps:
- The first thing will be to connect the hard drive to the computer.
- The next thing will be to right-click on the Start menu and select the Disk Management option.
- The Disk Management tool will show up with all your hard drives installed.
- If the hard disk is new, it will not have any format, and the following window will appear:
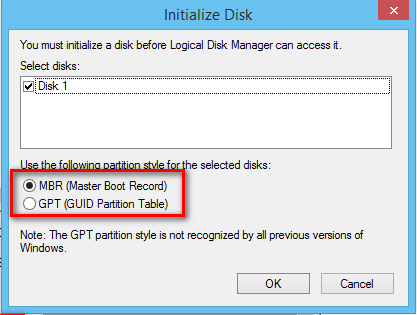
- Now you must select OK, in the main window you can see how this unit appears in black its graphic.
- Right-click on the unit and select New simple volume.
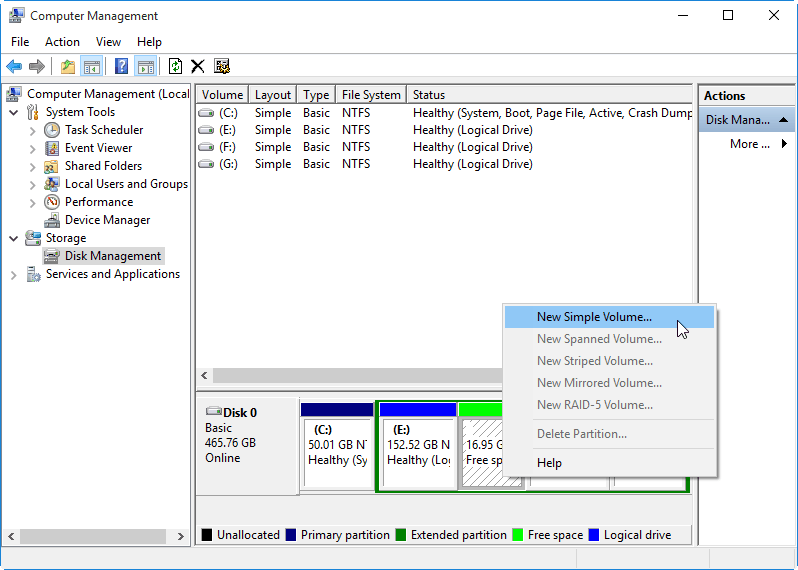
- A wizard will appear on the screen where you can format the unit.
- In one of the windows, you must assign a letter to the unit. In this case, you are free to choose that letter.
- Once this is done, the following will be to format the disk. Keep in mind that if it is a large unit, it is recommended to give it an NTFS format, but if it is a small unit such as a USB memory you can select FAT32.
- Finally, give a name to the unit and click on Next.
- Once the formatting is finished, it will have to appear in blue, and you can start using it immediately.
Method #4: Hard Drive without Letter Assigned
There is the possibility that when you get a unit in RAW format, what has happened is that it doesn’t have a letter assigned. Therefore, it will not be able to start working, thus being a reason more than enough for the computer not to recognize the storage unit.
In this case, to be able to assign a letter to the hard drive, you must follow these steps:
- The first thing will be to right-click on the portable drive in the Disk Management tool.
- Then, select Change Drive Letters and Paths.
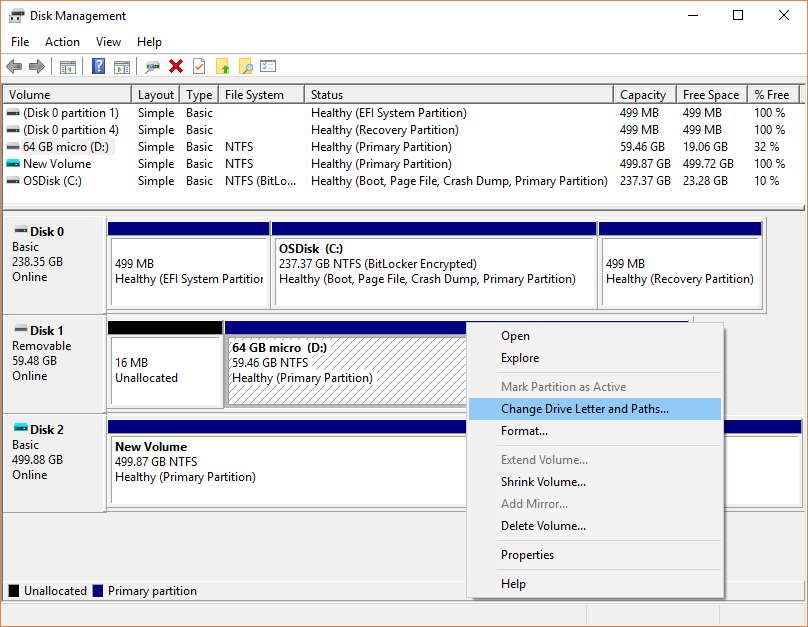
- In the next window that appears on the screen, you must select Add.
- Now you must assign the letter of preference and accept the changes made. After this, the unit will begin to appear again.
Method #5: Write Protected Disk
The last method to try to solve this type of problem when your hard drive is not showing up in Disk Management is making sure that it doesn’t have any write protection enabled.
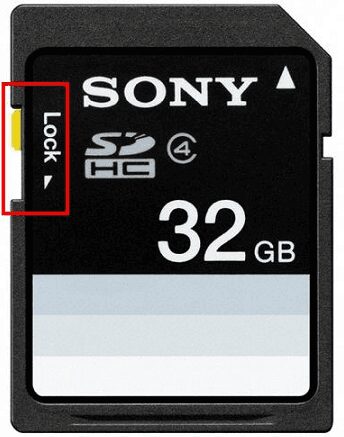
Nowadays, it is challenging to find a device that has this type of protection. However, this can be located as small movable things at one end of the hard disk.
But if the storage unit doesn’t have any of these movable things, what may be causing the error will be the following:
- This inconvenience may be due to a possible failure in the USB port of the computer. This is not always the most successful, but it should be noted that in some cases, it works. Therefore, it must be tested by connecting it to another of the USB ports.
- It may be due to a possible system error.
Wrapping Up: Hard Drive Not Showing Up in Disk Management
Although this error is annoying, and when you try all to fix, it becomes a nightmare. But on this post, I try to help you in the most simple ways.
Remember that these kinds of hardware are advanced so if you can solve it by any means, may you need to call for some assistance.
If you have any questions, leave them in the comments, I will answer you as soon as possible. Thanks for reading.

