Do you want to clear the cache of your computer? In this tutorial, I will show how you can clear the cache in Windows 10.
Today I’m going to explain how to clear cache in Windows 10. They are a type of file that Windows was storing to perform specific operations and that, over time, they end up accumulating without having individual utilities. Therefore, deleting them is always the first step to free some internal storage on your computer.
In this post, will I will leave several methods. We will start with the primary method that you can continue using Windows 10, which is to remove them through Disk Cleanup. However, afterward, I will also briefly mention other alternatives ways of proceeding, although, in essence, they do the same thing in a somewhat less complete form.
So, let’s see how to clear the cache in Windows 10.
Method #1: Clear Cache using Disk Cleanup
Windows 10 has a built-in disk cleanup tool that you can use to clear the cache.
- Click on the Windows Search
- Type disk cleanup
- Click on Disk Cleanup
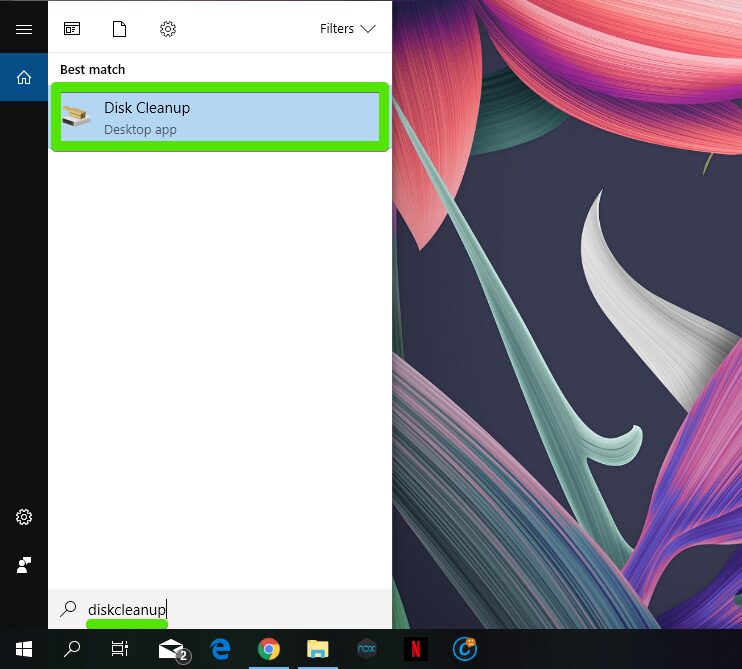
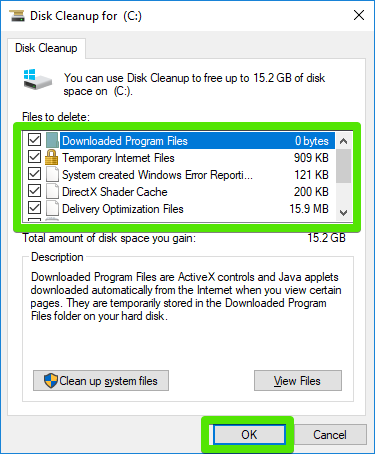
- Inside Disk Cleanup check all the boxes and click on OK to clear the Cache
Method #2: Clear Cache using Settings
You can manually remove the temporary files in Windows 10, for that follow these steps:
- Press the key combination: Win + I
- Now, click on System and in the left part, click on Storage
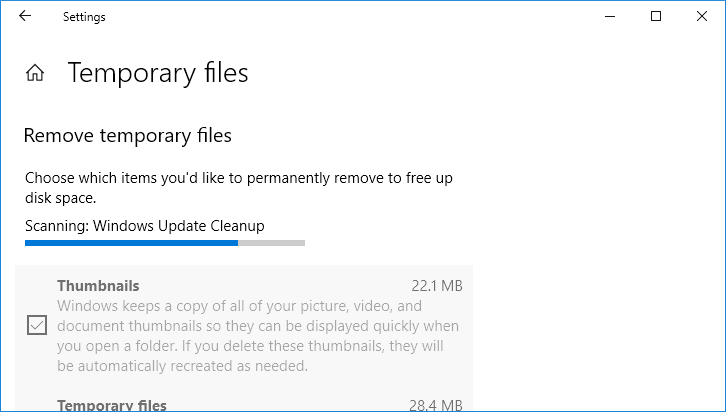
- Once there, click on Temporary Files to access all the storage used.
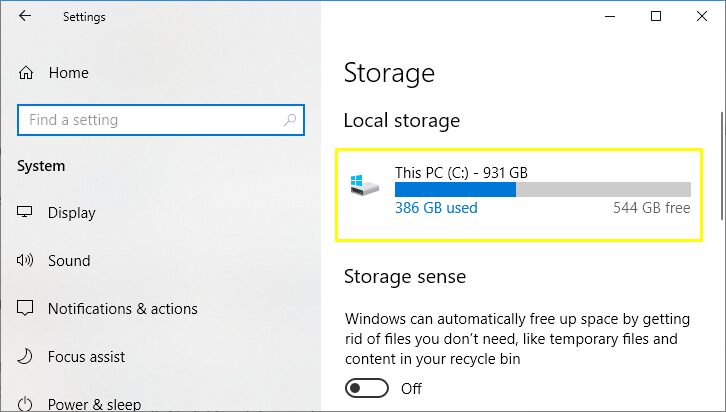
- Now, Windows 10 will start scanning all the temporary files that you have on your disk and the cache. There you need to scroll and verify that you checked all temporary files like Downloads, Recycle bin, etc.
- When you are ready to clear the cache on Windows 10, you need to click on the button Remove files
- Wait until Windows 10 makes all the temporary files on your computer and with it, the cache.
Method #3: Clear Cache using Shortcut
This small shortcut can clear the cache in your Windows 10 without a restart. This shortcut free the space available in your memory RAM, improving its performance.
You can use the shortcut anytime, so it’s an excellent tool to have on your Desktop.
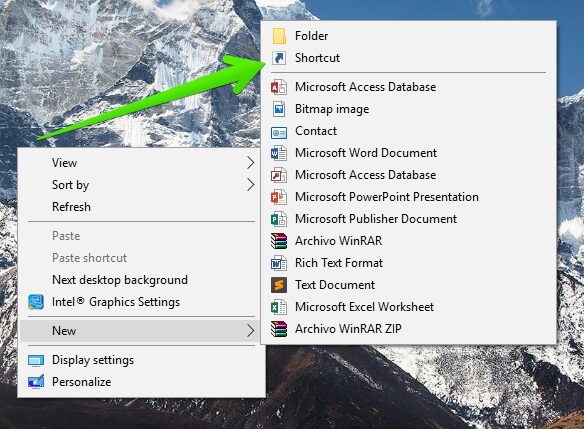
- Right-click on your Desktop and select New > Shortcut
- In the location, enter the following:
For 32 bits: %windir%\system32\rundll32.exe advapi32.dll,ProcessIdleTasks
For 64 bits: %windir%\SysWOW64\rundll32.exe advapi32.dll,ProcessIdleTasks
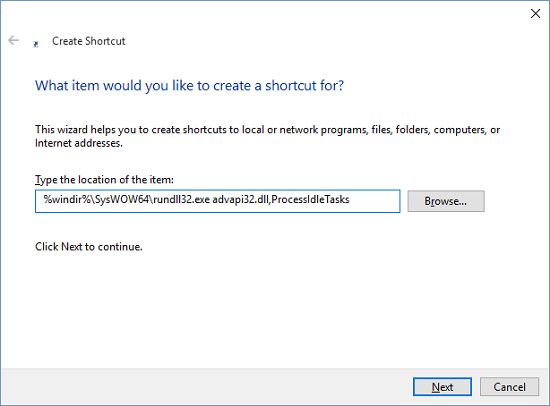
- Click on next and give a name to the shortcut
- Now click on Finish
- The shortcut will appear on your desktop; you only have to double-click on it to clear the cache

Method #4: Clear File Explorer Cache
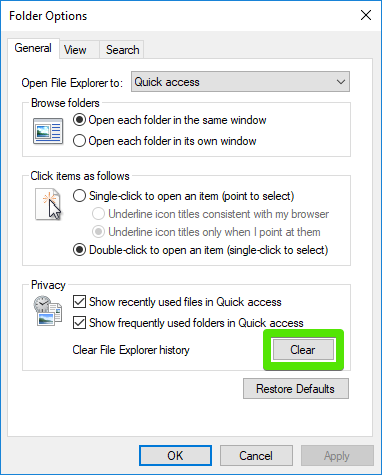
Your file explorer also caches your recent files and folders and temporary files.
In a few simple steps, you can clear the cache in the File Explorer
- First, open the File Explorer
- Now, go to the View Tab
- Click on Options and select Change folder and search options

- In the window that opens, click in Clear on Clear File Explorer history and click on OK
Method #5: Clear Windows Store Cache
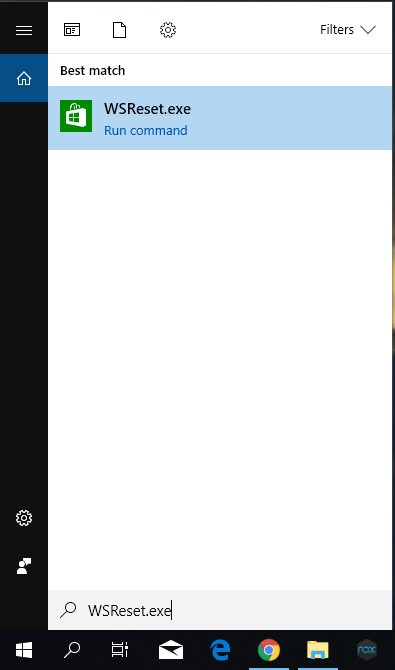
Windows Store also uses a cache that you can quickly remove using these simple steps
- Open the search box
- Type the command: WSReset.exe
- Press Enter to run the command
- That’s all to clear the Windows Store Cache
Method #6: Clear Location History
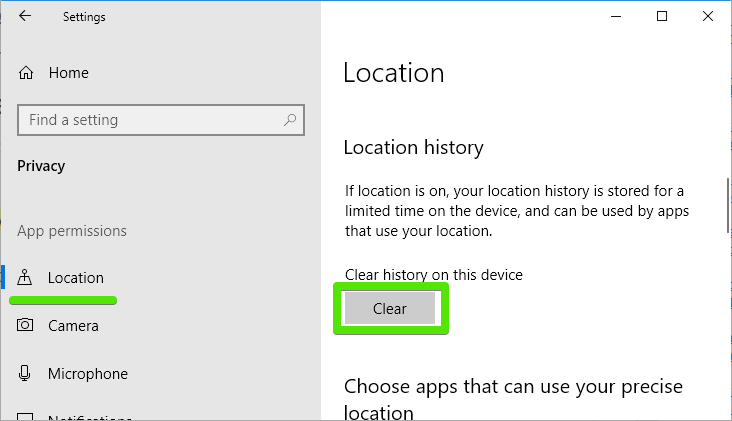
Your location (if it’s active) is also stored in a cache file. Clear the cache often to protect your privacy.
- Press the keys Winkey + I to open Settings
- Click on Privacy
- On the left click on Location
- On the right click on the Clear button under Location history
Method #7: Clear all the Cache using CCleaner
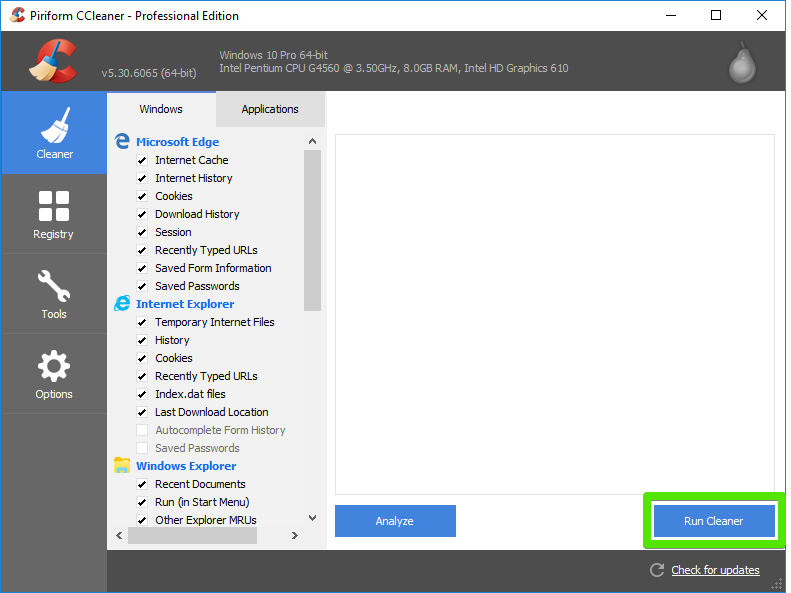
As you see, there a various to delete any cache, but thanks to CCleaner, you can clear all the cache of your computer.
- First, download CCleaner.
- Install CCleaner
- Open the program
- To clear the cache, go to the Cleaner section on the left
- On the right select what kind of cache you want to clear
- Finally, click on Run Cleaner
https://www.piriform.com/ccleaner/download
Method #8: Clear Windows Update Cache
Unless you use third-party tools to control Windows Update, the operating system usually always saves a cache with the data generated by the platform to manage everything related to these updates. This cache takes a lot of storage space. It is usually the most common cause of problems with Windows updates, so deleting the Windows Update cache is often one of the most effective ways to eliminate these problems.
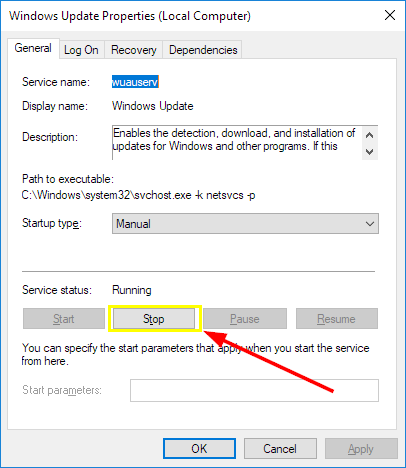
Before removing the Windows cache, the first thing you must do is stop the service since, otherwise, the cache will be blocked by Windows. For this, search in Windows 10, “services” and open it.
There move to the end to find the Windows Update service and open its configuration by double-clicking on it. You will see a new window like the following one.
In the General tab, click on the Stop button in case the service is started. If the Stop button is not active and Start appears, the service is deactivated, and you can continue with the manual.
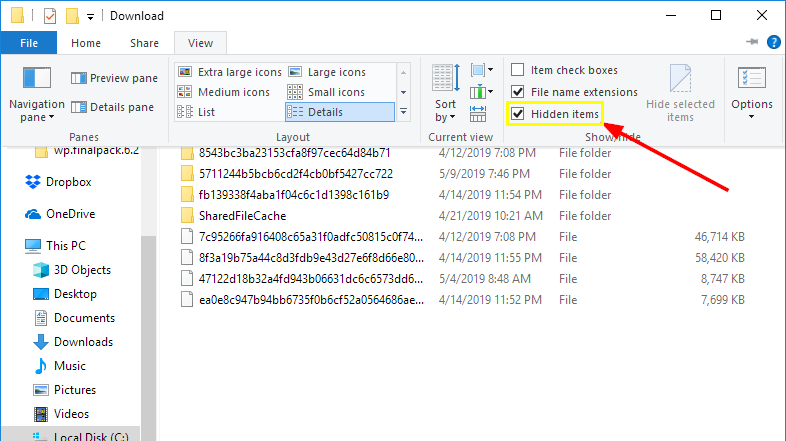
Once the service is stopped, you must move to the directory C:\Windows\SoftwareDistribution\Download, a directory where all updates of Windows Update are downloaded and where the system saves the cache of the same ones.
The files of this folder are hidden, so before you can see and delete them, you must activate the Hidden items option in the View menu of the Windows Explorer.
Now, all you have left to do is select and delete all the files that appear in the Windows folder. You will need administrator permissions for this to be a system folder, so accept them and wait for all data to be deleted from that folder.
Problems related to the Windows Update cache should have been resolved. The only thing that remains for you to do is to return to the Services window and restart the Windows Update service (otherwise, it would be disabled, and you would not receive updates) and manually search for updates.
Final Thoughts
As easy as that, you can clear the cache of your computer using any of the methods mentioned above. Have you been able to clear the cache on your Windows 10? Let me know in the comments section if I can help you with anything.

