Do you have a problem with Windows Update that keeps turning off? In this post, you can learn why this is happening and how to fix it.
Windows is the most used operating system worldwide. It is chosen by most for its versatility, compatibility with other programs and also has a very intuitive interface. And to maintain that quality, Microsoft is always developing new updates for the Windows system.
Even most of the time, the system is set up for updates to download automatically if you are connected to the Internet, thanks to the Windows Update tool. This is very favorable, since, if we keep your system up to date, you reduce the risk of our computer being attacked by malware, ransomware, or other kinds of computer viruses.
But even so, there are occasions in which when the Windows update turns off and the updates or searching for updates process stops. Yes, we know it’s annoying, many Windows users have experienced this problem. So don’t despair, here I will show you different ways on how to fix the Windows Update utility that keeps turning off.
Solution 1: Microsoft Troubleshooter
This problem is quite common, and even Microsoft has created a specific utility that lets you fix this issue on Windows Update automatically.
- You need to visit the following website
https://support.microsoft.com/en-us/help/10164/fix-windows-update-errors - There choose your operating system and finally run the troubleshooter that you save to your computer
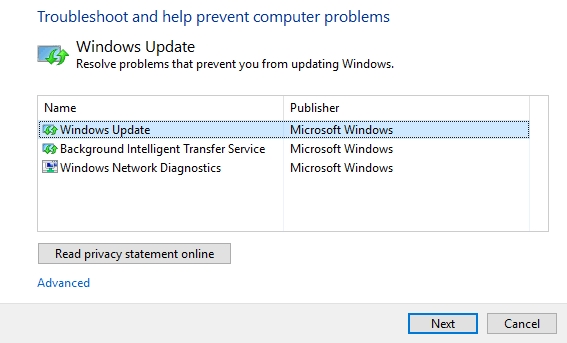
- In the Troubleshooter, you need to select the option Windows Update and click on Next
- The utility will ask you for administrator permissions to fix the problems with Windows Update
- After the troubleshooter finished the fixing process, it is advisable to restart the computer to apply the changes
- Then verify if the Windows Update is on and working without issues
Solution 2: Built-in Troubleshooter
Some users have a problem running the troubleshooter because an error appears. That could have some reasons, but if you are unable to use the utility above and you have Windows 10, you can try to use the builtin troubleshooter.
But before that, you need to clear Windows Update cache to avoid any problem during the troubleshooting process.
- First, you need to make sure that the Windows Update is stopped.
- Open the Command Prompt as administrator and there run the following commands:
net stop bits
net stop wuauserv
net stop appidsvc
net stop cryptsvc
- Now, open the File Explorer and there navigate to the following path: C:\Windows\SoftwareDistribution
- In this folder, select all the files with Ctrl + A, and remove them all with the shortcut Shift + Del
- Once you have cleared the Windows Update cache, you can try to run the Windows Update troubleshooter
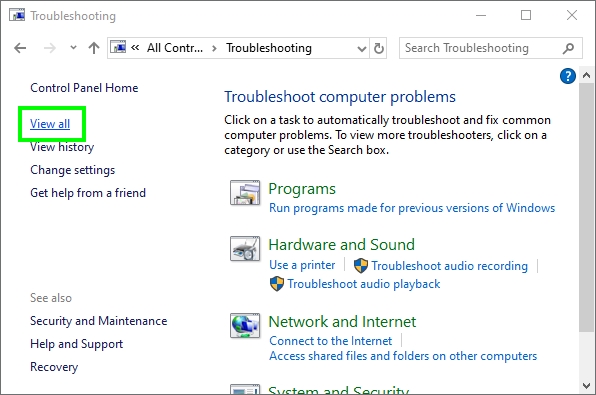
- Open the Control Panel and sort the view by icons
- Click on the section Troubleshooting. There look for the section System and Security and there click on Fix problem with Windows Update
- In the troubleshooter that opens, click on the button Advanced Options and check the box Apply repair automatically. Then click on Run as administrator and finally click on Next to start the process
- With this method, you will surely fix any problem with the Windows Update utility that keeps turning off, and you can continue updating your system without problems
Solution 3: Registry Workaround
Do you continue having problems with Windows Update that turns off? This is a quick workaround that you can try quickly form the Command Prompt.
This little tweak adds a value in the Windows Registry that forces the Windows Update to stay active, and that could fix this issue. Follow these steps to try this method:
- Open the Run dialog Win + R and there copy the command cmd
- To run the command prompt as administrator, press the keys Ctrl + Shift + Enter in the Run dialog
- Windows will ask you for the permissions, click on Yes to give administrator rights
- Once you are in the Command Prompt, copy the following command and hit Enter:
reg add "HKEY_LOCAL_MACHINE\SOFTWARE\Microsoft\Windows\CurrentVersion\WindowsUpdate\Auto Update" /v AUOptions /t REG_DWORD /d 0 /f
- You have added the Windows Update value in the Registry, and now you need to copy this another command and hit Enter:
sc config wuauserv start= auto
- This command will set the Windows Update to start automatically always on your computer. Restart your PC to apply the changes and verify that the problem has been fixed correctly.
Solution 4: Reset Windows Update
You have tried everything, and nothing works? You can try one last fix that maybe help you in this case.
Some users report on Reddit that a simple Windows Update reset to fix the problem, and you can try it as well.
You can try to perform by yourself on the Command Prompt, but I will recommend a useful Script that will automatically reset Windows Update.
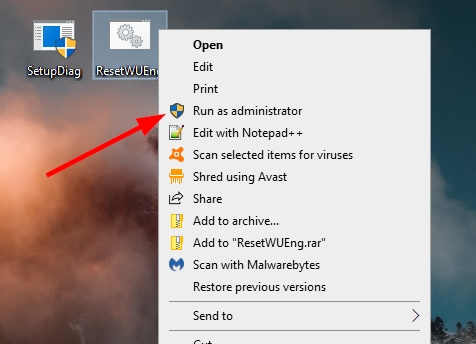
- Navigate to the following page and there download the file ResetWUEng.zip
- Unzip the file to any folder, and there you need to right-click in the file ResetWUEng. In the menu that opens, click on Run as administrator
 Now you will see a Command Prompt and performing some steps, and it will ask you something if it is necessary. Then you only need to wait for the utility to reset all the Windows Update components automatically
 - Finally, verify that the Windows Update utility doesn’t turn off again, and you can keep your computer updated without problems.
https://gallery.technet.microsoft.com/scriptcenter/Reset-Windows-Update-Agent-d824badc
Wrapping Up
I hope this troubleshooting guide helps you to fix the Windows Update utility on Windows 7, 8, or 10. If you need more help with your specific operating system, you can reach me in the comments section below.
here you have also other Windows Update articles that may help you in this case: