You want to customize your Windows 10, but you see the error: Some settings are managed by your organization? In this post, I will show you several to fix it.
Windows 10 is a dynamic operating system that provides you a secure platform where you can perform some things like making purchases online, type your passwords, and input your sensitive data.
It is normal that when you work in corporate environments, you find personalized and disabled functions. You have to think that a company must have a system administrator who controls what users can do in their computers.
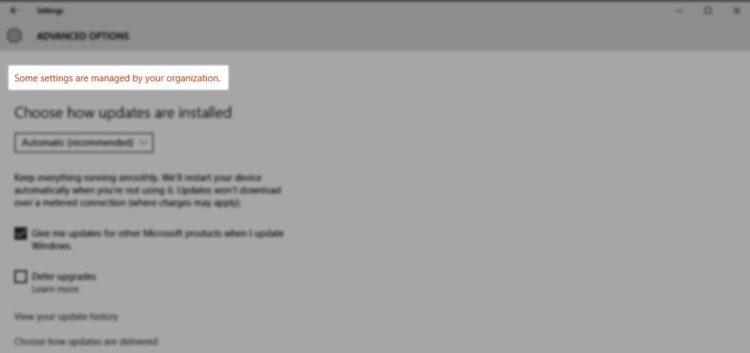
According to different reports, there is an error that bothers many users, and that is the following message “Some settings are managed by your organization.”
Although it may seem that it is a very complicated error, especially if your computer doesn’t belong to any organization, on this post, I will try to help you to fix this error quickly.
Method #1: Allow Telemetry
The first thing that you can try to fix this error is to enabling Telemetry in Windows 10. Follow these steps:
Note: This method only works on Windows 10 Pro and Enterprise editions, if you have Windows 10 Home, check the next method to install Group Policies on your system.
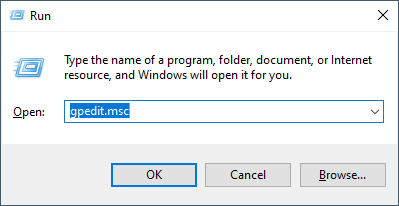
- Open the Run window using the keyboard shortcut: Win + R
- Once there, copy the following command
gpedit.mscand press Enter
- A new window will open named Local Group Policy Editor, there navigate through the following folders: Computer Configuration > Administrative Templates > Windows Components > Data Collection and Preview Builds
- There, find and double click on the line Allow Telemetry
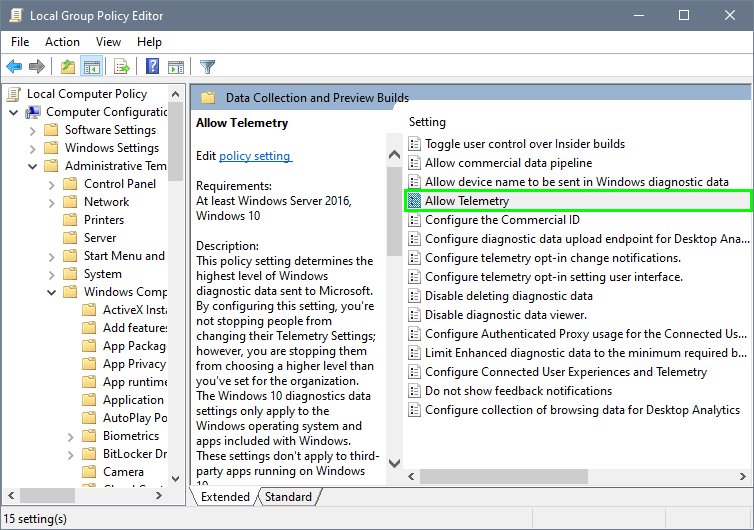
- A window will pop up, and in the left side, click on the option Enabled
- At the bottom, under the section Options, click on the dropdown menu and select 3- Full

- Finally, click on Apply and OK to save the changes.
With this method, you can remove this annoying message and configure your system without problems.
Method #2: Install Group Policies on Windows 10 Home
Group Policies are only available in the Pro and Enterprise editions of Windows 10, but you can install it manually on your Windows 10 Home following these simple steps:
- Download Group Policy Editor
- Once downloaded, install it as usual
- Now, open File Explorer and navigate to the following path:
C:\Windows\SysWOW64 - Once there copy the following folders GroupPolicy and GroupPolicyUsers and the file gpedit.msc
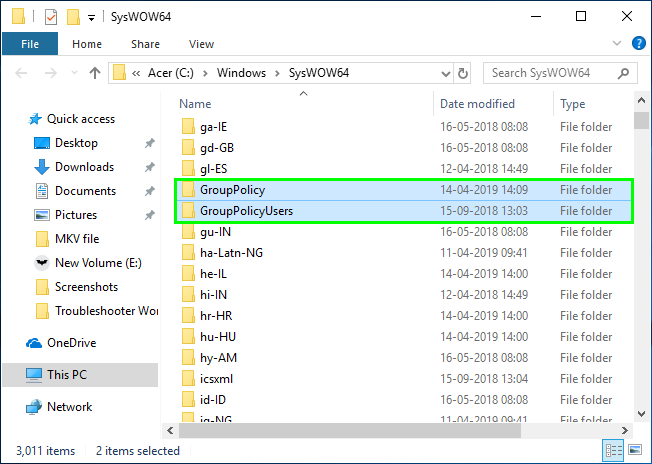
- Finally, you need to paste those folders and file and in these paths:
C:\Windows\System
C:\Windows\System32
- Now you can open the Run window and open the Group Policy Editor running the command
gpedit.msc - You can go back to the method above and try to Allow Telemetry to fix the error.
Group Policy Editor:
https://www.microsoft.com/en-us/download/details.aspx?id=21895
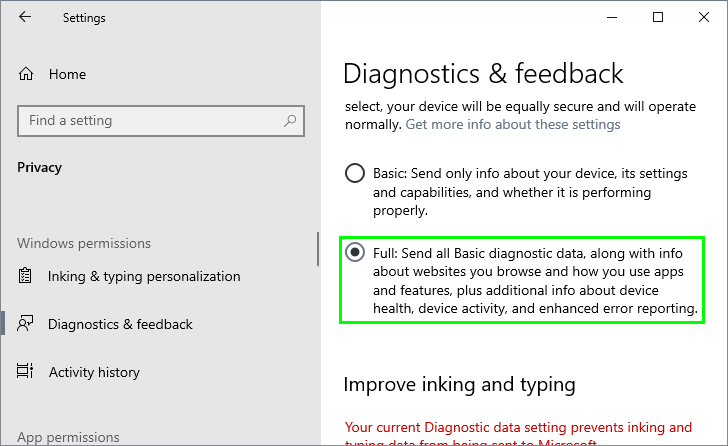
Method #3: Change Diagnostic Data Settings
On this method, you need to change the Diagnostic Data settings to remove the message: Some settings are managed by your organization.
- Open the Settings window using the keys combination: Win + I
- Once there, navigate to the section Privacy
- Now, on the left side menu, click on Diagnostics & feedback
- Finally, on the right side, verify that the setting Diagnostic Data is set to Full
This is one of the commons ways to remove this message and be able to configure Windows 10 as you like. If you cant remove the message after following those steps, you can try the last method.
Method #4: Disable Antivirus
Your Antivirus protects you from any attack and malicious software that could harm your system, but sometimes these friends have some configurations that could be the reason for this error. You can try to disable the Antivirus temporarily to troubleshot the error.
Disable Antivirus
- Rightclick on the icon of your Antivirus located in the taskbar
- In the menu, select the option Disable shield > Disable protection temporarily for 10 minutes
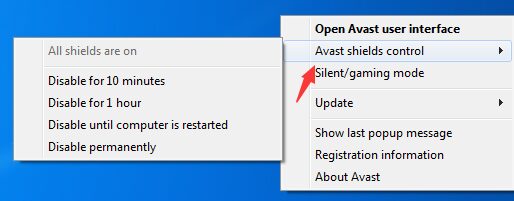
Note: These options will vary depending on your Antivirus, but you can find them easily.
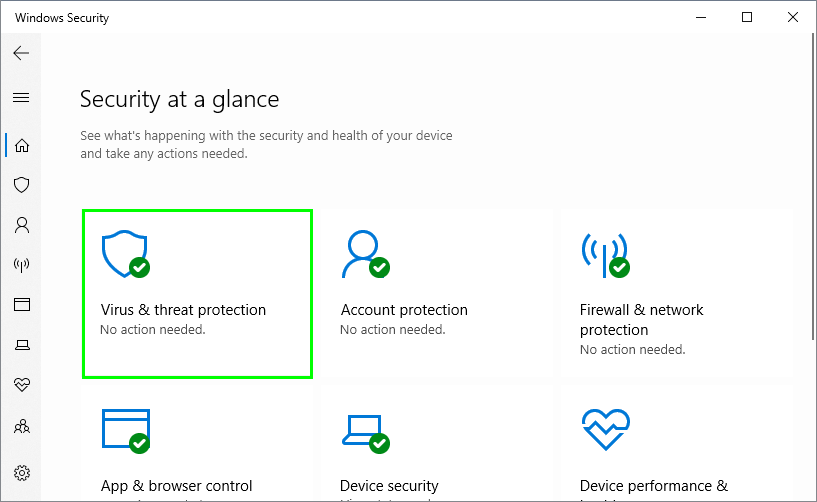
Disable Windows Security
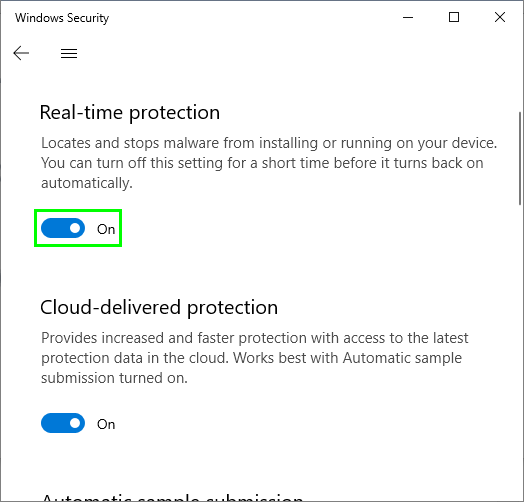
- Double click on the Windows Security icon located in the taskbar
- Once there click on the section Virus & threat protection
- Scroll down and click on the line Manage settings under the section Virus & threat protection settings
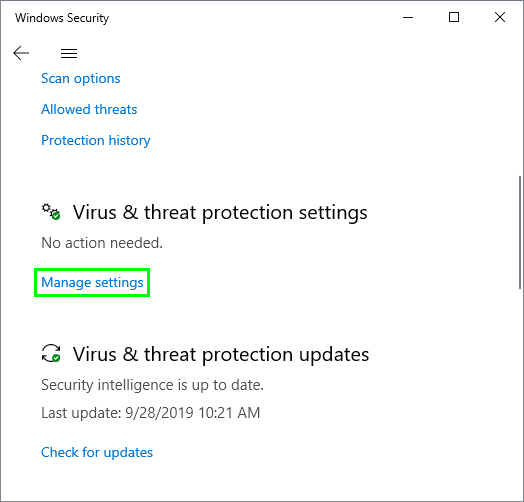
- Finally, disable the switch in the section Real-time protection
Now, you can check if the message has been removed.
Method #5: Reset Windows 10
If any of the methods above work to remove the message, you can reset Windows 10 to their default settings.
- Open the Settings tool using the keyboard shortcut: Win + I
- There, navigate to the section Update & Security
- On the left side menu, click on Recovery
- Now, on the right side, click on the Get started button under the section Reset this PC
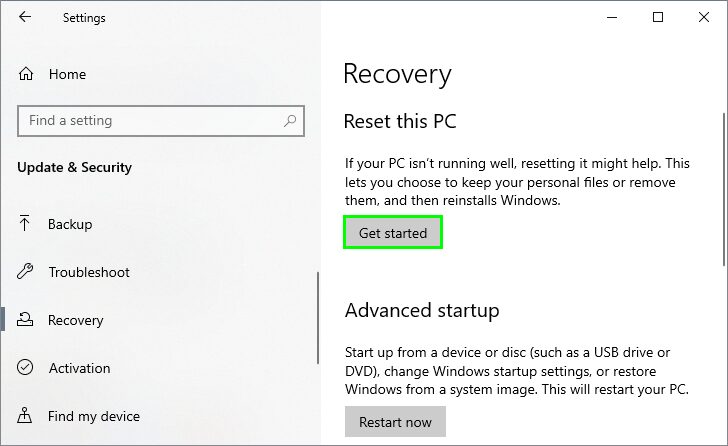
- A new window will open, where you can choose if you want to keep your files or remove everything
- You only need to follow the wizard until the end
Wrapping Up: Some settings are managed by your organization
As easy as that, you can remove this annoying message on Windows 10 and change any settings that you want.
Must read: Winload.exe is Missing error on Windows 10 [Fix]
If these options don’t help you, you should contact the computer administrator if you work in an organization. If you have any questions about this tutorial, let me know in the comment section.