Temporary files are information that applications created to store quick tasks that you usually perform or improve performance between the programs and your memory RAM.
They are also considered as a backup that you’re operating system created before modifying some files to recover their original state avoiding data loss.
Although the usual behaviors should be that the temporary files are deleted automatically when you uninstall some program, there are still some of those files that are left behind.
Web browsers also store temporary files and they create several of them, then when those files get too big, you may experience slowness or even freezing problems.
Cleaning your disk from temporary files is something that will improve the performance of your computer. Besides, sometimes these types of files contain malicious programs like viruses.
What are Temporary Files?
In summary, temporary files are files created by your programs or operating system to store some information that will be used in your current sessions. That means that when you close the program or remove some files, those temporary files will be gone.
Why Delete The Temporary Files?
Deleting these files could be useful when you want to protect your privacy when someone performs an audit in your files. Although you may delete all the programs and files, on those files you could find some information about you and your applications.
You can also improve the performance of your applications and your computer when you remove those files but in the case of web browsers, you can lose your history.
You know what are temporary files, now I’m going to show you to delete those files on Windows 10 using various methods.
Let’s get started
From Settings
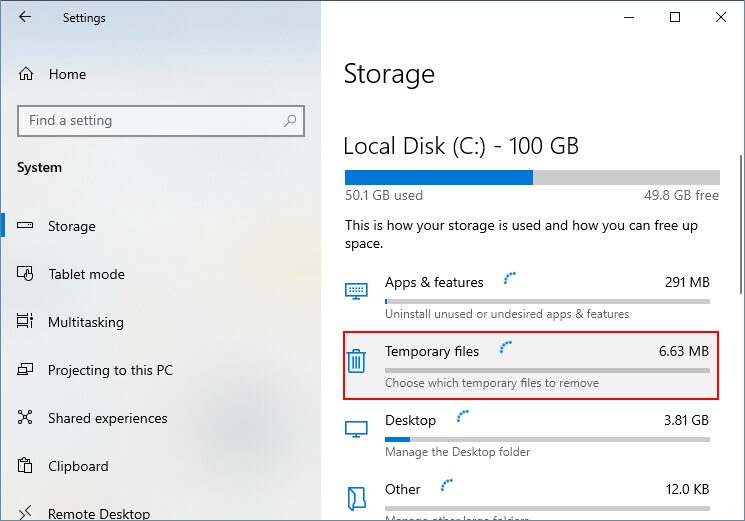
- The first thing you need to do is open the Start Menu. In this menu, you will see a left sidebar where you can find some options. Move the mouse to the Gear icon and you will see the Settings label. Click on that icon to open the Windows Settings

- In the new window that opens, you need to navigate to the section System
- On the left side, you need to click on Storage
- In the right section, you will see your disk. Below it, click on the button Temporary files
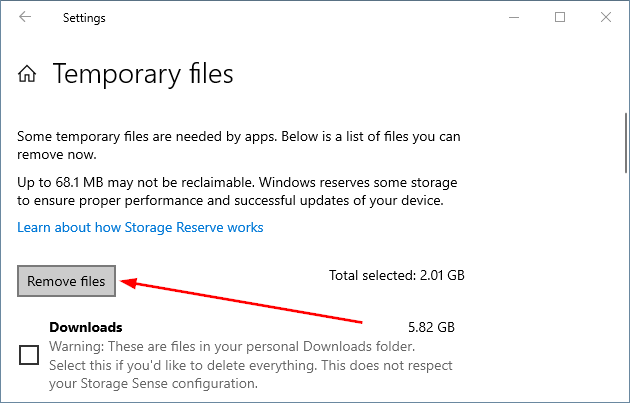
- Windows 10 will scan the temporary files and then you can choose what files you want to remove. Check as many boxes you like and then click on the button Remove files
From File Explorer
Thre is another to remove the temporary files in Windows 10 and involve using the File Explorer. To do that, follow these steps:
- First, open the Run dialog pressing the keys Win + R
- In this dialog, you need to copy the command
%temp%and hit Enter - This command will open the temporary files folder of your computer. Now you only need to select all the files inside and remove them.
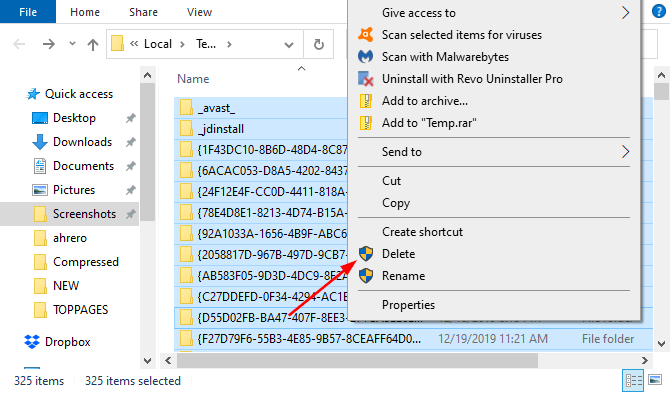
- You can use the shortcut Ctrl + A
Create a BAT file to Delete Temporary Files
You can create a BAT file that you can use every time that you want to remove the temporary files real quick.
- First, open the Notepad
- Once there, copy the following lines:
del C:\Users\%username%\AppData\Local\Temp /f /s /q
rd C:\Users\%username%\AppData\Local\Temp /s /q
del c:\Windows\Temp /f /s /q
rd c:\Windows\Temp /s /q
pause
- Now, save the file changing the extension txt with bat. Remember that you need to change the filetype to able to change the extension correctly
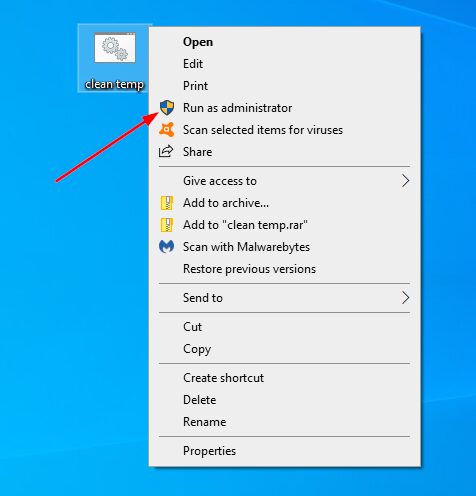
- Once done, when you want to delete the temporary files, you can right-click in the file that you have created and select the option Run as Administrator
From Command Prompt
You can also delete the temporary files running some commands in the Command Prompt on Windows 10.
- First, open the Start Menu and search the word “cmd”
- Rightclick in the results Command Prompt and select the option Run as Administrator
- Once opened, you need to copy the following command:
cleanmgr /d <driveletter> - Remember to change the <driveletter> with your drive, something like C and removing the brackets
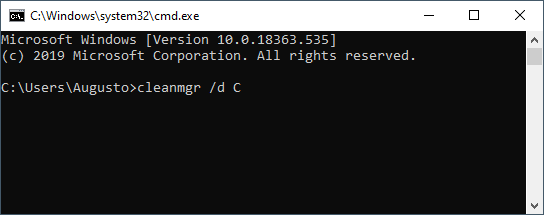
- HIt Enter to execute the command and wait until the processes finished
I hope all the methods that I just show you, help you to delete the temporary files on Windows 10. If you know another way to perform this process, let me know in the comments section below.
Thanks for visiting this blog. Good Luck!