Google Chrome is the most popular and used web browser in much of the world. The experience offered to users is undoubtedly one of the main factors that make users decide to use in Google browser and not another.
However, you may have noticed that after a while using the browser, its speed has decreased, and it is somewhat slow. So, if Google Chrome is running slow on Windows 10, on this post, I will show you some tips to fix and speed up the browser.
First of all, you must know that there can be many reasons why Chrome is slow, such as cache, browsing history, specific extensions, etc. It is even possible that after some update of Windows 10, you may also have noticed that Google Chrome is going somewhat slower.
Anyway, I will show some recommendations or tricks to speed up Google Chrome.
Update Google Chrome
Not having your browser correctly updated can be one of the main reasons for its slowness. Each new version of Google Chrome comes with important security-level fixes and performance improvements.
Therefore, it is advisable always to have your browser updated.
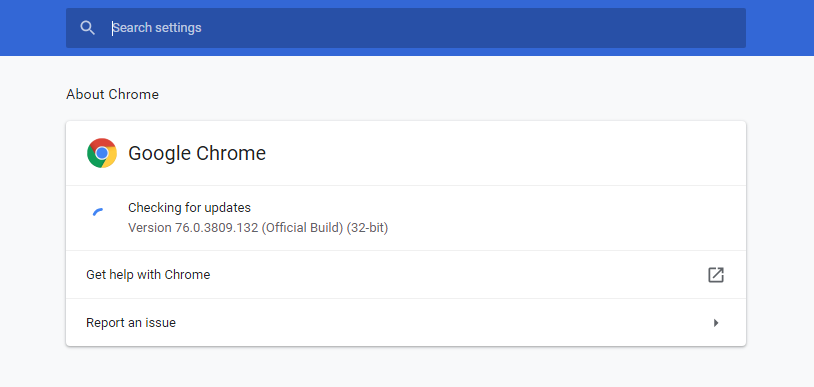
To update Chrome, all you have to do is open a browser window, type in the address bar chrome://help and press Enter.
You will automatically see how a check is made of the current version that you have installed and if there is any available to update. In that case, wait for the process to perform the update.
Clear Cache and History
Google Chrome stores cache and cookies for a faster response; however, this can sometimes affect browser performance. Deleting the cache and browsing or history data can make Google Chrome go faster.
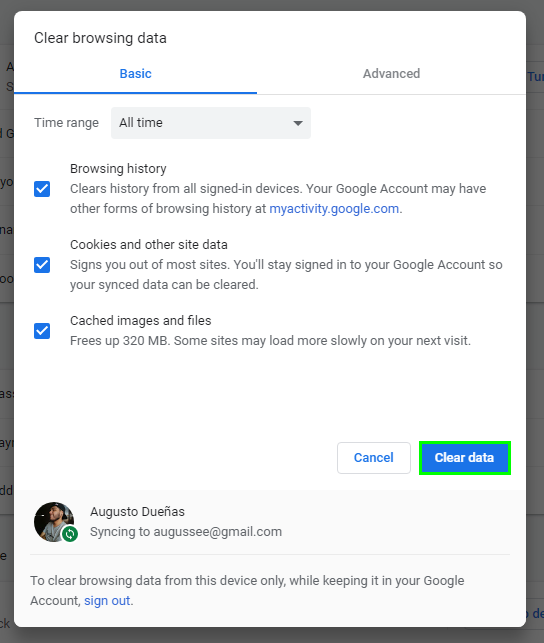
To delete this data, open a Chrome window, type in the address bar chrome://settings/clearBrowserData and press Enter.
This will automatically take you to the option to delete browsing data within the browser settings. There you have to mark everything you want to remove and click on the Delete data button.
In a few seconds, everything will be deleted, and you can see if you fix Chrome slow on Windows 10.
Uninstall Unused Extensions
Extensions are small software that we can add to our browser to provide certain functions.
However, having many extensions installed in Chrome can affect browser performance, since some extensions that run in the background need to load their Internet data package, and this affects browsing speeds and slows Chrome.
Therefore, it is advisable to uninstall all those extensions that you have installed and that you don’t frequently use to speed up Google Chrome in Windows 10.
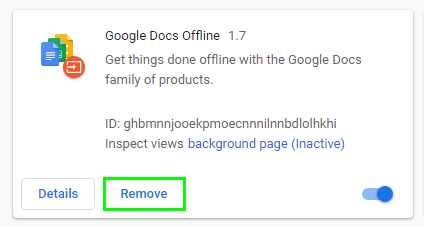
To do this, open a Chrome window, type in the address bar chrome://extensions/ press Enter and click on the Remove button for each of the extensions you want to uninstall.
Enable Google Chrome Preload Feature
Chrome uses some web and prediction services to improve the browsing experience and reduce page load times.
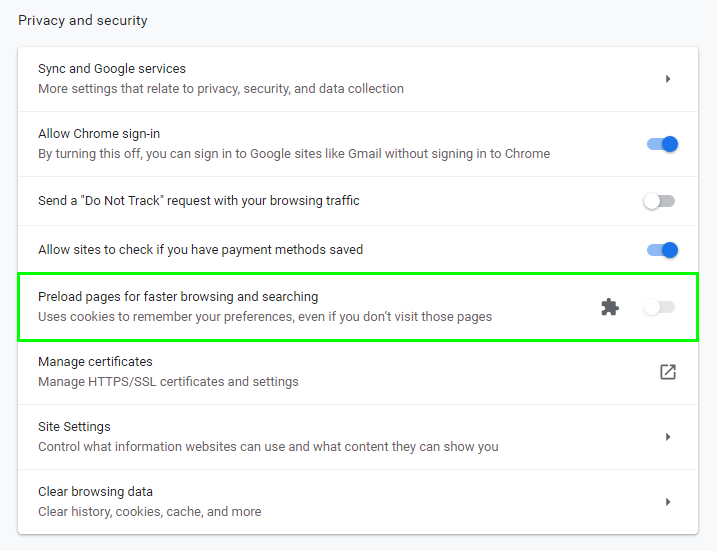
To enable preload, you have to open a browser window, type in the address bar chrome://settings/ and navigate to the bottom. There click on Advanced settings and in Privacy and Security enable the switch Preload pages for faster browsing and searching.
To save these changes to be effective, you will have to restart Google Chrome.
Use the Default Google Chrome Theme
One of the features of Google Chrome is that it allows you to customize your interface by changing themes.
However, the negative side of this is that most themes use a large amount of RAM, something that influences the speed and performance of the browser.
Chrome’s default theme is already optimized to make Google Chrome go faster, so it’s best to delete any theme you have enabled.
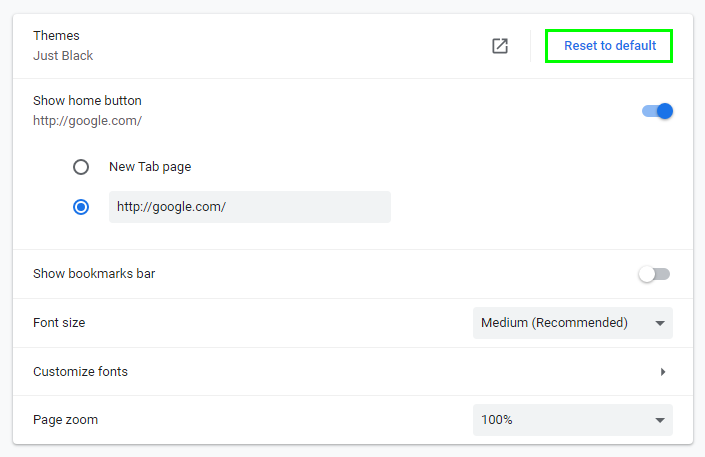
To do this, type in the address bar chrome://settings/ and in the Appearance section, you will find the Themes option.
Next, to this option, you will have the Reset to Default button, which will automatically enable the default Google Chrome theme.
Reset and Clean Up Chrome
The browser itself has a tool capable of searching for all those programs that may be affecting Chrome’s performance.
Google Chrome Cleanup tool is responsible for performing a full scan and removing any malicious software that may cause browser problems.
To run the Google Chrome clean up, open a window and navigate to Settings > Advanced settings > Reset and Clean up.
There you will find the Clean up computer option, click on it, and a new page will appear, click on the Find button. This will automatically launch the cleaner tool and will remove any software that may be affecting Chrome’s performance.
Restore Chrome to Default Settings
Another option to fix Chrome slow on Windows 10 if you nothing of the above tips works for you, is to return to Chrome’s default settings. In this way, reset the browser settings to leave it just as you have it after installing it.
To do this, open a browser window and from the menu and navigate to Settings > Advanced settings > Reset and Clean Up.
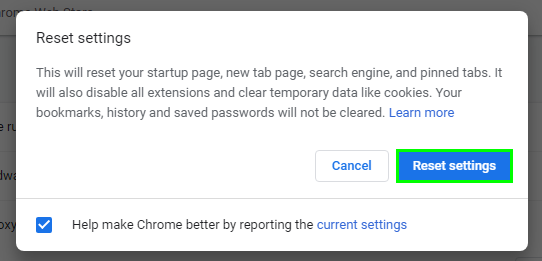
There click on the option Restore settings to their original defaults, and it will automatically show us a pop-up window indicating that you will proceed to reset your browser settings
This implies that the homepage, new tab, search engine and fixed tabs are reset if you have them. All extensions will also be disabled and temporary data such as cookies will be deleted.
The only thing that will not be removed will be the history, saved passwords and bookmarks.
And that’s all, I hope this tutorial helps you to speed up Google Chrome easily on Windows 10.

