Do you want to change the name of your printer? On this post, I will show you several ways to rename your printer on Windows 10.
One of the most fundamental things you do as a user is to customize every aspect of the operating system, such as themes, audio, etc.
One of the everyday tasks and that are frequently required by users is to rename their printers so that they be located quickly in case they are shared or are in a network resource.
https://en.wikipedia.org/wiki/Printer_(computing)
On this tutorial, I will show you how to rename any printer in Windows 10 easily.
The printer is one of the standard components that you currently have in your homes or offices, and you can see how today they fulfill more than just printing since these can scan, take photocopies and even send a fax.
A customization task that you can execute is to modify its name to recognize it in a better way or only to change the default factory name.
So, let’s see the best ways to change your printer name on Windows 10.
1. Find Your Installed Printers
To access the printers that you have available in Windows 10, follow these simple steps:
- Open the Run window using the keyboard shortcut: Win + R
- On the box type the word control and press Enter
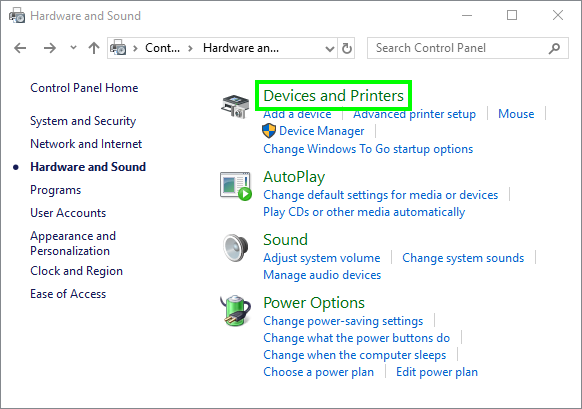
- Once in the Control Panel, navigate to Hardware and Sound and then to Devices and Printers
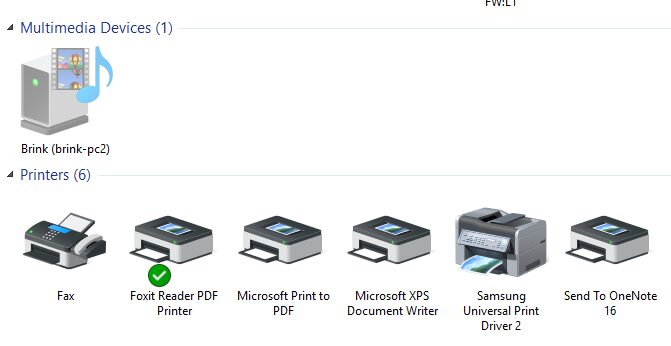
- As you see in the Printers section, you have the ones that are currently available, some of them predetermined with the operating system.
2. Rename Printer using Properties Tab
Once you find all your printers with the steps above, follow these steps:
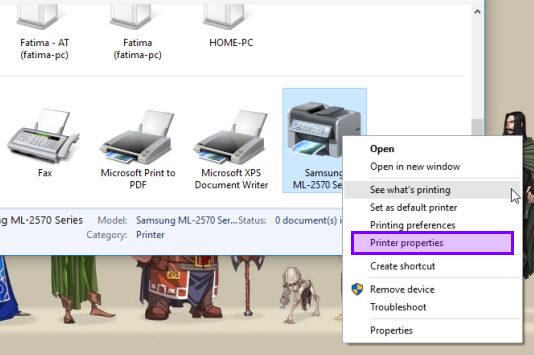
- Rightclick on the printer you want to rename and in the menu select Printer Properties
- On the window that opens, at the bottom click on the button Change properties
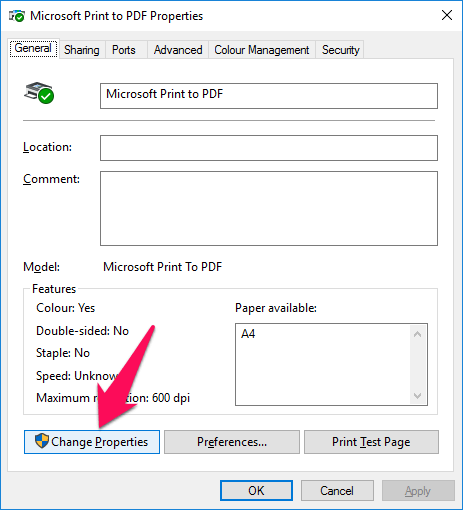
- Now you can change the name of the printer
- Once you rename it, click on the button Apply and then on OK.
3. Rename Printer using Windows PowerShell
The PowerShell is the new management tool of Windows 10; from there you can manage all the system properties, even the printer. You can also use the Powershell to rename your printer on Windows 10.
To do this, follow these steps:
- Open the Windows search using the keyboard shortcut: Win + S
- On the box type the word: PowerShell
- Rightclick on the first results and in the menu select Run as Administrator

- Once in the PowerShell copy and run the command:
Rename-Printer –Name "Old Name" –NewName "New Name"

4. Rename Printer through Settings
Since Windows 10, there is another tool to manage the configuration of your system, and from there you can also rename your printer on Windows 10.
To do this onWindows 10, follow these simple steps:
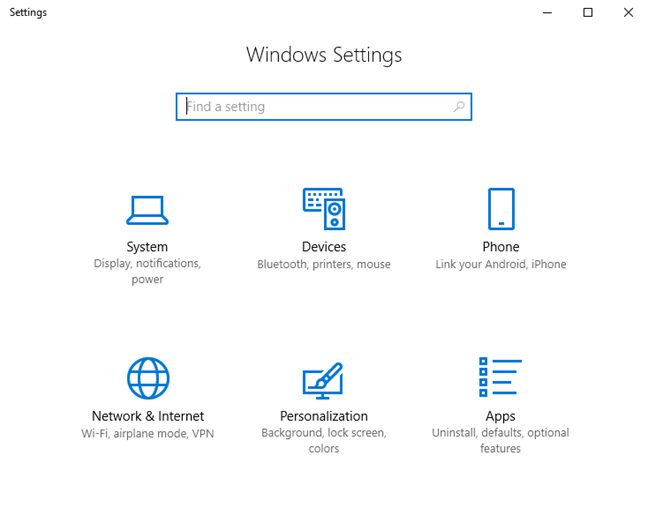
- Open the Window Settings using the keyboard shortcut: Win + I
- Navigate to the section Devices
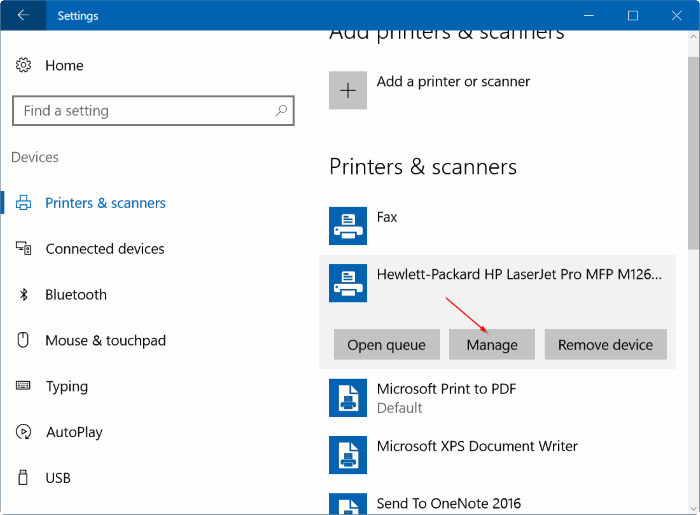
- On the left side menu, click on Printers & scanners
- Click on the printer you want to rename and then click on the button Manage
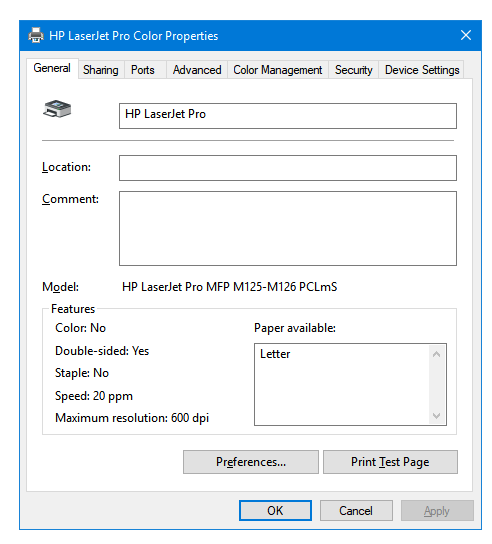
- Now, click on the line Printer properties

- Then click on the button Change Properties and then change the name and click on the Apply and OK buttons.
Wrapping Up: Rename Printer on Windows 10
As you can see it is a simple and efficient process to modify the names of your printers in Windows 10. Now you can recognize your printer easily when you have multiple printers or share your printer.
Must read: How to Fix Printer Driver is Unavailable on Windows 10
Do you know another to do this process, let me know in the comments section below. Thanks for reading.
