Your Steam client is running slow after some time using the platform? In this post, I will show you some of the best tips and solutions to improve the Steam performance on Windows 10.
Steam is undoubtedly a revolutionary platform in the world of videogames, with a base of millions of users that don’t stop growing, and an utterly optimized system for gamers to access the titles they want quickly and easily.
Although, as many of us already know, Valve works on its operating system: Steam OS and more and more games are coming to Steam for Linux. The vast majority of users continue to use the Steam client on Windows mainly, and that will not change at least in the immediate future.
How to Fix Steam Client Running Slow
Although Steam is a very well developed platform, it is not perfect. Since the variety of computers and components that can be purchased is vast, not all users have the same experience, and some suffer a little more than others. Optimizing our PC games usually requires more work than merely inserting a disk into a console. To fix the Steam running slow problem, you have some things that can do, and here I will leave some of the best methods and tips for this task.
Solution 1: Close Background Programs
This should be the first step if you are noticing some slowness in the Steam client. On Windows 10, you will have some background programs that will keep running even you close their Windows.
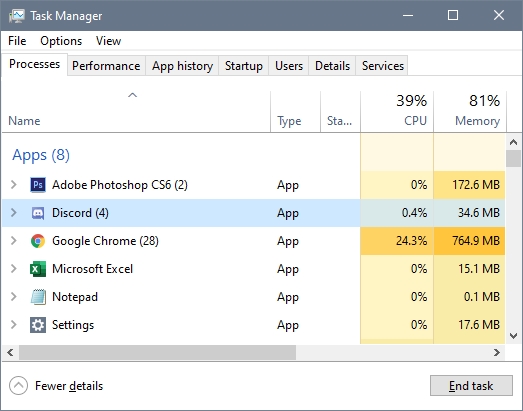
Some examples of those programs are Skype or Discord. Therefore, you will need to close those background processes from the task manager following these steps:
- First, you need to open the Task Manager, to do that, you only need press the following keys at the same time Ctrl + Shift + Esc
- Now, in the window that opens, click on the button More details
- In this task manager, you will see all the programs running in the background. Select the ones you want to close and click on the button End Task
- Finally, you can verify if the Steam client is working without problems
Solution 2: Improve Steam Browser Speed
All of us who have used Steam know that the integrated browser you have is extremely slow and more if you open it with browsers such as Firefox or Chrome. It feels like it creeps up most of the time.
The problem seems to be caused in part by an incompatibility with the Windows Proxy detection options.
To fix this issue, you can try to follow these easy steps:
- Press the keys Win + R and type the command
control. Press Enter to open the Control Panel - Navigate to the Network & Internet section and there click on Internet Options
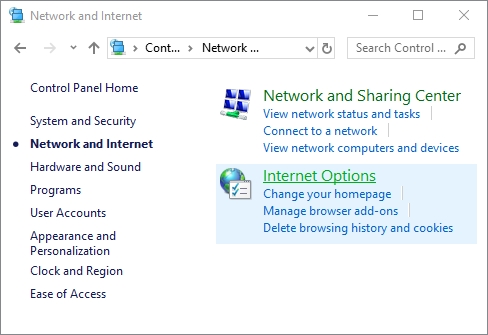
- Now you need to navigate to the Connections tab and there click on the button LAN Settings
- Finally there, uncheck the box Automatically detect settings
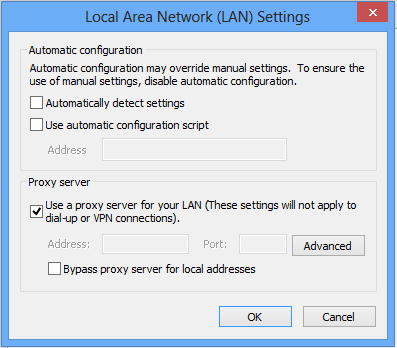
- Click on OK to save the changes
Solution 3: Improve Steam Download Speed
Each time you download a game, Steam automatically detects the server closest to your location. In case you are experiencing very slow downloads, which can sometimes happen when there is a lot of traffic, as in the case of highly anticipated new games, or especially when Steam launches its great and great offers.
From the program options, you can manually change the server following these steps:
- Open the Steam client and open the menu, there click on the option Settings
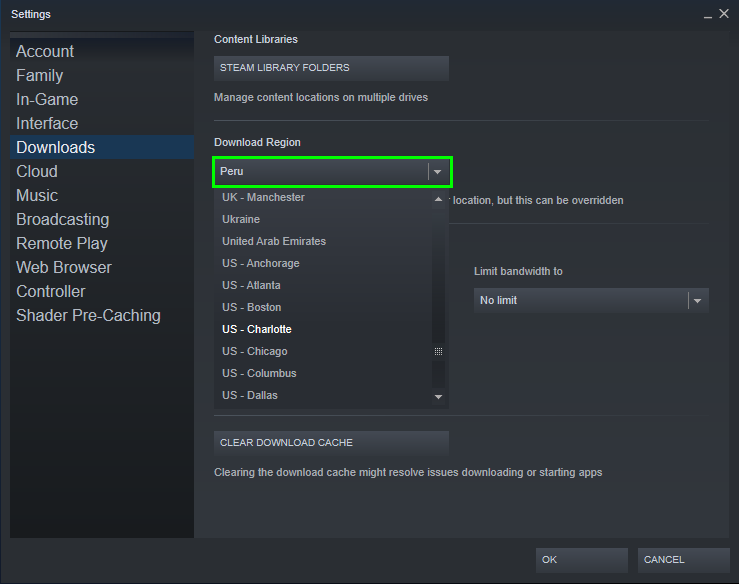
- Once in the Settings window, on the left side, navigate to the Downloads section
- Finally, open the dropdown menu Download Region and choose another location nearest to your area
Solution 4: Clear Downloads Cache
Another thing that may be causing slowness in the Steam client could be that the downloads cache is full and you will need to clear it following these steps:
- On the Steam client, open the menu and click on Settings
- Once again, navigate to the Downloads tab and there click o the button Clear Downloads Cache
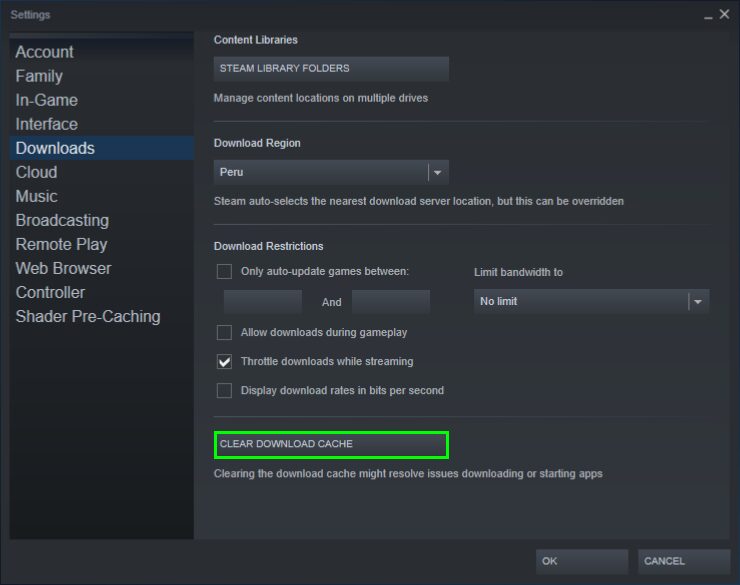
- Click on OK to confirm the action and wait until Steam clear the cache.

Solution 5: Verify Integrity of Game Files
If you have problems with a specific game, Steam includes an option that allows you to check the game cache and replace corrupt files automatically. To use it, you can follow these steps.
- In the Steam client, navigate to your games Library
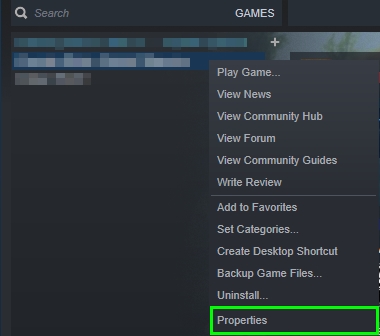
- There select the game you wish to check from your Steam library, right-click on it and then click on Properties
- Navigate to the Local Files tab and then press the button Verify Integrity of Game Files
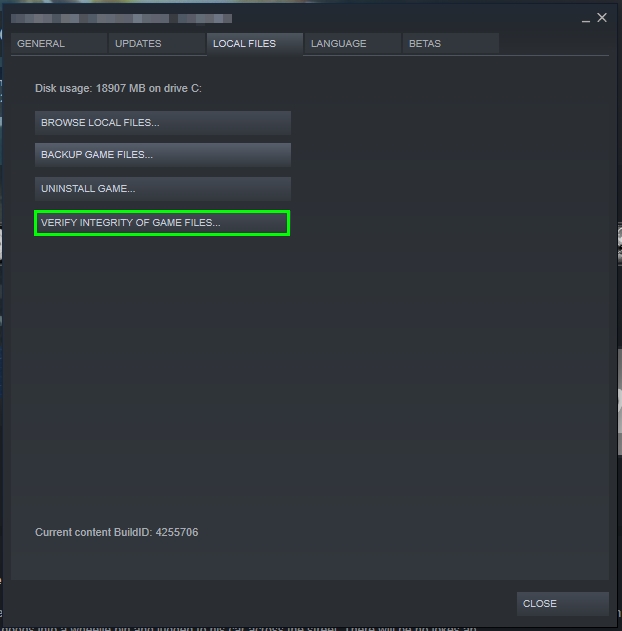
- Wait for the process to finish, and the window will close automatically.
- Rerun the game to try. It is important not to execute this option at the same time as processes that demand high system use, such as hard disk defragmentation or antivirus scanning.
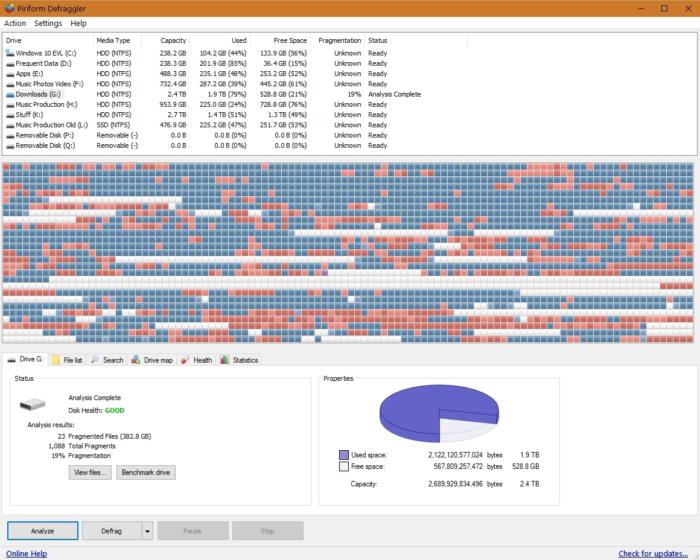
Solution 6: Defragment the Hard Drive
Although Windows 10 handles disk fragmentation much better than Windows XP or Vista, when you have large game files, especially in the case of games on which you have installed multiple updates, DLCs, patches, mods, etc.
Over time, as happens with all the files in Windows these are fragmented, you can use third-party tools to defragment your hard disk regularly and keep it optimized or schedule maintenance with the integrated Windows defragmentation tool.
If you need some options, here you have a list of some of the best defrag tools for Windows 10.
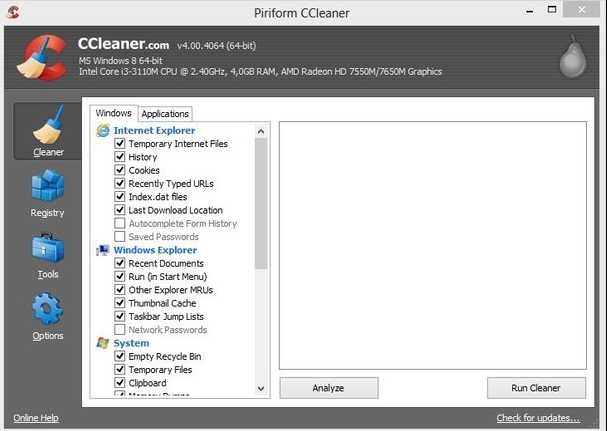
Solution 7: Clean Up Unnecessary Files
Since not only does Steam uses your computer, you use your computer for more activities than just playing. If you also browse the Internet and handle all types of files, your system is gradually filled with garbage — cookies, Temporary files, history, cache, thumbnails, log files, etc.
A simple way to clean those files on Windows is to use a free tool called CCleaner.
Solution 8: Update Graphics Card
One of the things that have the most significant impact on the performance of the games is the versions you have installed of your drivers. Both Nvidia and AMD continuously release updates for their drivers, which you can download directly from their websites.
Many times if you buy a factory Windows computer, it has old versions of the drivers. Or, sometimes, when you do a new installation of Windows, the system automatically detects drivers and installs them, but these are never the latest or the best.
If you need want to update your graphics card on Windows 10, you can follow these easy steps:
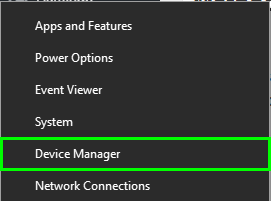
- Right-click on the Start menu and there click on the option Device Manager
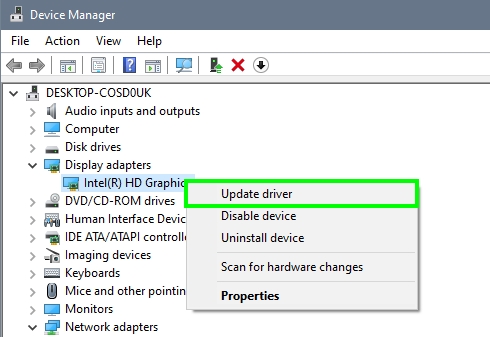
- Once there, navigate and expand the section Display Adapters. Then right-click on your GPU and select the option Update Driver
- In the window that opens, you need to choose the option Search automatically for drivers. Windows 10 makes a useful job finding and installing the latest drivers for the graphics card. Therefore you can trust the utility will install for your latest drivers.
Solution 9: Improve Hardware
Finally, the most potent alternative to fix the Steam running slow issue is to upgrade your hardware.
Add More RAM: easy to install and inexpensive.
Install an SSD and move your Steam installation folder quickly from the Steam Library Folders options. It is a more expensive alternative, but overall computer performance is much improved, mainly if you use it to install the operating system.
And of course, you can also buy a more powerful video card, but this is one of the most expensive options and is not an alternative for laptops.
Wrapping Up
So far, those were my best tips and solutions that will help to speed up Steam and be able to play your games without any problems or slowness.
If you have some other tip that you want to share with the community, you can leave a message in the comments section below.
Anyway, here you have some other Steam related issues that may help you:

