You are working on Windows, and suddenly you see the BSOD: FAULTY HARDWARE CORRUPTED PAGE? In this post, I will show you how to fix it.
Frequently Windows 10 can show you specific errors associated with wrong configurations, apps incompatibility, corrupt files, and more.
The advantage of these errors is that they usually give you a code with which the support task can become much simpler and more direct.
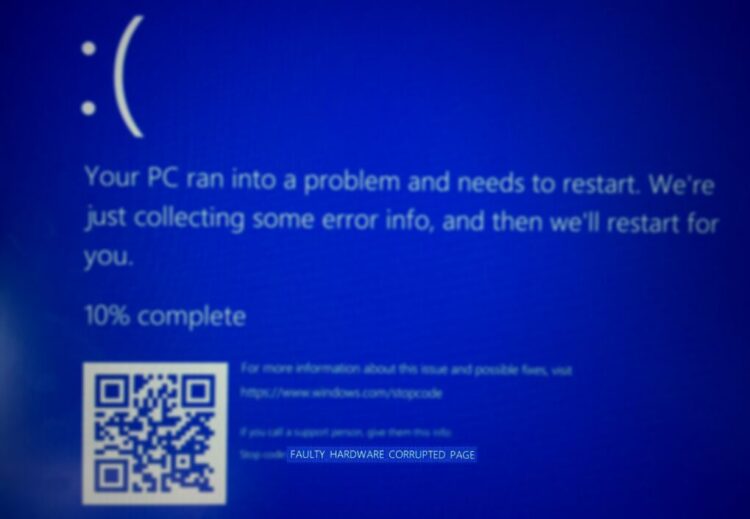
One of these errors is the one in the image below, which comes with the following message: “Your PC ran into a problem and needs to restart. We’re just collecting some error info, and then we’ll restart for you. (0% complete)”.
What Causes This Error?
This error, which results in a blue screen of death, BSOD, can be caused by situations such as:
- Device drivers that have been incorrectly configured, obsolete, or damaged.
- Driver conflict after installing new hardware
- Some virus
- System file corrupted after installing a program
- RAM issues
In this post, I will leave the best ways to fix this error and recover the optimal performance of your system.
Method #1: Update Device Drivers
One of the most useful ways you can avoid this and many more errors in Windows 10, including BSOD errors, is to update the system continuously. Because as new Windows updates are released, it requires updated drivers of your devices to be fully compatible.
To update Windows 10 most quickly, follow these steps:
- Open the Start Menu and there click on the Settings button. You can also use the keyboard shortcut Win + I
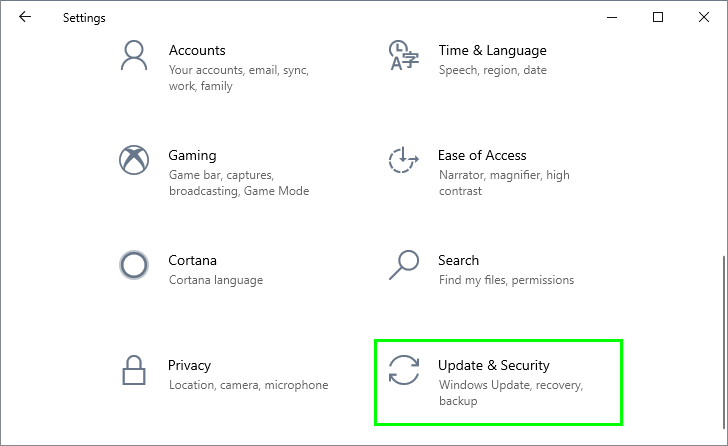
- Once there, click on the section Update & Security
- Now, select Windows Update on the left side menu, and, on the right, click on the button Check for updates
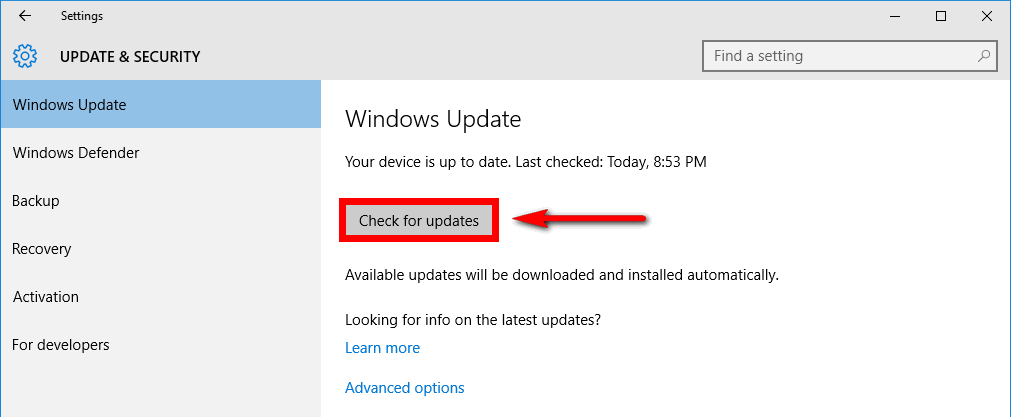
- Automatically Windows 10 will take care of searching for new updates that are available for the system, and you only need to wait and install them all.
You can also try to update your device drivers manually using the Device Manager, follow these steps:
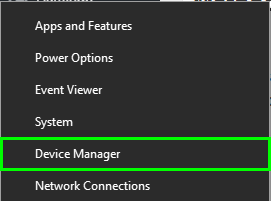
- Rightclick on the Start Menu or press the following keys at the same: Win + X
- In the menu that shows, select Device Manager to open it
- Once there, right-click on your outdated devices and in the list choose Update driver
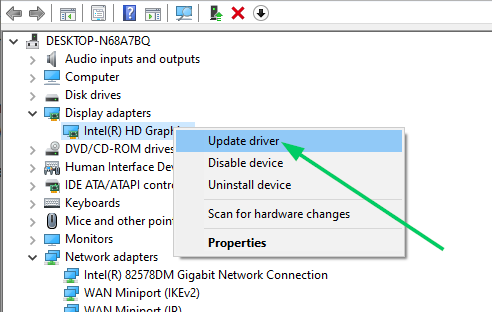
- Finally, click on the option Search automatically for drivers
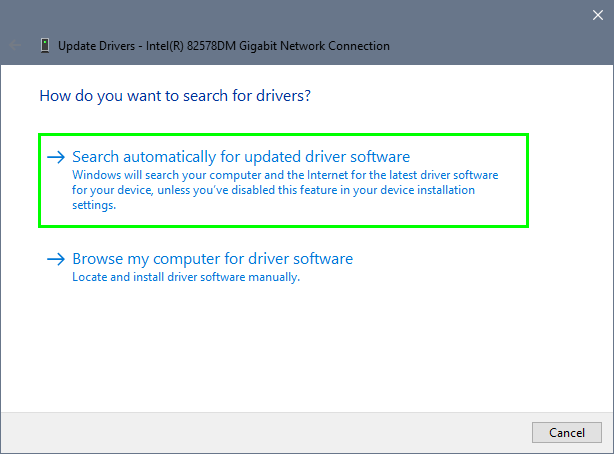
If you have downloaded driver files from your manufacturer, you need to use the second option.
Method #2: Uninstall Bad Programs
Many third-party apps can be the cause of this error on Windows, this for multiple reasons such as:
- Program Incompatibility
- Malicious Code
- Execution Errors
One of the third-party apps that can be the cause of the mentioned error is the Antivirus or even the Windows Firewall.
The reason is that these security utilities have been developed to prevent malicious content, such as viruses, malware, and others, from accessing Windows 10, but when the analysis beings it may block some vital components that crashes the system.
How to Uninstall your Antivirus
The first thing you should do is to uninstall the Antivirus following these steps:
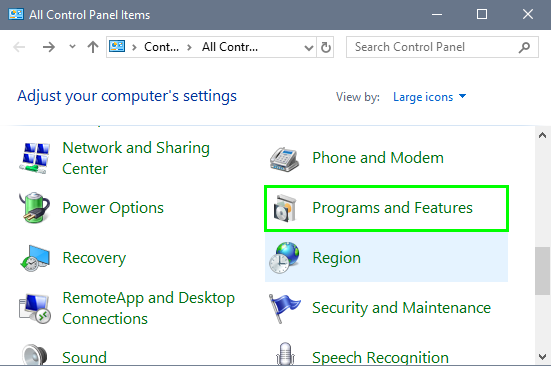
- Open the Run window using the keyboard shortcut: Win + R
- In the box enter the word
controland press Enter - Once the Control Panel opens, click on the option Programs and Features
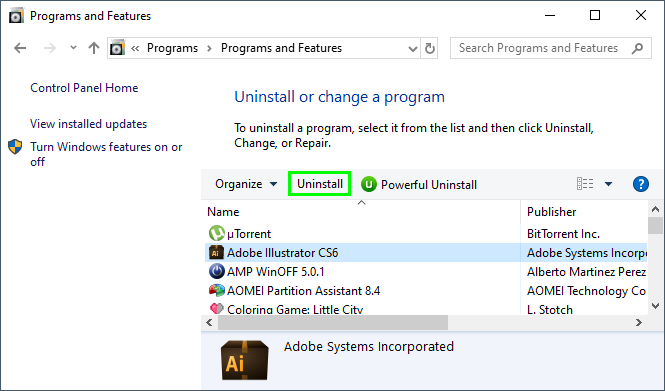
- There you have a long list of all your installed, find your Antivirus and click on the button at the top: Uninstall/Change
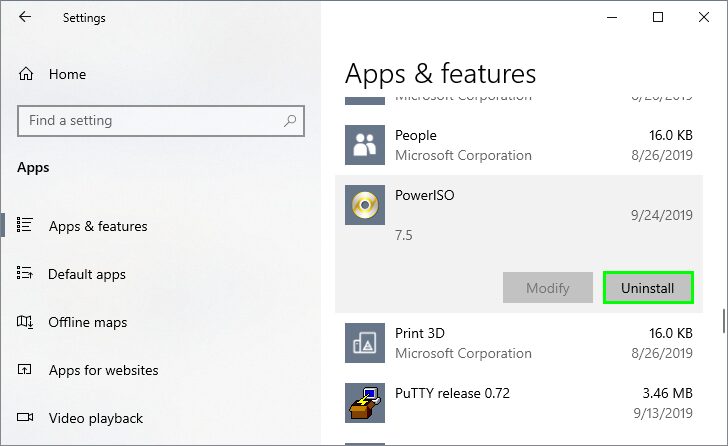
- You can also uninstall programs on Windows 10, from the Settings tool.
- Press the keyboard shortcut Win + I and navigate to the section Apps
- There you can search your Antivirus by the name and uninstall it easily.
If, after uninstalling the Antivirus, you still see the BSOD when you start Windows or after a while working, you may need to disable the Windows Firewall.
How to Disable Windows Firewall
- Open the Start menu and search the word:
control - There click on the result Control Panel
- Once there, make sure to sort the view by Large icons and then click on Windows Defender Firewall

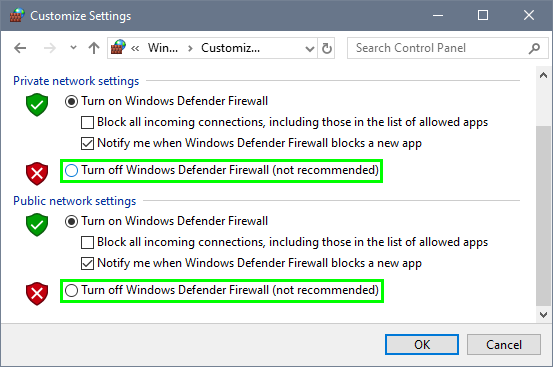
- Now, on the left side menu, click on Turn Windows Defender Firewall on or off
- Finally, click on the option Turn off Windows Defender Firewall under both, public and private network settings
Method #3: Uninstall Conflictive Devices
As I mentioned earlier, damaged, obsolete, or conflicting drivers are one of the first causes for the blue screen of death to be displayed with their respective errors.
In this case, the ideal is to uninstall the driver that could be the reason this error, to do that follow these steps:
- Rightclick on the Start Menu and in the list select Device Manager
- Once there, right-click on your device and select the option Uninstall device
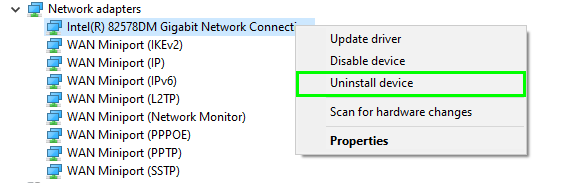
- Finally, click on the Uninstall button to confirm the action.
Method #4: Reset Windows 10
An extreme measure if no other solution fixes this annoying error is to reset the PC from scratch, thus removing all errors that you may have on the system.
One of the advantages that Windows 10 offers you when resetting the system is that you can keep your files.
To reset Windows 10, follow these easy steps:
- Open the Windows Settings using the keyboard shortcut: Win + I
- Once there, click on the section Update & Security
- Now, on the left side menu, click on the section Recovery
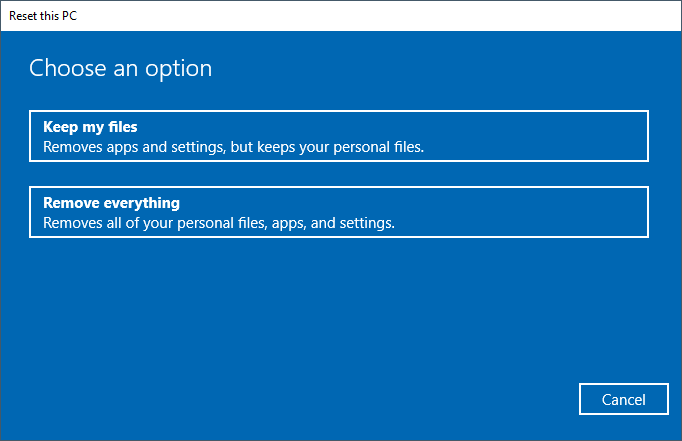
- Then, on the right side, click on the button Get started that you will find under the section Reset this PC
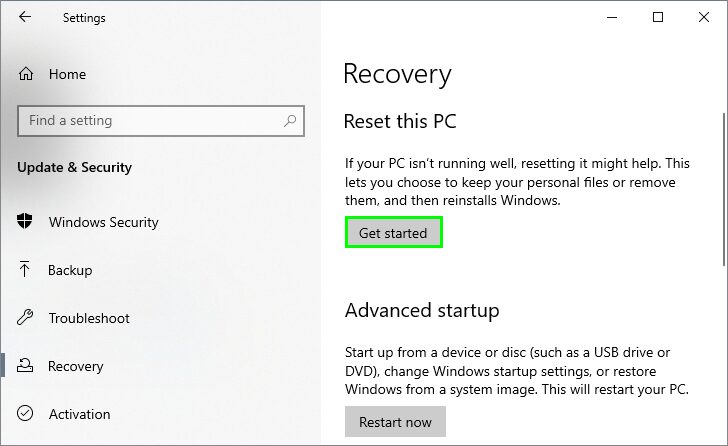
- A new window will open, and there you have the precious opportunity to choose to keep your files while resetting the system
Method #5: Downgrade BIOS
This process is more advanced, and need more responsibility and care, because you may need to downgrade the BIOS to an earlier version, this is because the error can be caused by some new BIOS update that creates an incompatibility loop between the BIOS and the system.
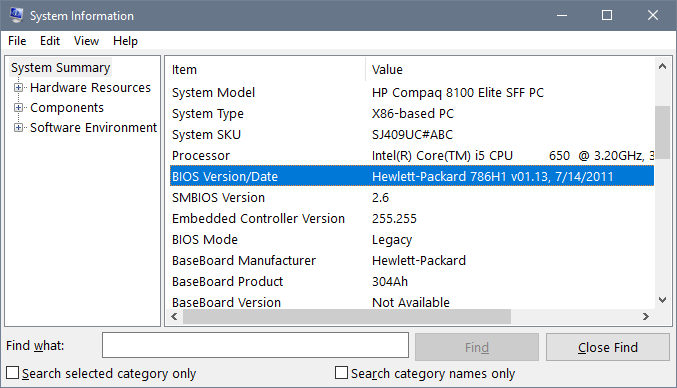
To perform this process, you need to visit your motherboard’s manufacturer and there look for the Support section, and there you can download an earlier BIOS version. To get your BIOS manufacturer and version follow these steps:
- Open the Run window using the keyboard shortcut: Win + R
- In the window that opens, enter the word
msinfo32and press Enter - There you can find your BIOS information in the line BIOS Version/Date
Method #6: Check for Hardware Issues
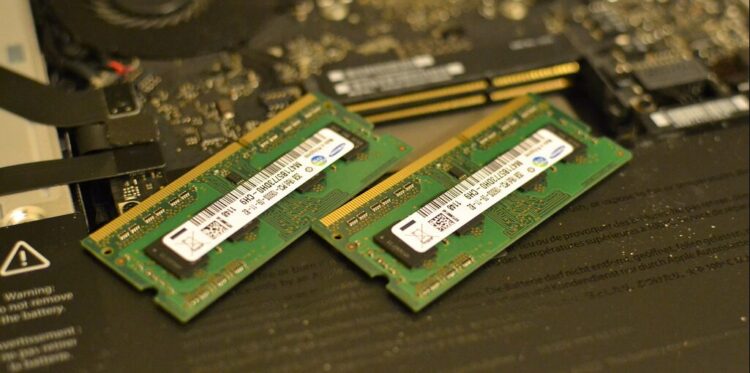
We all like to increase the power of our computers by adding more RAM, new hard drives, and even updating the CPU, but in some cases, there have been blue screen errors when new hardware is detected in the system.
To rule out this option, you can temporarily remove the new hardware and test that everything works ideally.
Method #7: Run SFC
Another tip to fix and prevent this type of errors is to make an in-depth analysis of the system, and Windows 10 offers you the SFC (System File Checker) tool which is in charge of analyzing the file systems thoroughly and thus determines if there are errors and if so proceed with their solution.
- Open the Run window using the keyboard shortcut: Win + R
- On this window, enter the word
cmdand press the keys Ctrl + Shift + Enter - Once in the Command Prompt, run the following command:
sfc / scannow
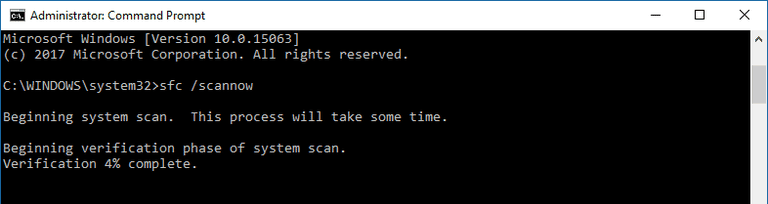
- Now you only need to wait; this process can take some time depending on your hard drive size.
Method #8: Run CHKDSK
One of the errors that can be the cause of this problem is some damage to the hard disk. Windows 10 offers you the option to run a command to check the state of the hard drive and correct any failure in it for this.
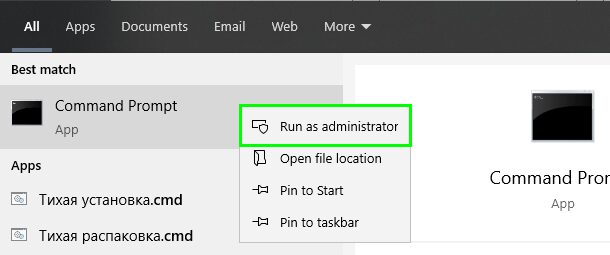
- Click on the Start Menu and search the word
cmd, then right-click on Command Prompt and in the menu select Run as Administrator
- Once there, run the following command:
chkdsk /f - Finally, you only need to wait for this process to end.
Wrapping Up
So far, those were the best ways to fix this annoying BSOD on Windows, and now you can fix your system and recovery the optimal performance quickly following the methods.
If you cant fix the error with any of the methods above, you may need to ask for tech support from your manufacturer, also remember to be careful when you follow these steps. Thanks for reading.